Remodeling the Kitchen

The Well-Traveled Table

I’ve categorized this post under “Remodeling the Kitchen” because while I’ve been working on packing up the kitchen in preparation for tearing it all out, I’ve been trying to finish another project I started before Thanksgiving. I’ve been trying to get this Mission-style coffee table refinished.

I call this the well-traveled table because it has really gotten around in the last ten or so years. From 2003 to 2010, I lived and taught in Las Vegas, Nevada. I furnished two rental apartments from second-hand stores, and then I bought a fixer-upper in Las Vegas. I had been living in really small apartments, and the house wasn’t very big, but I didn’t have enough furniture for it.

Dennis decided to buy some furniture for the Vegas house at the Victims of Crimes Benefit sale. The inmates enrolled in the woodworking program in one of the local prisons make a number of items for an annual sale to benefit the victims of crime.  Dennis bought a beautiful corner table made from birds-eye maple, two oak plant stands, and the Mission-style coffee table, and gave them to me for Christmas. I loved all the pieces. I left the corner table at home in California because it fit perfectly there and gave me a place to display some hand-thrown pottery, but the rest of the furniture came down to the Vegas house with me.

The coffee table lived in the Vegas house for three years. Then it moved to Denver with my daughter, Amy, and her husband, Solomon. Amy and Solo had lived with me in the Vegas house while Amy attended dental school at UNLV. When she finished her program, they moved to Denver so that she could take specialized training.

When Dr. Amy graduated from her periodontal program in Denver, the coffee table was loaded into another moving truck, and back it came to Reno, Nevada, where Amy and Solo bought a periodontal practice. The table lived in their rental house for about a year before they decided it no longer worked with their new furniture.

At that point, Amy asked me if I wanted the table back, or if she should try to sell it or donate it. I think she probably already knew what my answer would be. Everybody in the family knows I am sentimental about things. Dennis bought that table for me at a very stressful time in our lives, when we were conducting a long distance marriage. It was a sweet gesture, and the table will always be special to me for that reason. In addition, I’ve always liked the Mission furniture style, and we have other Mission-style pieces in the house. I decided I’d rather have the well-traveled table than the one we currently had in the living room.

There was just one problem. I’d never liked the ugly, yellowish-brown finish on the coffee table, and by this time, it was pretty beat up from all its travels. In the move from Denver to Reno, one of the side support pieces had suffered some bad gouges that needed to be filled.

OLYMPUS DIGITAL CAMERA

OLYMPUS DIGITAL CAMERA

And after Amy and Solo rescued a sweet, badly injured little Yorkie, the bottom shelf got pretty scratched up from doggie toenails. So the table needed a facelift.

I’ve refinished a lot of wood furniture and all the doors in the house, including the closet doors. I used to really enjoy it, but I have to admit, this project was not as enjoyable as my other adventures in wood refinishing have been. Stripping and sanding are really hard on my back and hands now, and I needed a lot of help from Dennis on the sanding. He really did more of that than I did, and it was hard for me to trust him to do it to my standards! In fact, I sent him back to the sander more than once, and I probably should have been even stricter about it than I was.

But eventually, the well-traveled table was stripped, sanded as good as it was going to get, and ready for stain and finish. I decided to do a two-toned effect, partly because the lower parts of the table were very difficult to sand, and I knew it would be impossible to get the old, ugly stain out completely, and partly because of the filler in those deep gouges,  Filler never takes stain quite like the wood surrounding it, in my experience. But I wanted the top and the bottom shelf to be natural. I knew the wood had beautiful grain and character. So I decided to stain the legs and side pieces a dark, reddish brown that would look nice with my brown leather couch. And I kept the top and shelf light with the application of a clear, water-based polyurethane that won’t amber as it ages. I really like the contrast of the light horizontal surfaces with the dark legs and support pieces.

OLYMPUS DIGITAL CAMERA

OLYMPUS DIGITAL CAMERA

Now this piece that Dennis bought for me years ago has its second wind and a new life in the living room here in the house in the woods that I fell in love with in 1987.  I like the way the table looks with the other woods in the room, the knotty cedar tongue-in-groove planks on the walls, the old, unstained oak plank floor, and the birch doors.

OLYMPUS DIGITAL CAMERA

OLYMPUS DIGITAL CAMERA

It took quite a bit longer to finish the table than I’d figured it would, and after the deadline for Thanksgiving passed, and then the deadline for Christmas passed, I knew the table had to be finished before we started ripping out the kitchen. In part that was a practical decision, because the slate coffee table had to come out and the Mission coffee table put in place to make room for the temporary storage in the living room of the kitchen appliances.

Now that the well-traveled table is done and in place, it’s onward to demolition of the kitchen. The pantry cabinets (the really big ones) came out yesterday, and I ordered flooring today. Progress!

OLYMPUS DIGITAL CAMERA

OLYMPUS DIGITAL CAMERA

Standard
Remodeling the Kitchen

The Things We Keep

I love rustic Americana. I think fine china and crystal are nice, but they’re not me. They’re fragile and pretty, and I’m not. I’m physically challenged, but I am far from fragile. I am strong in mind and heart from years of living with a life-and-body changing disease, and my beauty is the beauty of a well-seasoned cast iron skillet, not a silver chafing dish.

That said, it’s probably no surprise that some of my favorite pieces that I’ve collected over the years are my red-and-white enamelware coffeepot, cup, small pan and soup pot. I would have more of these pieces if I had more room. The coffeepot was actually our camp coffeepot for many years when we tent-camped. When we finally retired it, I put it up with my other treasures on the top of the cabinets.

While I’m giving away and donating a lot of things I’ve collected over the years, I’m keeping the white-and-red enamelware. It’ll go on some open display shelves made perhaps from barn wood.

When I packed up these things, I noticed something about the big white-and-red soup or stew pot that I’d forgotten. Before it hit the secondhand shop or yard sale where I bought it (I’ve had it so long, I really can’t remember when I bought it or where), someone had tried to make it hold water again by placing a bolt or screw through a hole in the bottom, securing it with a washer and nut on the other side.

OLYMPUS DIGITAL CAMERA

OLYMPUS DIGITAL CAMERA

OLYMPUS DIGITAL CAMERA

OLYMPUS DIGITAL CAMERA

Eventually, the bottom of the pot rusted out in a ring, and then it was no longer functional and couldn’t be repaired. But I wanted it.

Why would anyone want a pot that won’t hold water? Well, I love the look of the white body with the red trim. I love that somebody, maybe many people, most probably women, used this pot. Cooked beans and bacon in this pot. Stew. Cornmeal mush and grits. Turnip and collard greens. I look at that pot, and I imagine the meals that a woman like me produced in it. And I honor her effort and cherish the only remnant of it.

OLYMPUS DIGITAL CAMERA

OLYMPUS DIGITAL CAMERA

But the other reason I love this pot is the very fact that it’s been mended. That says to me that somebody was poor enough to need to mend this pot. The owner of the pot couldn’t just buy a new pot. Either she didn’t have the money for a pot, or she lived in such a frontier sort of place that replacement pots weren’t available. So with some ingenuity, the owner of the pot mended it, and the pot continued to be used for some time afterwards. I applaud that kind of mental toughness, grit, determination, the ability to go on in the face of misfortune. What do you do when your one pot is broken? You mend it.

We live in a culture of the disposable. Disposable products come on the market with monotonous regularity. From toilet wands to coffee filters to razors, there’s a disposable option for nearly everything in our world. We create so much waste for the sake of convenience. Many folks, like my oldest friend, Coral Young Hawley, work really hard to rescue, repurpose, reuse, and recycle what others have discarded. (Check out the clothing, jewelry, and other items in Coral’s Etsy shop at https://www.etsy.com/shop/DaughterOfBetty). People like Coral are the spiritual heirs of the owner/mender of my pot. When I display this leaky old pot on my wall, I salute the mindset that mends rather than discards.


Standard
Remodeling the Kitchen

In Memoriam: Virginia French

As I pack up the decorative items in my kitchen (I’ve barely started on the contents of the cabinets), I am washing things so that they can be put away clean and taken back out and put back clean. I have time, as I wash, dry, and wrap, to think about what these things mean to me, and in some cases, what they meant to someone else.

One of the things I have to find a new space for after the kitchen remodel is this huge vase/urn/thing that belonged to my mother-in-law.

OLYMPUS DIGITAL CAMERA

OLYMPUS DIGITAL CAMERA

When I took this thing down from the top of the cabinet and washed it, I found the tag Virginia had placed on the bottom many years ago. On a piece of white adhesive tape (the kind we used for really big boo-boos when I was a kid), she’d written: “Lee and I bo’t this in Tijuana, Mex. in 1951.”

OLYMPUS DIGITAL CAMERA

OLYMPUS DIGITAL CAMERA

Lee was Virginia’s husband and my husband’s father.  Dennis’ dad died when Dennis was seven years old. Lee had gone on a hunting trip, fell asleep at the wheel while driving home after getting his buck, and was killed when his vehicle drifted across oncoming traffic. It was a devastating blow to Dennis, his older sisters, and his mom. I know that Virginia loved her husband very much. She talked about him quite a bit over the years, and I think this vase was a reminder of a time that was very precious to her.  1951 was three years before Dennis was born, and about five years before Virginia was mistakenly diagnosed with multiple sclerosis.

This vase was one of the things Virginia brought with her when she moved up to Susanville to be close to us in the early ’90s. She downsized from a double-wide mobile home to a one-bedroom apartment, where space was very limited, and she chose to bring this huge vase with her. One handle of the vase has been broken and mended (more skillfully than I did with my Blue Willow plate).  It obviously meant a great deal to her.

OLYMPUS DIGITAL CAMERA

OLYMPUS DIGITAL CAMERA

When Virginia’s disease progressed to the point where she could no longer live alone, she moved into the convalescent facility in Susanville and lived there for ten years before she passed away. The vase (and a lot of other things) came to our house when Virginia moved out of the apartment and into the nursing home.  She put these adhesive tape tags on many of the things she passed on to us, so that we would know their significance.  I really appreciate that now and have begun to do the same thing for my kids.

Virginia and I didn’t get along well.  I was never good enough for her baby boy, and she let me know it.  I always tried to be respectful to her, but I often didn’t like her much. I appreciated her better qualities, though.  She had guts, a good sense of humor, and faith.  I think at times I resented her for still being alive when my mother was gone.  But after she passed away, I missed her more than I thought I would.

I think this vase is ugly. I don’t really like it. But it was important to my mother-in-law, and out of respect for her, I can’t discard it. Maybe my kids will be able to get rid of it when I am gone. They are far enough removed, emotionally, to not be particularly moved by it. But I am. I look at that vase, and at that faded tag written in Virginia’s distinctive script, and I think about the father-in-law I never met, the family that he left behind, the struggles they all went through with his loss, and the courage that Virginia possessed to raise a little boy on her own while battling a disease that slowly sapped her ability to move.

I’ll find a place for that vase somewhere. It’s what my mother-in-law’s memory deserves.

Standard
Remodeling the Kitchen

The Blue Willow Plate

OLYMPUS DIGITAL CAMERA

OLYMPUS DIGITAL CAMERA

When I was a little girl, my mother had me read Blue Willow, by Doris Gates, published in 1940. It’s a story about a little girl, Janey, whose father becomes a migrant worker in the San Joaquin Valley in California, in the 1930s. Janey’s prized possession is a Blue Willow plate that is both a family heirloom and a symbol of the permanent home she longs for.

When my daughter, Amy, was three or four years old, I found a Blue Willow patterned plate in a yard sale. I gleefully bought it, put a plate hanger on it, and hung it on my kitchen wall. I loved that plate and the memories of talking about the story with my mother that it evoked, and it served as a vehicle for introducing the story to Amy when it was her turn to read Blue Willow.

It was Amy’s job to dust the kitchen, and one day, when she was dusting the stuff hanging on the walls, my Blue Willow plate came crashing down. I heard it from the living room and came rushing in to see what had broken. My heart sank when I saw what was lying on the floor in pieces. My little girl held the dust cloth in her hand, a frightened look on her face.

I was angry. I treasured that plate, and I thought Amy had been careless because she didn’t like dusting. (She hated dusting, and I did too, when I was her age.) I don’t remember what I said to her, but I remember that it stung. I could see it in her face. I remember that she said she had been careful, but the plate had just fallen. I could tell that she felt really bad about the plate; it was written all over her. I picked up the plate and looked at the hanger. The nail it had been hanging on had pulled out of the wall. The same thing would have happened to me, if I’d been the one dusting the plate.

I gave Amy a big hug and told her that she was more important to me than the plate was, so much more important that she could not even imagine it. Feelings assuaged, Amy continued to dust the kitchen, and I picked up the pieces of the Blue Willow plate.

I almost threw the plate away. It was badly broken, and even if I glued it back together, the breaks would show. But then I thought that maybe I needed to mend the plate to remind me of a very important lesson: Never let things become more important than my kids or their feelings.

So I glued the Blue Willow plate back together as best I could, and I hung it back on the wall with a longer, stronger nail.

OLYMPUS DIGITAL CAMERA

OLYMPUS DIGITAL CAMERA

When we remodeled the kitchen when Amy was about twelve, I ended up putting the plate in the space on top of the cabinets with some other blue treasures. (That is Amy’s 3rd grade painting of a clown on the wall.  Those of you who know me from UNR days might remember it hanging in our graduate teaching assistant office.)

OLYMPUS DIGITAL CAMERA

OLYMPUS DIGITAL CAMERA

A few days ago, I started taking down, washing up, and packing up my cabinet top treasures in preparation for another kitchen renovation. The first thing I took down was the Blue Willow plate. Still broken and badly mended. Still beautiful to me.

OLYMPUS DIGITAL CAMERA

OLYMPUS DIGITAL CAMERA

I wrapped the plate carefully and put it in the “save” box to put back up after the impending kitchen remodel is done. The lessons embedded in that plate are too valuable to lose. I hope that one day Amy will treasure it in her kitchen as much as I have always done.

Standard
Remodeling the Kitchen

Remodeling the Kitchen

For somebody who uses her kitchen like I do, a remodel is both scary and exciting. It’s scary because I am going to be without a kitchen for months, potentially.  It’s exciting because I am getting what I have needed so badly since I started canning and preserving again:  more counter space.

Today, I started the process of packing up the kitchen in preparation for the demo.  I began by taking down, cleaning, sorting, and putting away my rustic treasures that I am saving to display in the new kitchen.  It took all afternoon to do one side of the kitchen!  And I haven’t even begun the process of emptying out the cabinets yet.  Yeah, it’s going to be scary and exciting both.

Because I won’t have a working kitchen for quite some time, I’ve already put some thought into how I’ll be cooking in the next couple of months.  I will probably have Dennis put up the propane camp stove on the dining table I need to refinish, so I can fry and saute.  I’ll have my crock pot for one pot meals.  What I will not have is an oven, unless I use the really crappy one in the travel trailer, and as cold as it is, I probably won’t.  And I will have to wash any utensils or pans in the hall bathroom, in a pan of water on the counter.  Like camping.  Fun.  Not.

So here’s the deal.  I’m going to chronicle the process here, for myself and for friends, of remodeling a kitchen.  We’ll be doing a lot of the work ourselves, so our mistakes (and I’m sure we will make some) might be instructive for somebody else attempting to renovate on a shoestring budget.  I’ll also be posting some recipes I’ve been either hanging on to, for one reason or another, or working on, so even if I can’t bake/cook them myself for the next couple of months, you can try them.

One reason I expect the reno to take so long is that it is going to take us some time to demo.  You know those shows where they take sledgehammers to old cabinets and clear out everything in a day?  Well, that’s not us.  Some of these knotty pine cabinets are still in good shape, and those will go in the pump houses, shed, and barn for storage.  (And maybe some might go in my guest cabin one day if I ever get to build it.) So the cabinets are going to be taken down carefully, not smashed to smithereens.  The counter top will be reused also.  I want to use a section of it in the laundry room to create a folding counter, and some of it might go in the cabin eventually.  We will be putting the sink, stove, and dishwasher back in.  I’d love to be able to replace the stove and dishwasher so they match the fridge and sink, but I don’t have the money to do that all in one whack.  We’ll make them match as they wear out and need to be replaced.  And once all the cabinets and fixtures are out, we have to peel off the green, checkerboard linoleum and put down unstained red oak hardwood, to match what is in the living room.  Yeah, it’s going to be a while before I’m cooking in that kitchen again.

To start the journey, here are some photos of the kitchen as it was today before I started taking down my treasures.

From the living room, looking down the 21′ length of the kitchen.

OLYMPUS DIGITAL CAMERA

OLYMPUS DIGITAL CAMERA

From the table in the corner (which will be replaced by banquette benches and my other, expandable table that belonged to my mother-in-law), the only side of the kitchen that currently has counter tops.  Not enough!

OLYMPUS DIGITAL CAMERA

OLYMPUS DIGITAL CAMERA

The big pantry cabinets, which are coming out, on the other side of the kitchen.  When these pantries were put in nearly 20 years ago, I needed them.  But now I have pantry storage in my laundry room, and I need counter space/work space more than I need pantries.  The new cabinets, uppers and lowers, will extend to about where the little telephone table is sitting.  Counter space!

OLYMPUS DIGITAL CAMERA

OLYMPUS DIGITAL CAMERA

This photo shows the section of wall that is coming out to open the kitchen up a bit more to the living room.  The last time we remodeled, almost 20 years ago, we widened what was originally a door-width opening (the kitchen actually had an interior door on it at one time, before we bought the house).  Now we will widen that opening a bit more, about 3 1/2 feet, and the upper cabinet run will end on the section of wall that’s left.  No more corner cabinet.  The quartz counter top will butt up against a redwood burl slab, so that opening will function as a pass-through with a redwood bar top.  It will be live edge, so it will round the end of where the wall is now, extend out into the living/dining room space, and as my son says, “die back into the wall.”  It’s gonna be cool, people!  I have to pick the slab.  I’ve got several to choose from, so I should be able to find one that will work.

OLYMPUS DIGITAL CAMERA

OLYMPUS DIGITAL CAMERA

This is a view of the section of wall that will be coming out.  The knotty cedar paneling in the living room will be carefully cut out (don’t want to lose any of that stuff!) and the opening will be supported and cased.  The burl bar top will come through the space where the wall is now and extend out a little way into the dining space.  That table you can just see, covered with a hand-crocheted lace tablecloth (made by my husband’s grandmother) expands from a console table size (40″ x 24″) to become large enough, with a fold-out and pull-out function and three leaves, to seat 12 people.  That table will go in the kitchen in the corner, for family dinners, and we will use another of Dennis’ burl slabs in the dining area to the right of the wall here to create a live edge dining table.

OLYMPUS DIGITAL CAMERA

OLYMPUS DIGITAL CAMERA

So there it is, the old kitchen, and an idea of the new kitchen.  Our friend, Leonard Castro, put this kitchen in for us nearly 20 years ago.  It has served me well, and a lot of food has come out of this room, but it is time to make it easier for me to cook, can, and clean.  I’m excited, and scared because it’s going to be such a big job, but I never let being scared stop me from doing something I really want to do.  So, here we go!

Standard
Recipes, Uncategorized

Rendering Bear Fat

I called this blog “Garden, Forest, Field” for a reason. Most of my posts are about the garden and what I harvest from it, and how I cook it or preserve it, with some recipes for using the wild game we eat, usually bear and venison and fish. The blog has evolved into a mostly-about-cooking-whatever-I’m-cooking blog, with occasional forays into the philosophical or the profound. (Thus speaks the former professor!)

Today’s post might seem a bit esoteric for some. I mean, how many of those who read this blog actually hunt, or hunt bears, or cook bear meat, or would have access to bear fat? Probably very few. It might be useful to note that this technique of rendering an animal’s fat works for any animal fat, so no matter what animal you harvest, if the meat is good, with a little extra work you can have a source of pure fat for cooking and baking.

Our pioneer forebears had to render animal fat. They needed it for all sorts of things. Fat lamps for light in the winter, fat for biscuits and bread, fat for waterproofing leather shoes and horse tack, fat for sealing the tops of crocks of pickled meats, fat for soap-making, fat for soothing winter-chapped hands, feet, and lips. Fat for calories on cold winter days and nights.

In our times, fat has been the enemy, and then the worm turned, and fat has become our friend. Healthy fat. Clean fat. (For the complete low-down on dietary fat, and I do mean complete, here’s a wonderful guide: http://www.helpguide.org/articles/healthy-eating/choosing-healthy-fats.htm.)

As I was rendering fifteen pounds of bear fat yesterday, cut from the carcass of a young bear last September, I was thinking about that. Clean fat. Organic meat. Many, many people ask me, “What does bear meat taste like?” And they ask it with wrinkled nose and rolled-up eyes. I don’t know where this perception comes from, that bear meat is universally nasty. It can be. Any meat can be nasty, depending on what the animal has been eating. I’ve eaten nasty-tasting beef and pork. Which calls into question what the feed lots are feeding those animals and the horrific ways they are killed and processed. I have had nasty-tasting bear meat. When I was a kid, camping out for the summer with my parents up in the mountains to shorten my logger father’s travel time to work, somebody shot one of the bears who was getting into the garbage at the little dump for the company campground. We were given some of the meat. It was nasty. (We ate it, though!) It tasted like garbage. Well, duh. That’s what it had been eating! I would imagine that bears who’ve been feasting on fish would taste rather strong and fishy, although I’ve not ever eaten a fish-eating grizzly.

The black bears we harvest come from high in the northern Sierra Nevada mountains. They live far from human habitation, and they haven’t been eating garbage. Bears are omnivores, so they have been eating any and every thing they can get past their teeth. They aren’t big hunters, but they will capture and eat young fawns, small rodents, and large insects, as well as grubs and larvae from rotten stumps and logs, roots, berries, grass, and yes, carrion of all kinds. But it’s organic carrion! If bears lived on carrion alone, I suppose their flesh would taste nasty, but they don’t, so evidently a little carrion doesn’t hurt the meat’s flavor. There are very few fish anymore in the lakes and streams where we hunt, so the bears aren’t eating much fish. All this to say that the three bears we have taken from the mountains have been outstanding eating. And when you think about it, why wouldn’t they be? The bears have been eating a completely organic, completely natural diet. This is the highest order of clean meat, which is going to produce the highest order of clean fat.

The flavor of this bear meat is something like grass-fed beef, only better. It is more flavorful, although I would be hard pressed to explain how. When the bears are taken in the August hunting period, with a bow, they are still very lean. There is virtually no fat to harvest. The mid-September bear this year had a couple of inches of fat under the pelt, and it was so fresh and new, it liquefied in my hands as the guys cut it off and gave it to me to bag. I put 3 five-pound bags of fat into the travel trailer freezer, and that was the fat I rendered yesterday.

Before I started this process, I read about it online and asked friends who had rendered other fats. I’m thankful to those who have gone before me, especially David Draper, the Wild Chef, on the Field & Stream blog site, and my friend, Shannon Luzum. Here’s how I did it, and remember, this method works for all animal fats you might want to render: beef, deer, duck, etc.

First, thanks to my soap-making friend, Shannon of Stacked Stone Farm, I knew to grind up the fat for faster rendering. That made a huge difference in the time it took. This was important because it took all day to render that much fat in my big stock pot, and it had to be stirred several times each hour so that it wouldn’t stick to the bottom of the pan and burn.

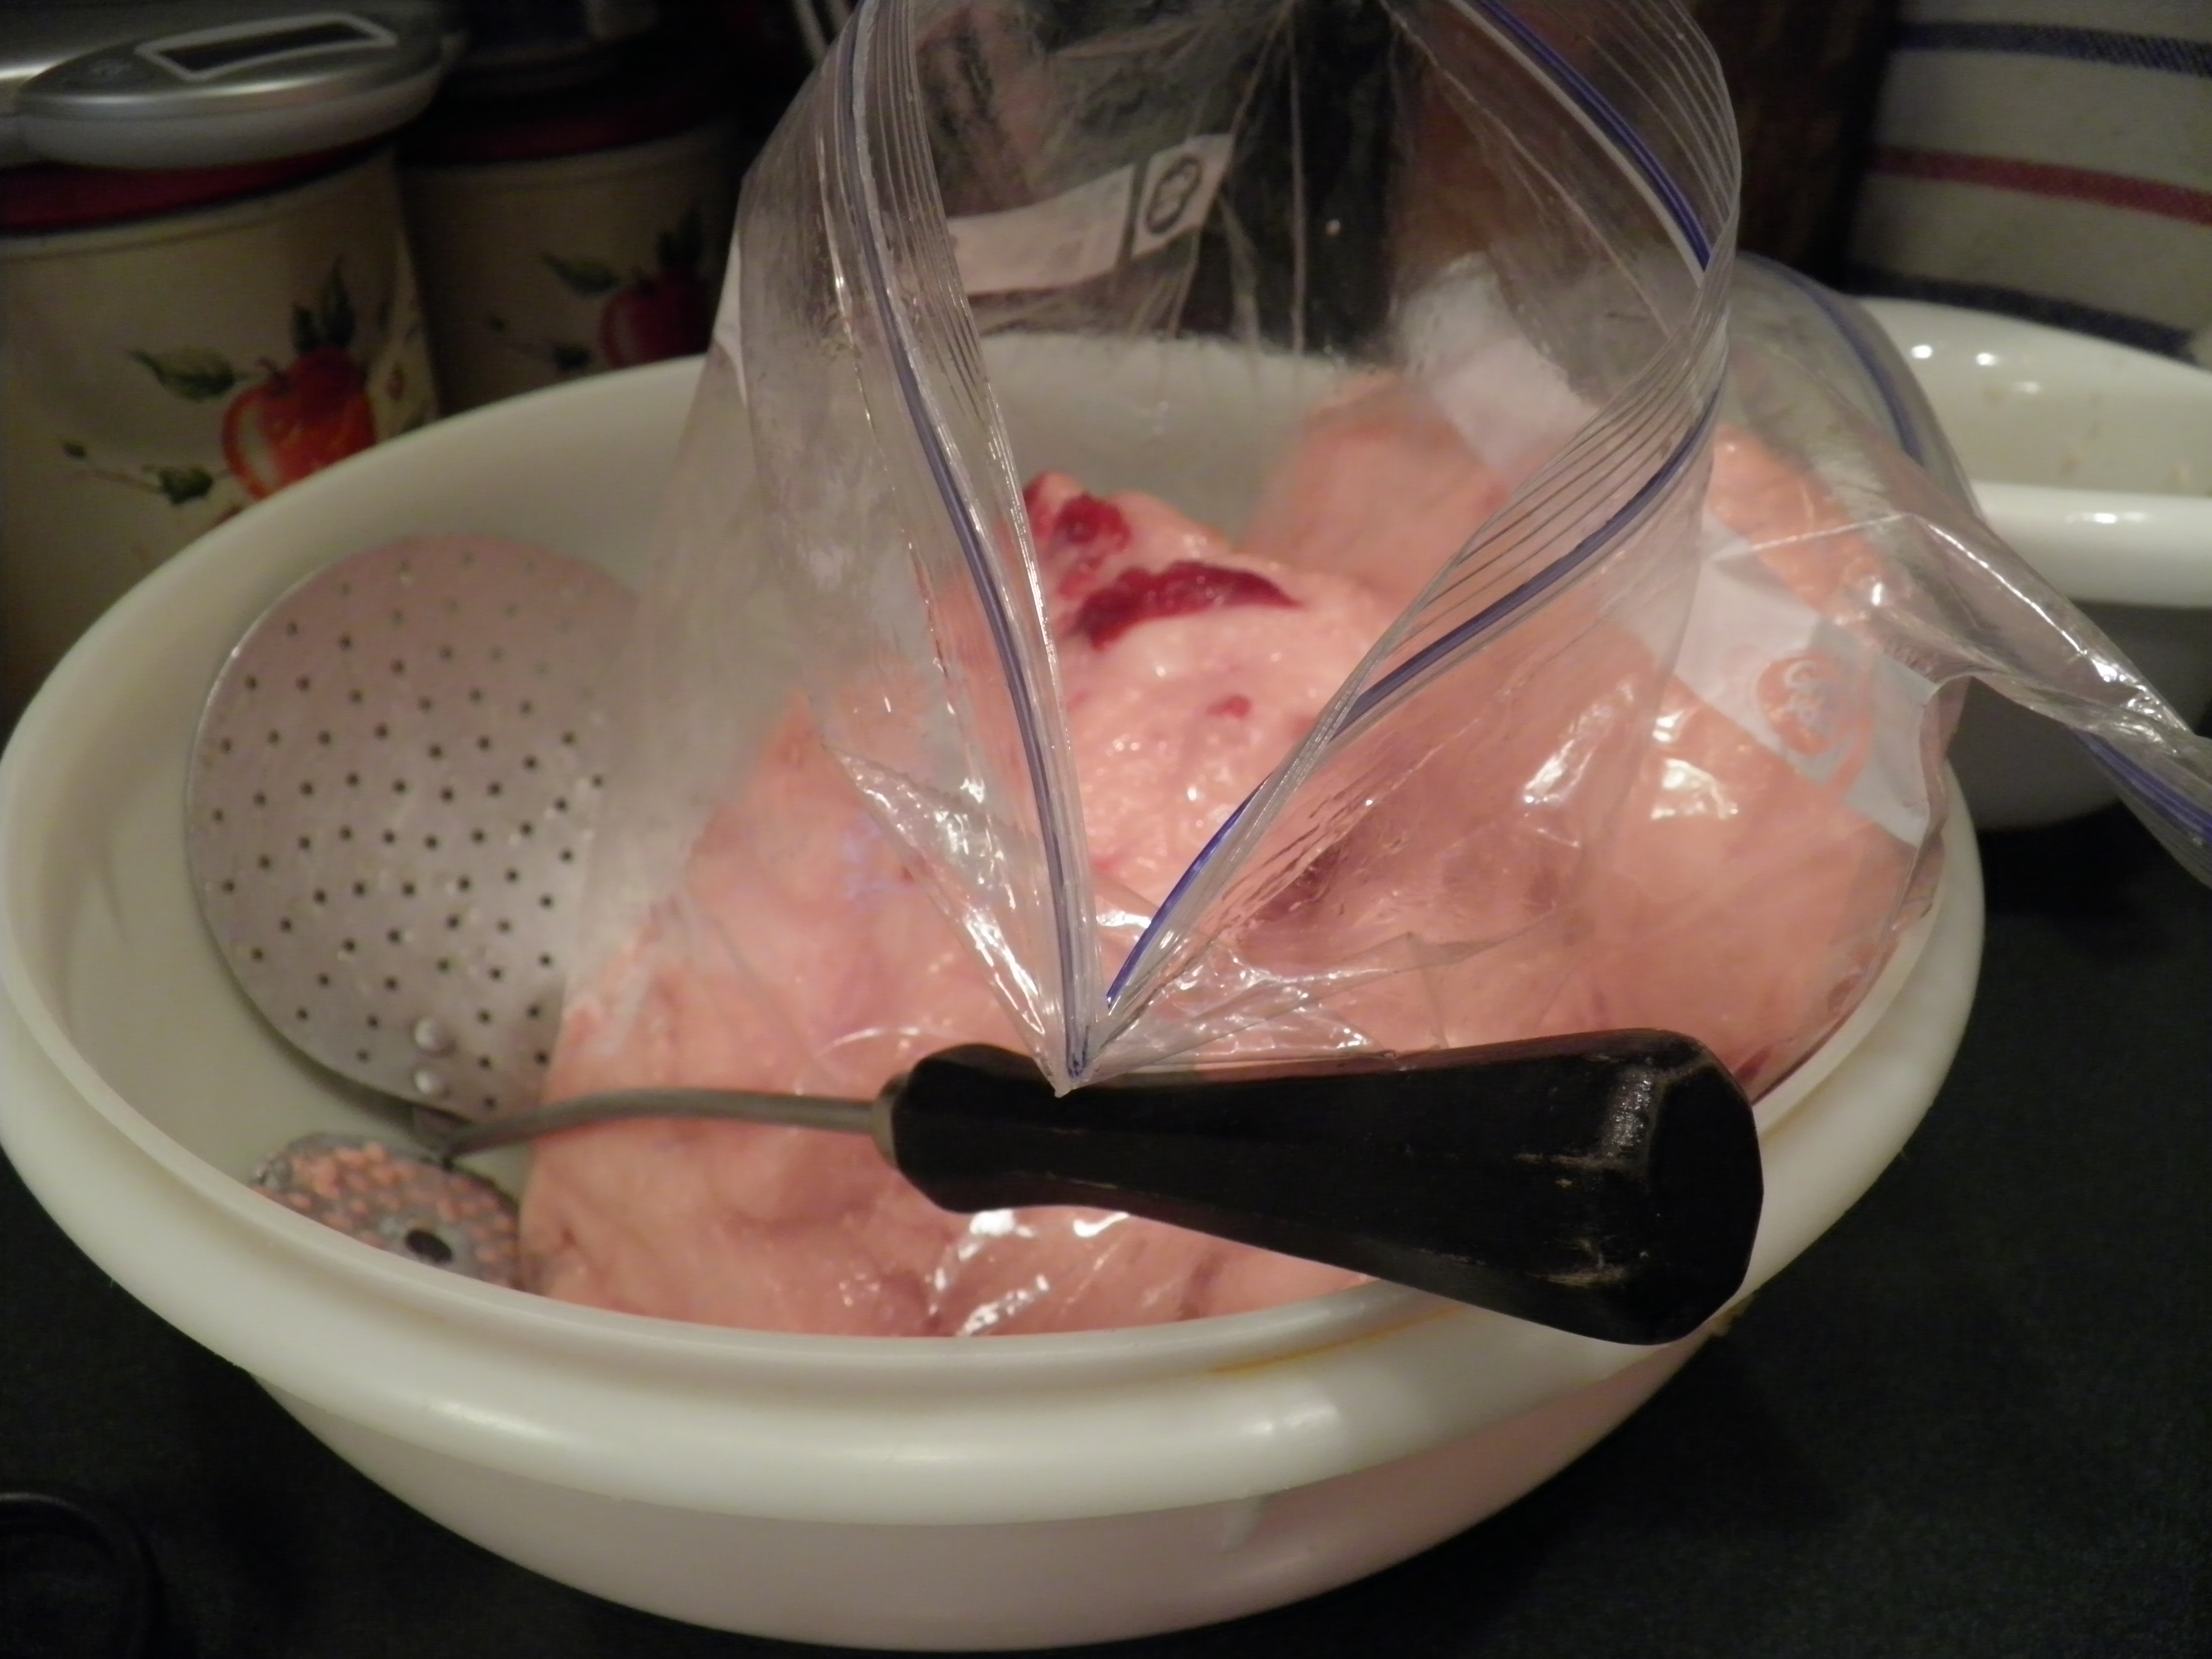
First, I cut the fat into cubes and strips to make it easier to feed through the meat grinder’s chute. (The guys had been really careful to keep the fat clean as they cut if off and handed it to me. I only had to rinse one piece to get rid of some forest debris and a couple of hairs. That’s important, of course, that the fat be clean. But it is easy to rinse and pat dry with paper towels if you need to.) As I was portioning the fat, I cut off any little bits of red meat. There wasn’t much. My guys are accomplished skinners, and they keep things really clean. I set the scraps aside to render separately, because I’d read that meat could taint the flavor of the fat. That scrap fat will be used for boot grease.

OLYMPUS DIGITAL CAMERA

OLYMPUS DIGITAL CAMERA

OLYMPUS DIGITAL CAMERA

OLYMPUS DIGITAL CAMERA

Then, using our son’s electric meat grinder with the large screen in place (we tried the other two screens but they clogged up), we ground the fat into small bits. Because it had completely thawed by the time we started, some of the fat liquefied as it was ground. This wasn’t really a problem as it started melting as soon as the bottom of the pan got hot on the burner. I think it would have been easier to grind if the fat had still been semi-frozen, but the timing just didn’t work out that way for us.

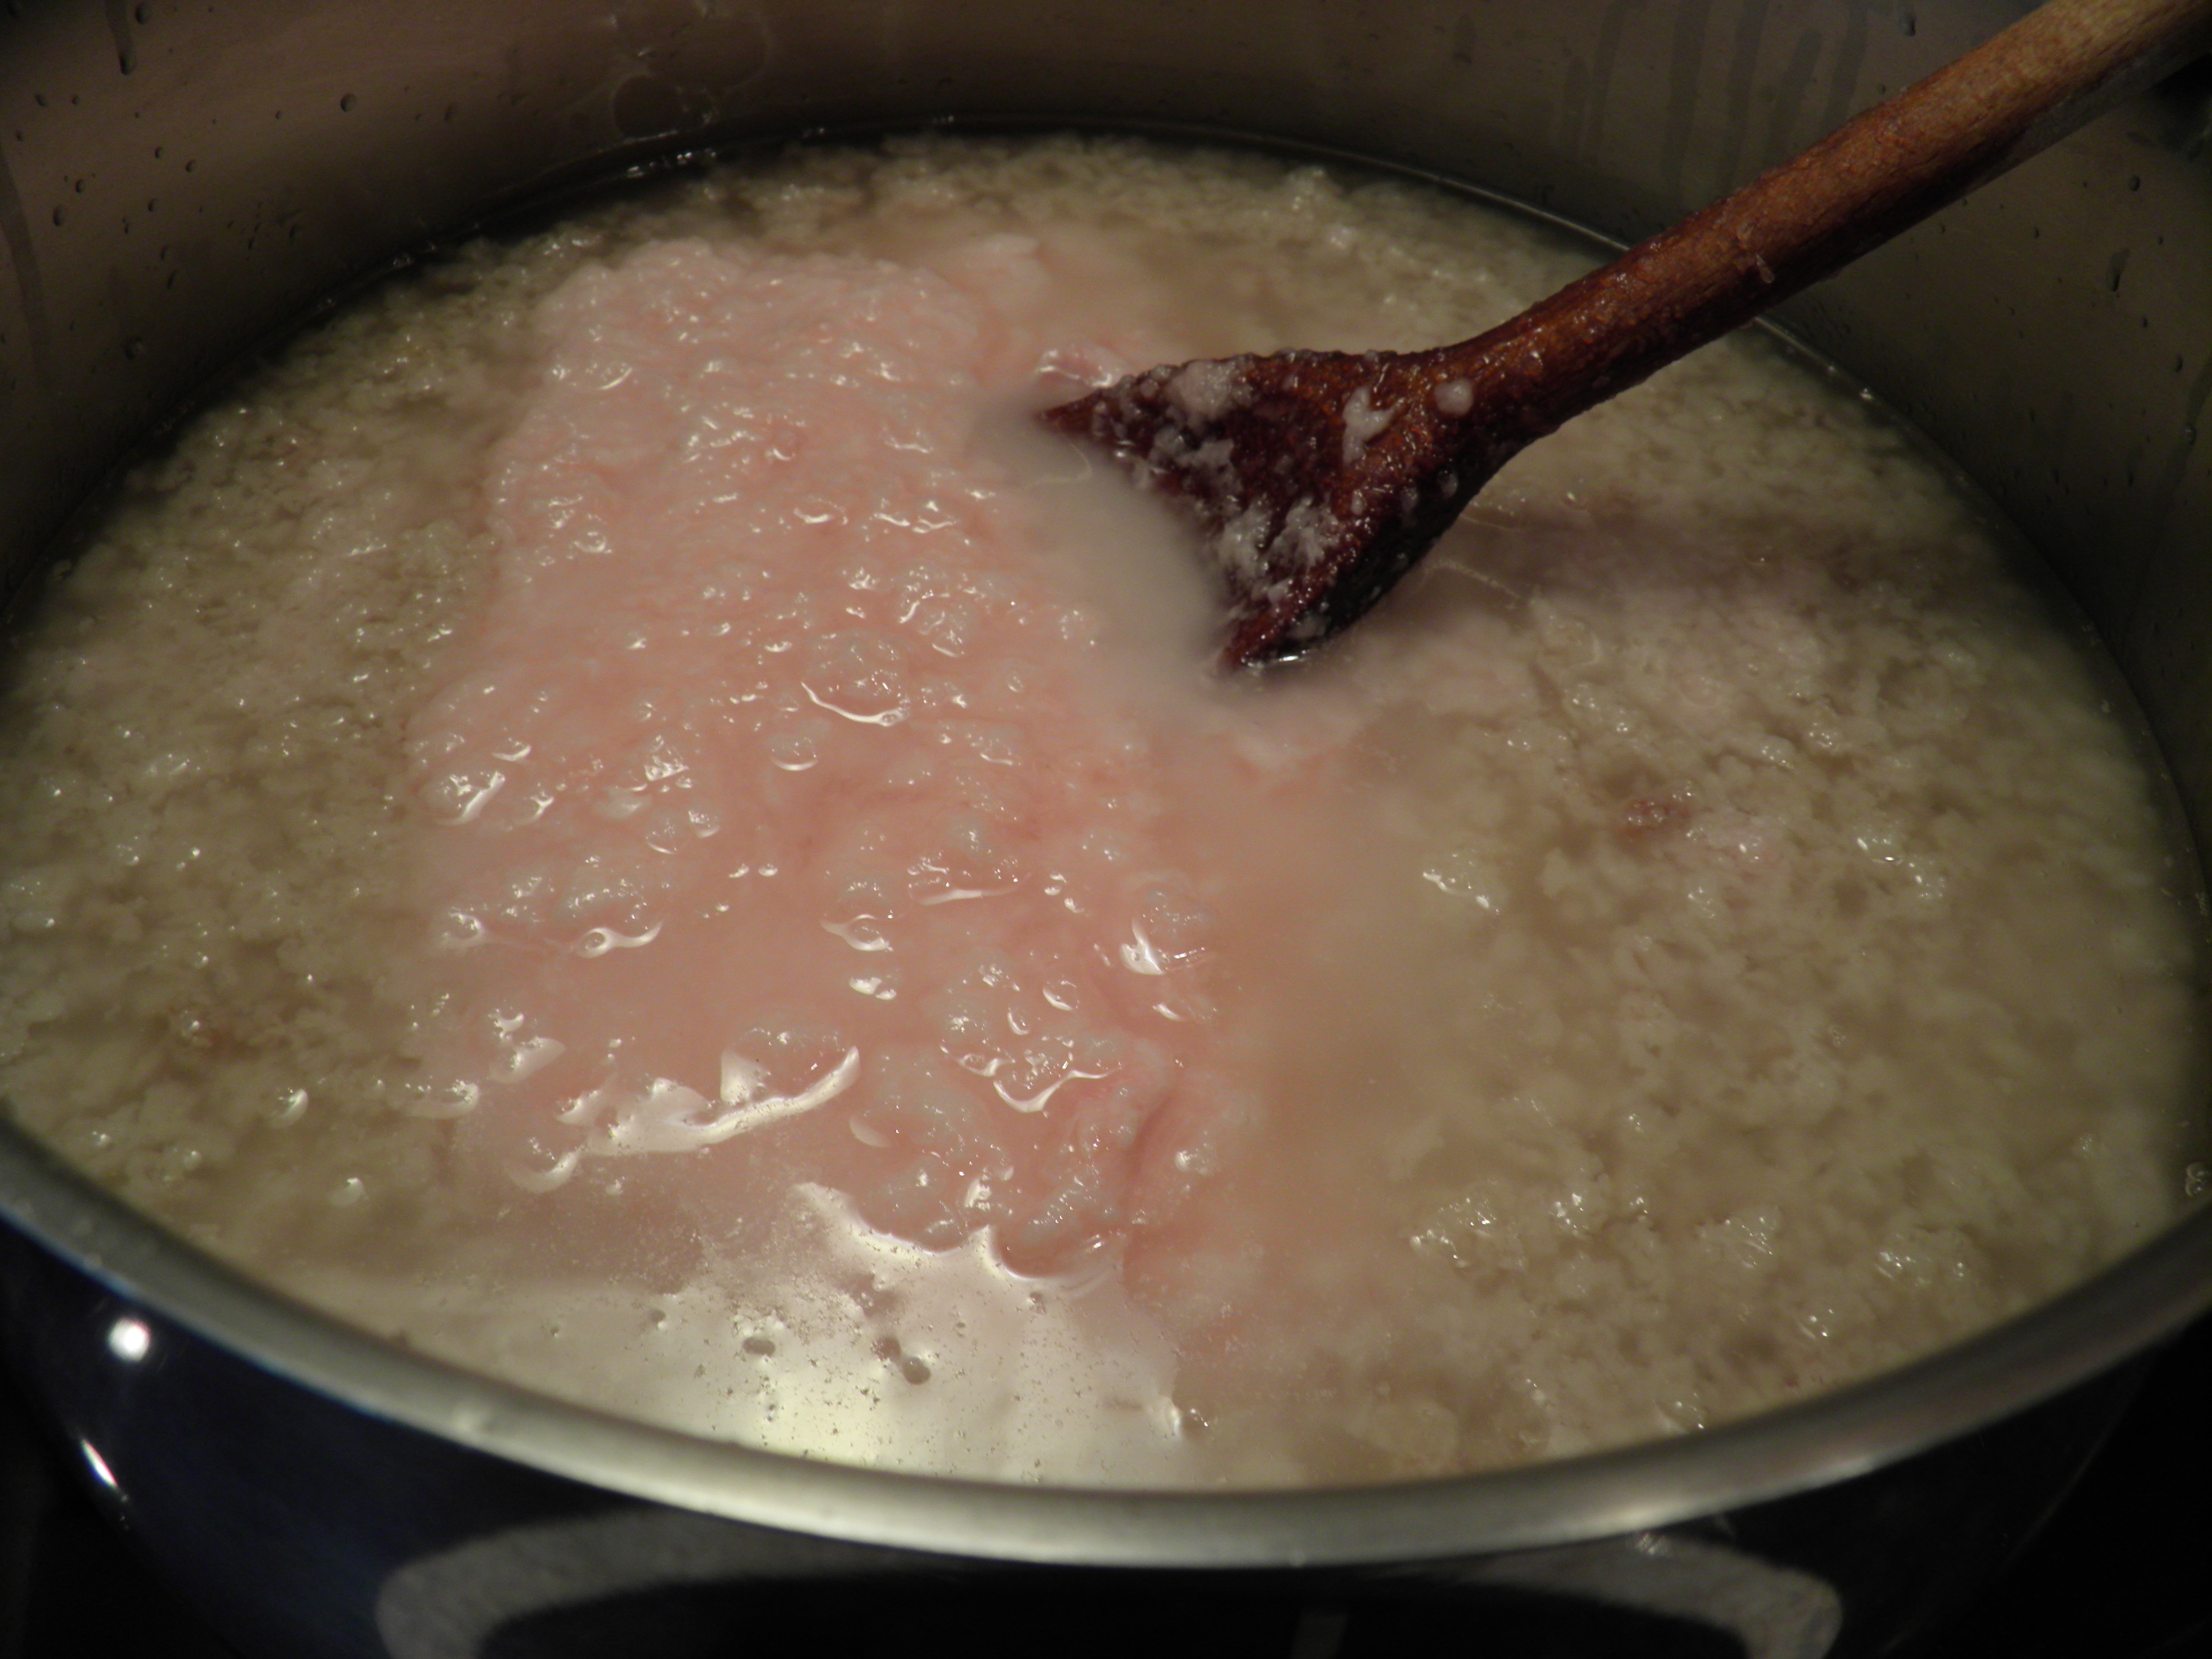
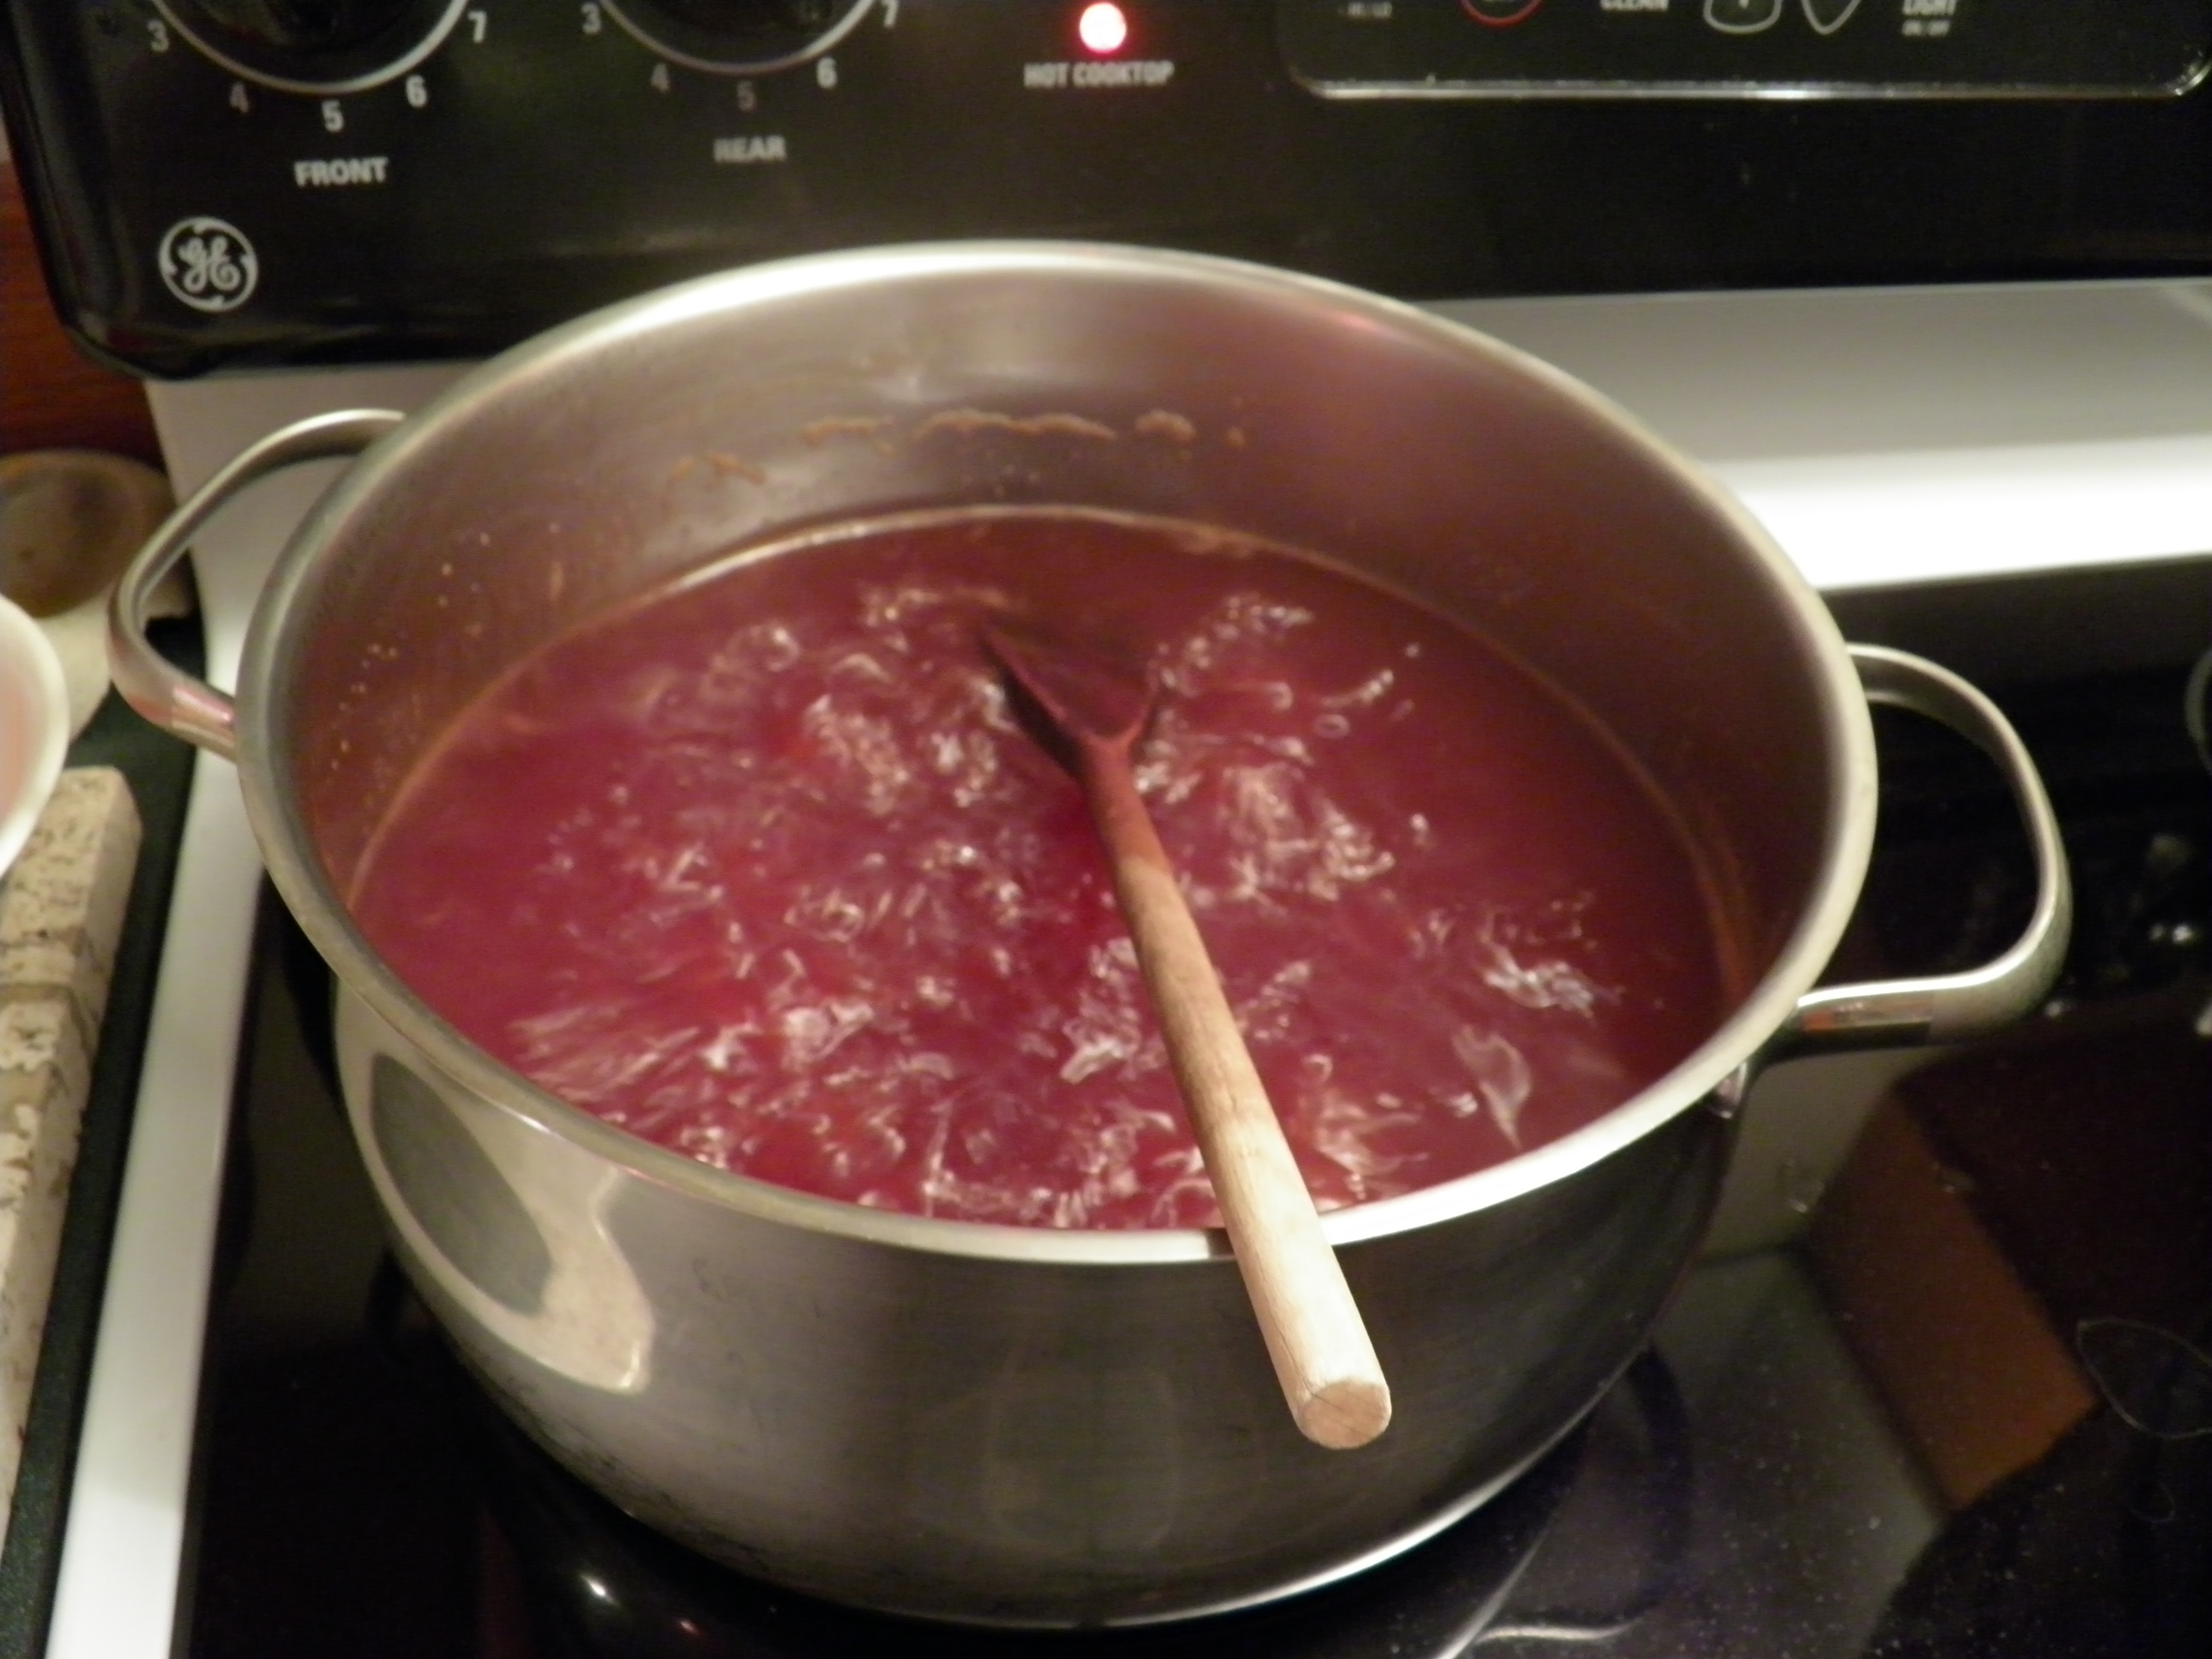
As the fat was ground, I removed it to my big, 12-quart stainless steel stock pot. I turned the burner on medium to get the fat melting, which it did within five minutes or so, and then I turned the heat down to medium-low so that the fat wouldn’t burn. I kept the heat at the point where the fat was at a gentle sizzle. It sizzles as the water in the fat cooks off.

OLYMPUS DIGITAL CAMERA

OLYMPUS DIGITAL CAMERA

Surprising, there’s a good bit of connective tissue holding the fat together. That stuff can clog the grinder screen and wrap around the screw, but it wasn’t a problem until Dennis was taking the grinder apart to clean it. By the time we got all the fat ground, the stock pot was half full, which is about 6 quarts of fat particles.

Then it was just a matter of keeping the heat low and slow, watching the sizzle, and stirring. The fat liquefied very easily. It took about 9 hours to finish rendering. It did tend to stick to the bottom if it wasn’t stirred about every fifteen minutes.

OLYMPUS DIGITAL CAMERA

OLYMPUS DIGITAL CAMERA

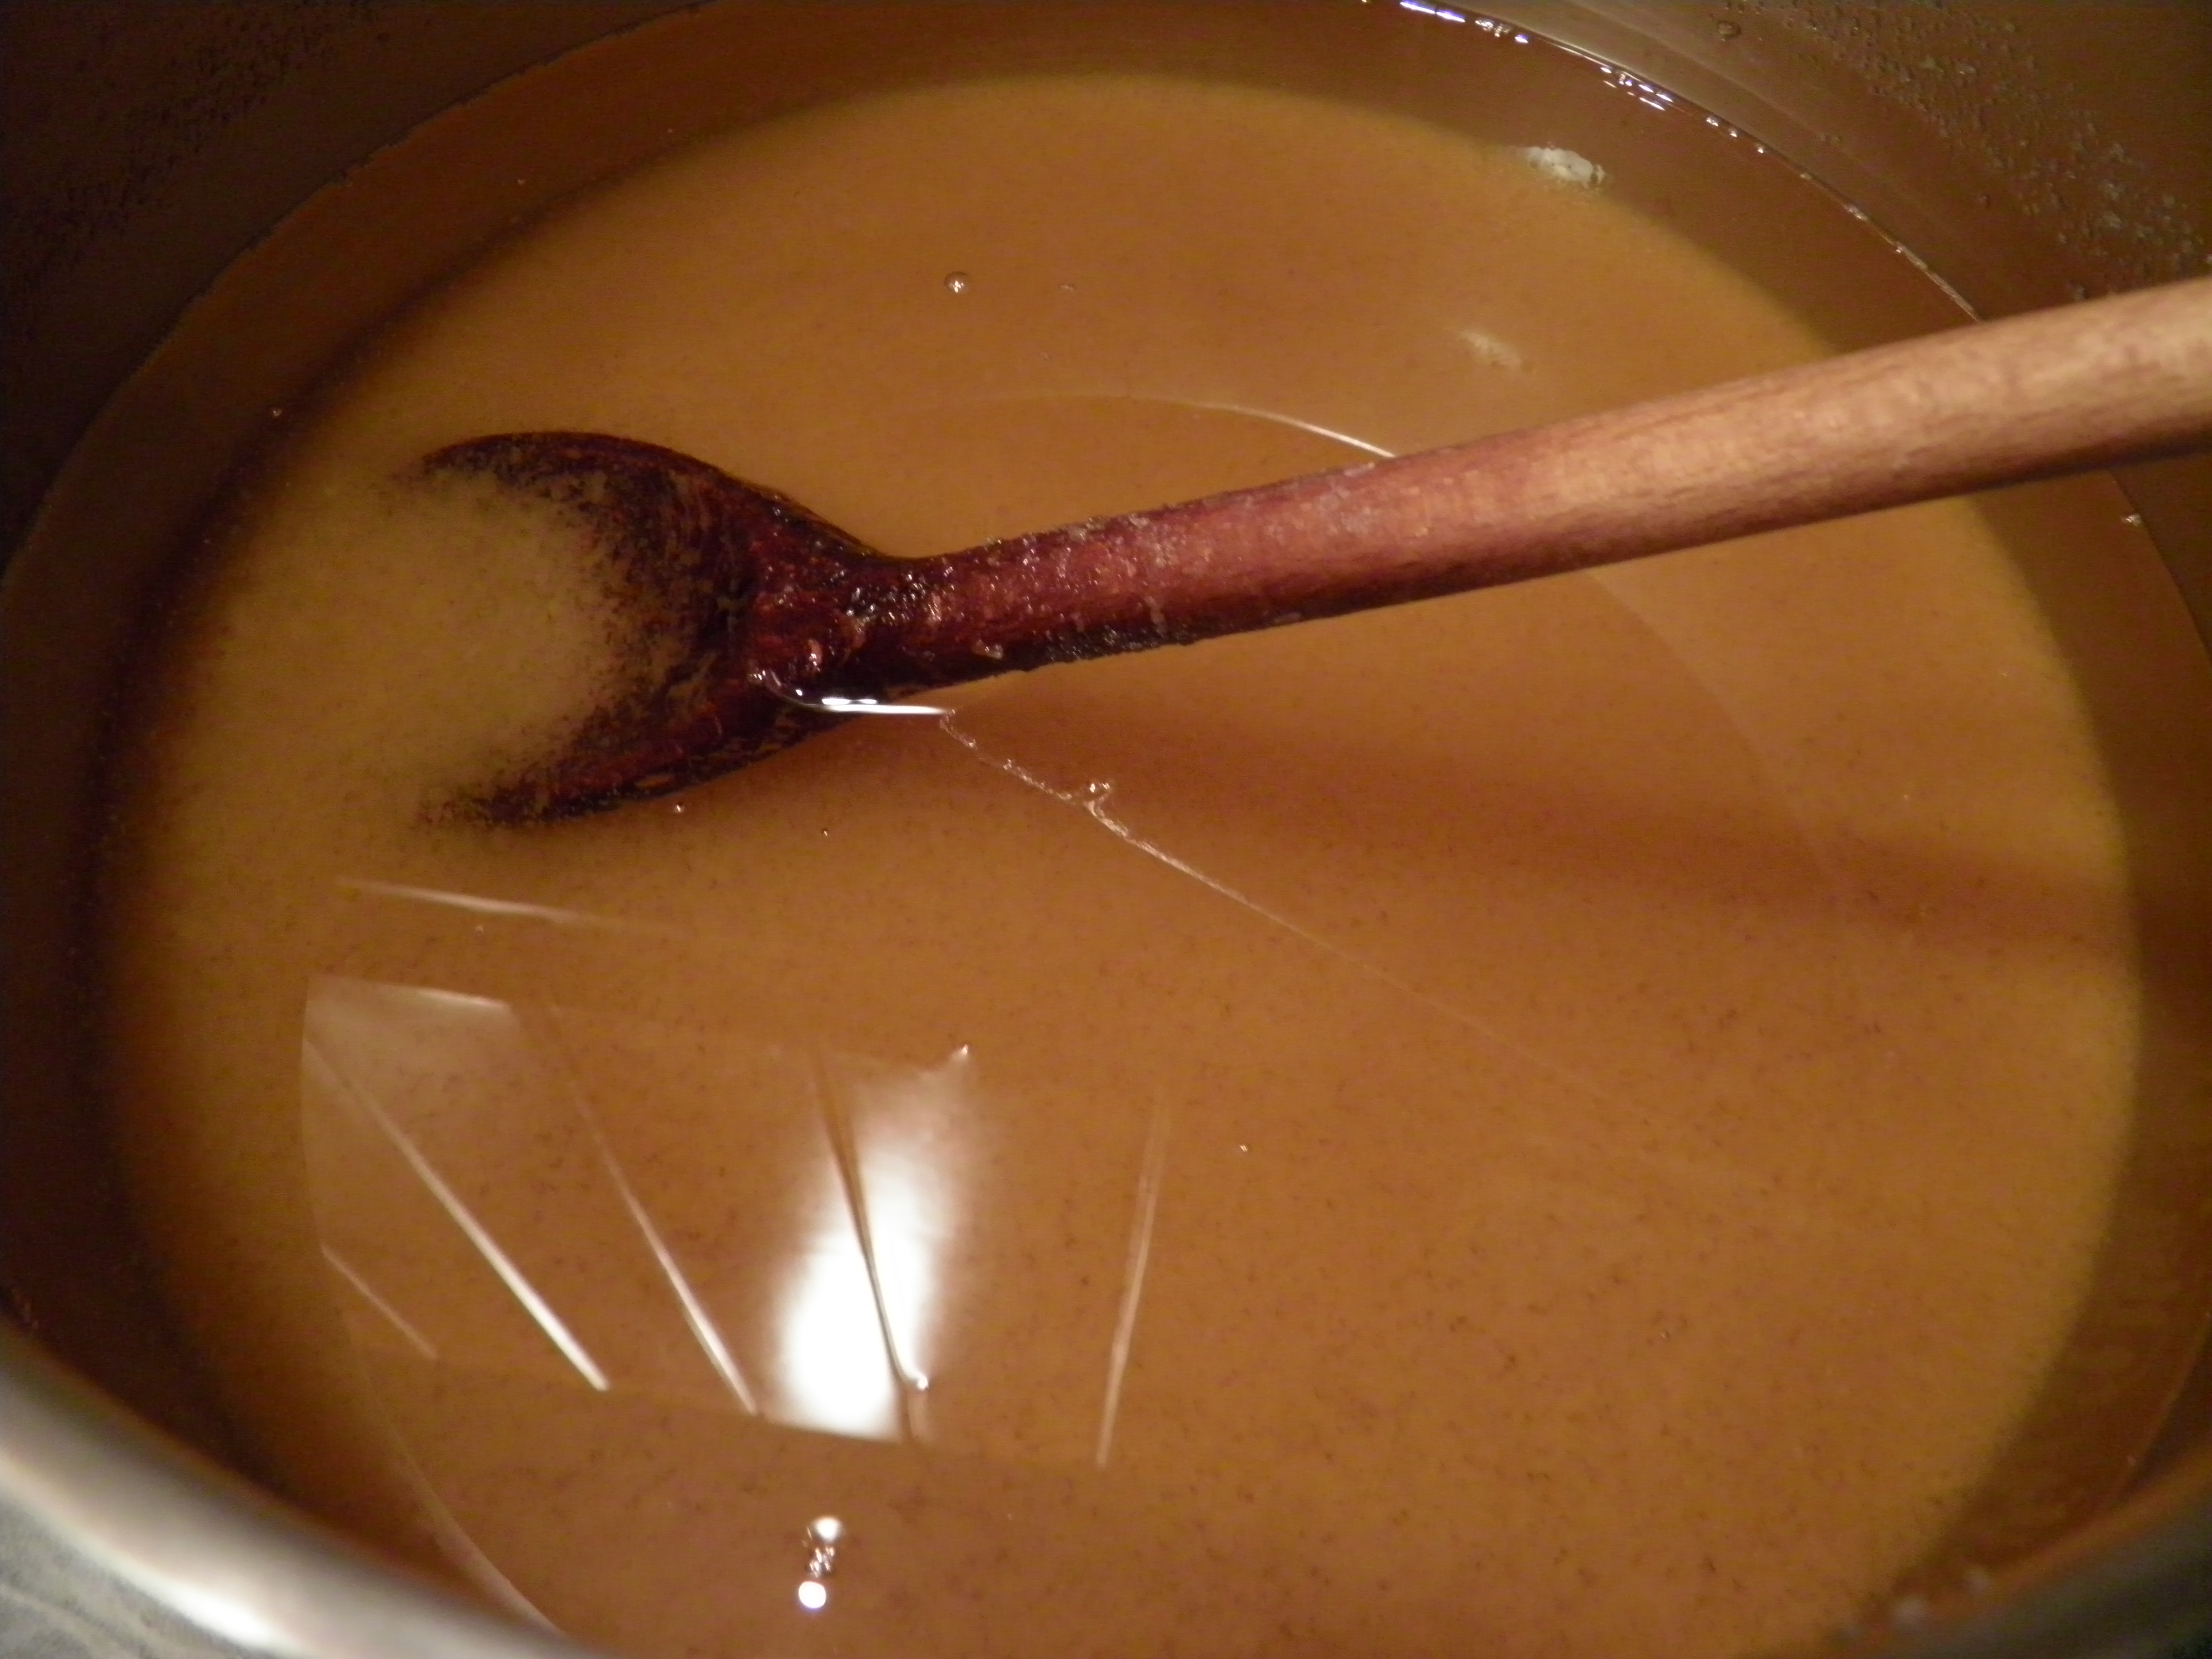
Rendering was complete when the sizzle and bubble slowed to almost nothing, the tiny particles that were left were golden brown, and they sank to the bottom of the pan. The fat floated on top and was a clear golden color.

OLYMPUS DIGITAL CAMERA

OLYMPUS DIGITAL CAMERA

Then, it was time to take the pot off the heat and let it cool slightly. I put the pot in my cold laundry room with the window open (it was 32 degrees outside) to cool off enough for straining.

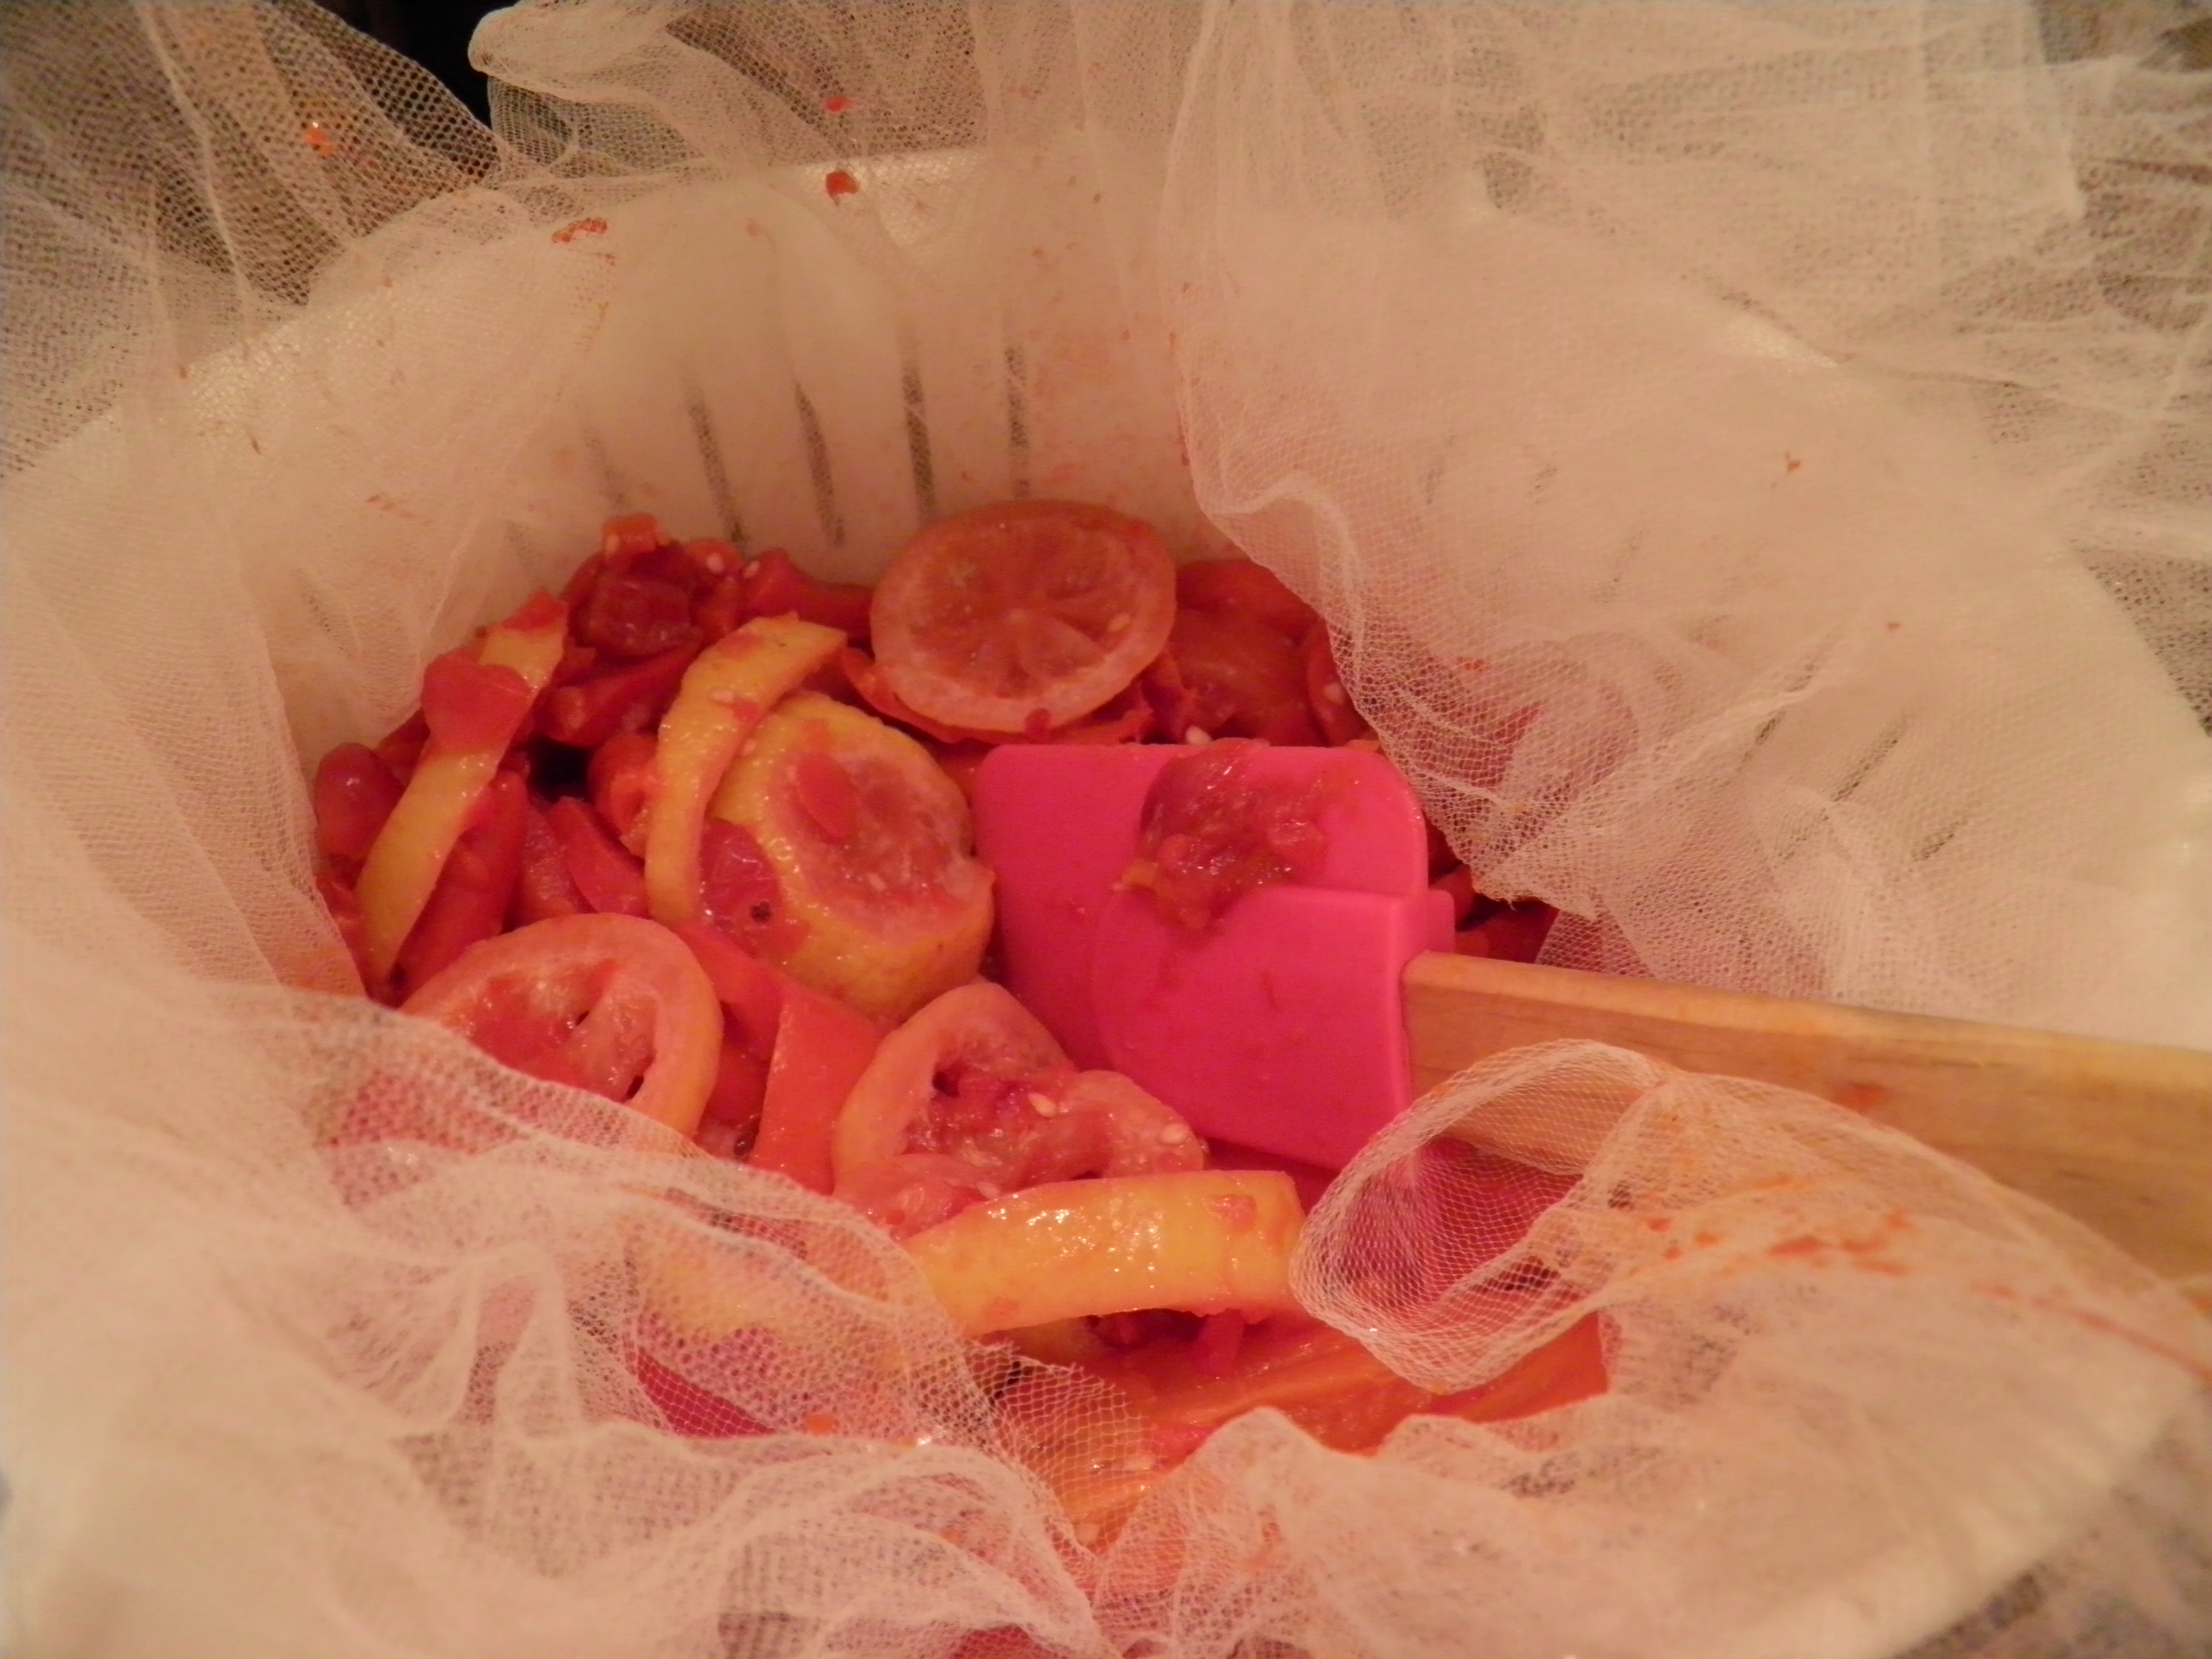
For straining the fat, I set up a small sieve lined with the nylon tulle that I use for straining everything from homemade ricotta cheese to berries for jelly or juice. I like it better than cheesecloth because it has smaller holes and is easily washed for the next use.

OLYMPUS DIGITAL CAMERA

OLYMPUS DIGITAL CAMERA

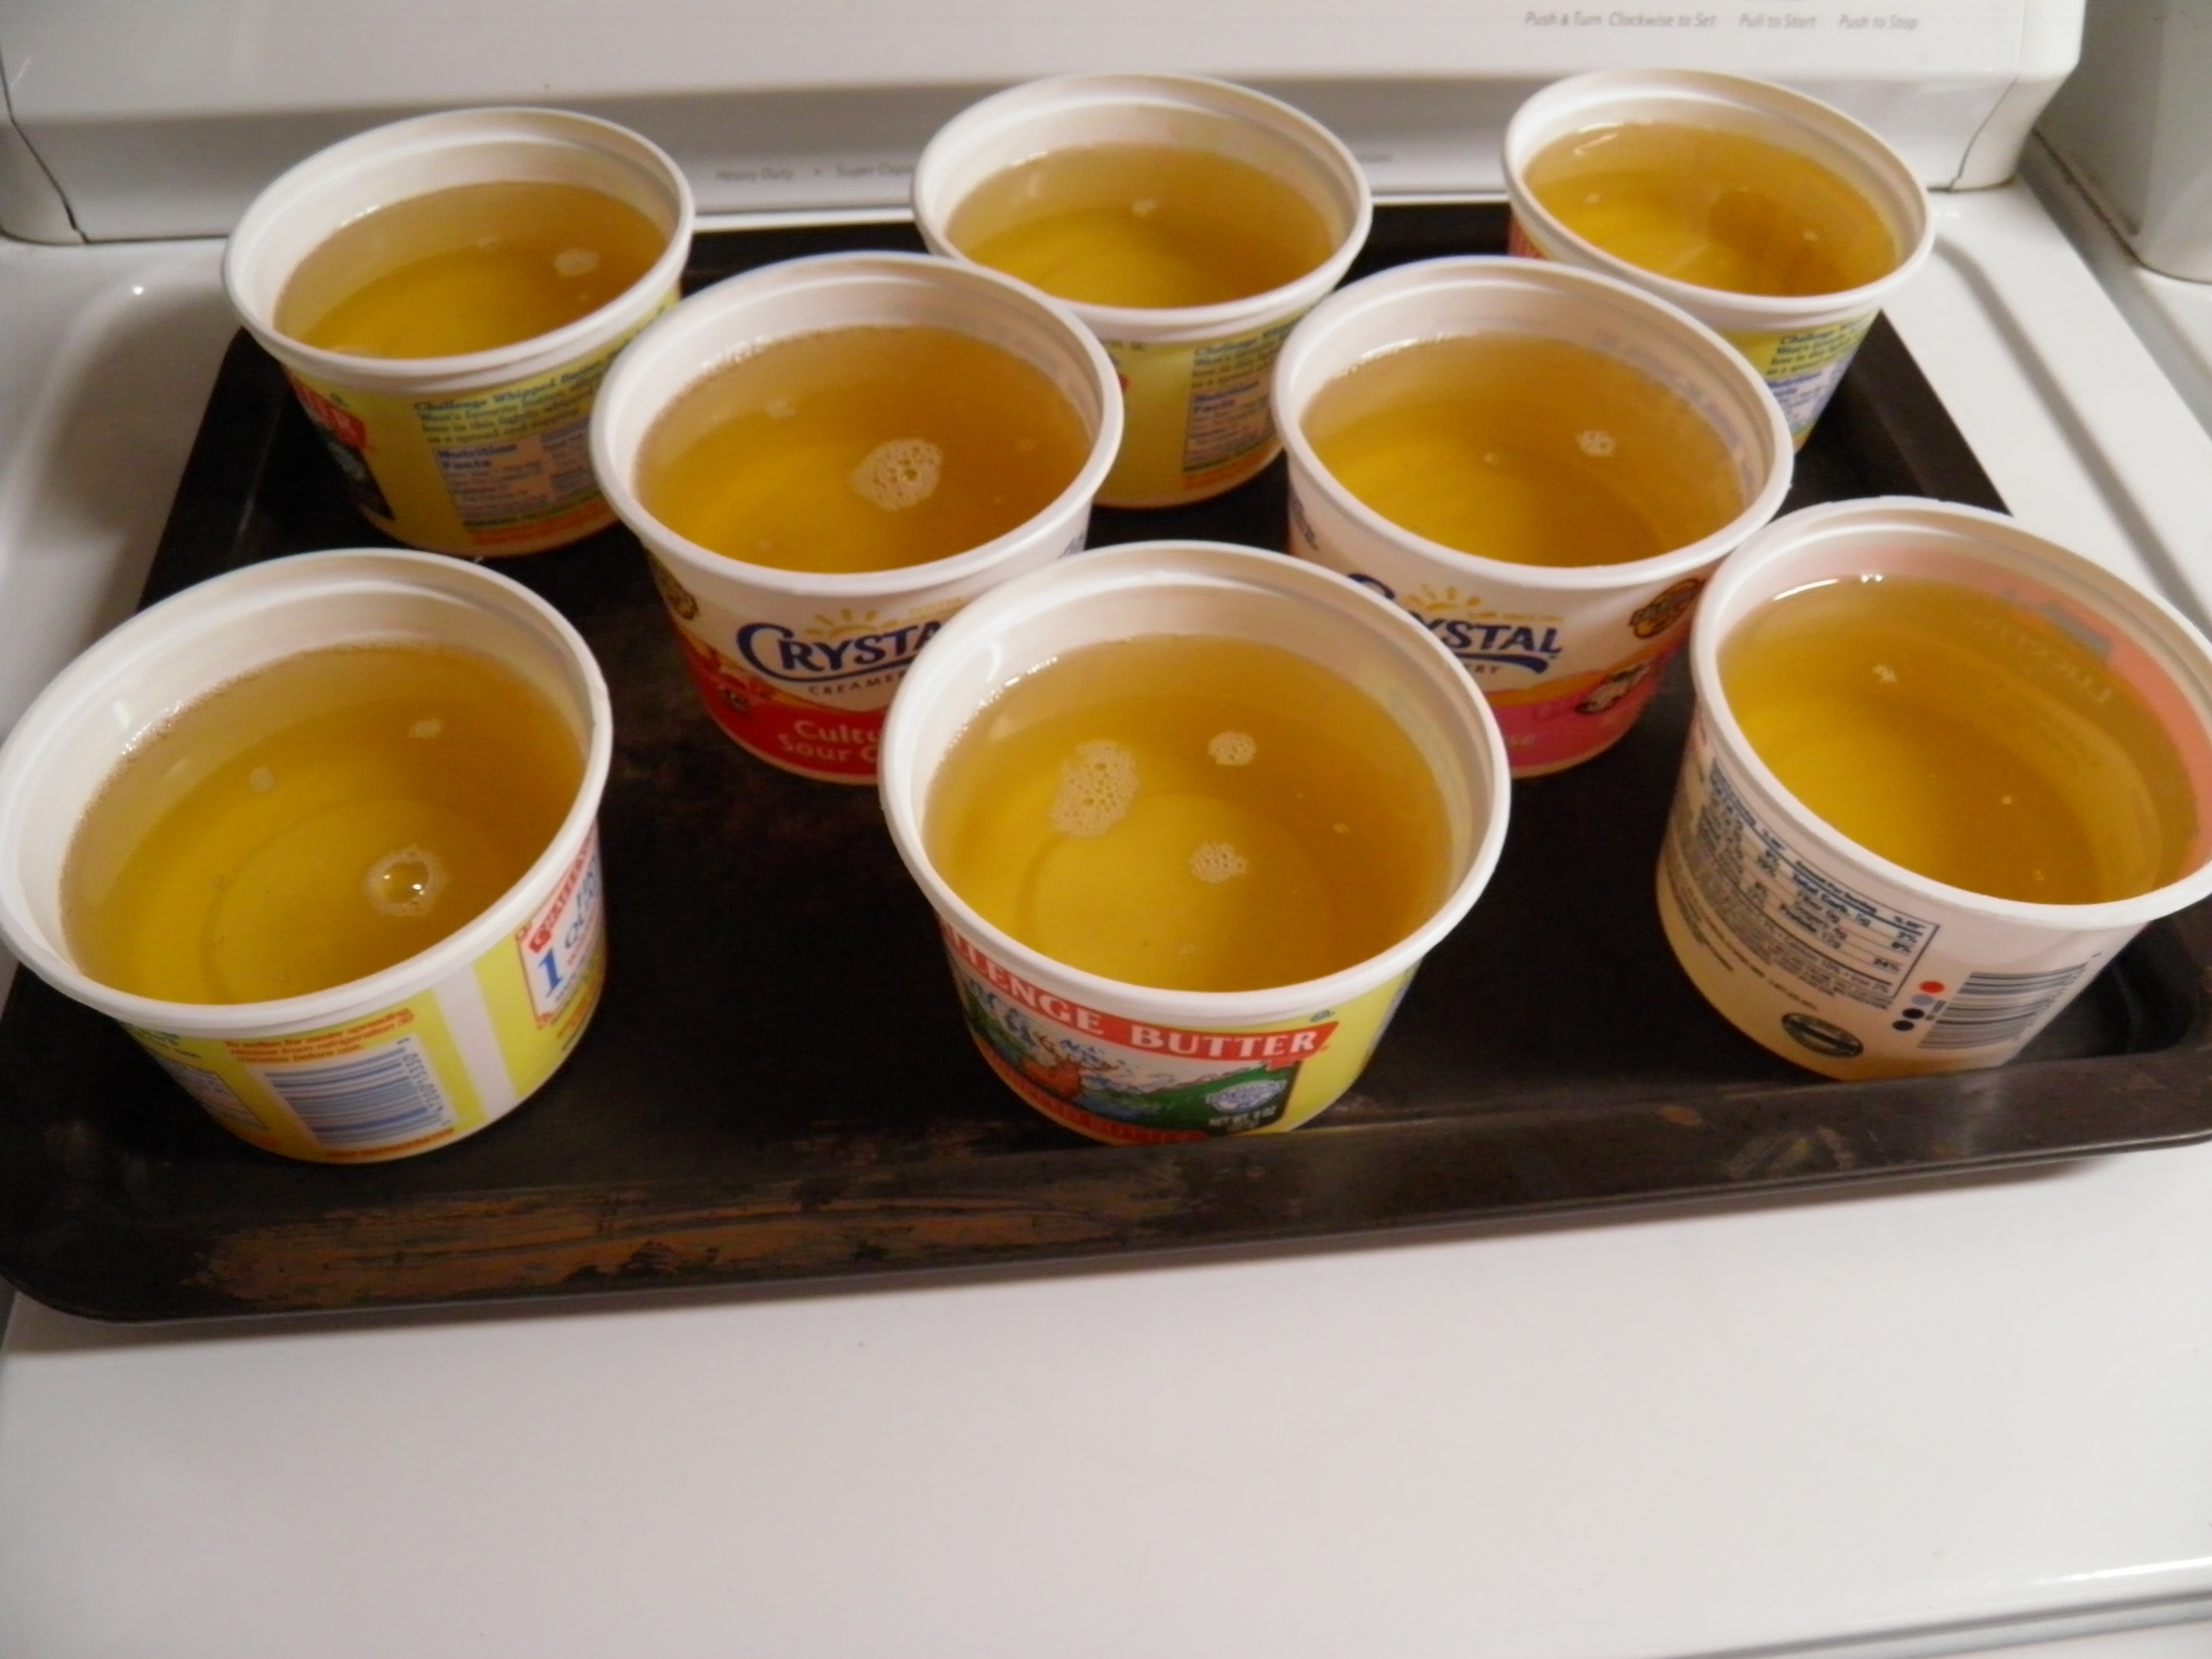
I needed the fat to be cool enough to go into the containers I’d chosen to store it in. I thought about mason jars, until I realized that I was going to have something like 6 quarts of fat to store. The fat will keep for several months in the fridge, and practically forever in the freezer, so I knew I needed to store the majority of it in the freezer. The way things tumble out of my freezer and onto my feet on a regular basis meant that mason jars were not a good choice. I thought about it all day as the fat was rendering, and I decided to raid the recycle bin for plastic butter and cottage cheese containers. These are one pound containers with tight fitting lids that have the benefit of being stackable in the freezer. Also, I can take one container out of the freezer before I want to use it, stash it in the fridge, and probably use it all up within a couple of months. I’m not going to be eating or using this fat every day, so this much of it will probably last me a year!

It took a couple of hours in a cold room for the fat to cool down to warmish. Even though it had been on a low temperature through the last hours of rendering, it was still sizzling hot when I took it off the stove. After about two hours in a cold room, the sides of the pan were just warm, the fat was still liquid, and was ready for straining.

I strained the fat into my biggest plastic mixing bowl with a pouring lip. Then I poured it into the containers that we’d set up on a cookie sheet. I left an inch or so of headspace in each container to allow for any expansion that might occur as the fat froze. I didn’t put the containers into the freezer right away because I didn’t want any condensation from the still warm fat to appear on the inside of the lids. The scrap fat was strained last and put into a separate container. There was only about a half a cup of it. I left the containers uncovered in the laundry room with the window cracked, overnight.

OLYMPUS DIGITAL CAMERA

OLYMPUS DIGITAL CAMERA

All the cracklin’ bits we put in an empty coffee can for the chickens. Some people eat them, but all they tasted like to me was fat, and I knew the chickens would think they were bugs. With snow on the ground now, the chickens could use a bug replacement. And I can report that they really loved their first small helping.

OLYMPUS DIGITAL CAMERA

OLYMPUS DIGITAL CAMERA

The next morning, to my surprise, the fat was still liquid. (From the reading I’ve done, I’m guessing that this fat, maybe because it was so newly formed on the bear, is mostly unsaturated, as it remained liquid at a cold room temperature, but I’m not entirely sure about this. If I were Alton Brown, I could explain it, but I’m not, so I can’t.) The fat was cool, but there was no solidification, except a trace amount on the one small container of scrap fat. I put the lids on the containers, labeled them, and then stashed them in the freezer, still on the cookie sheet to contain any possible spillage before the fat froze.

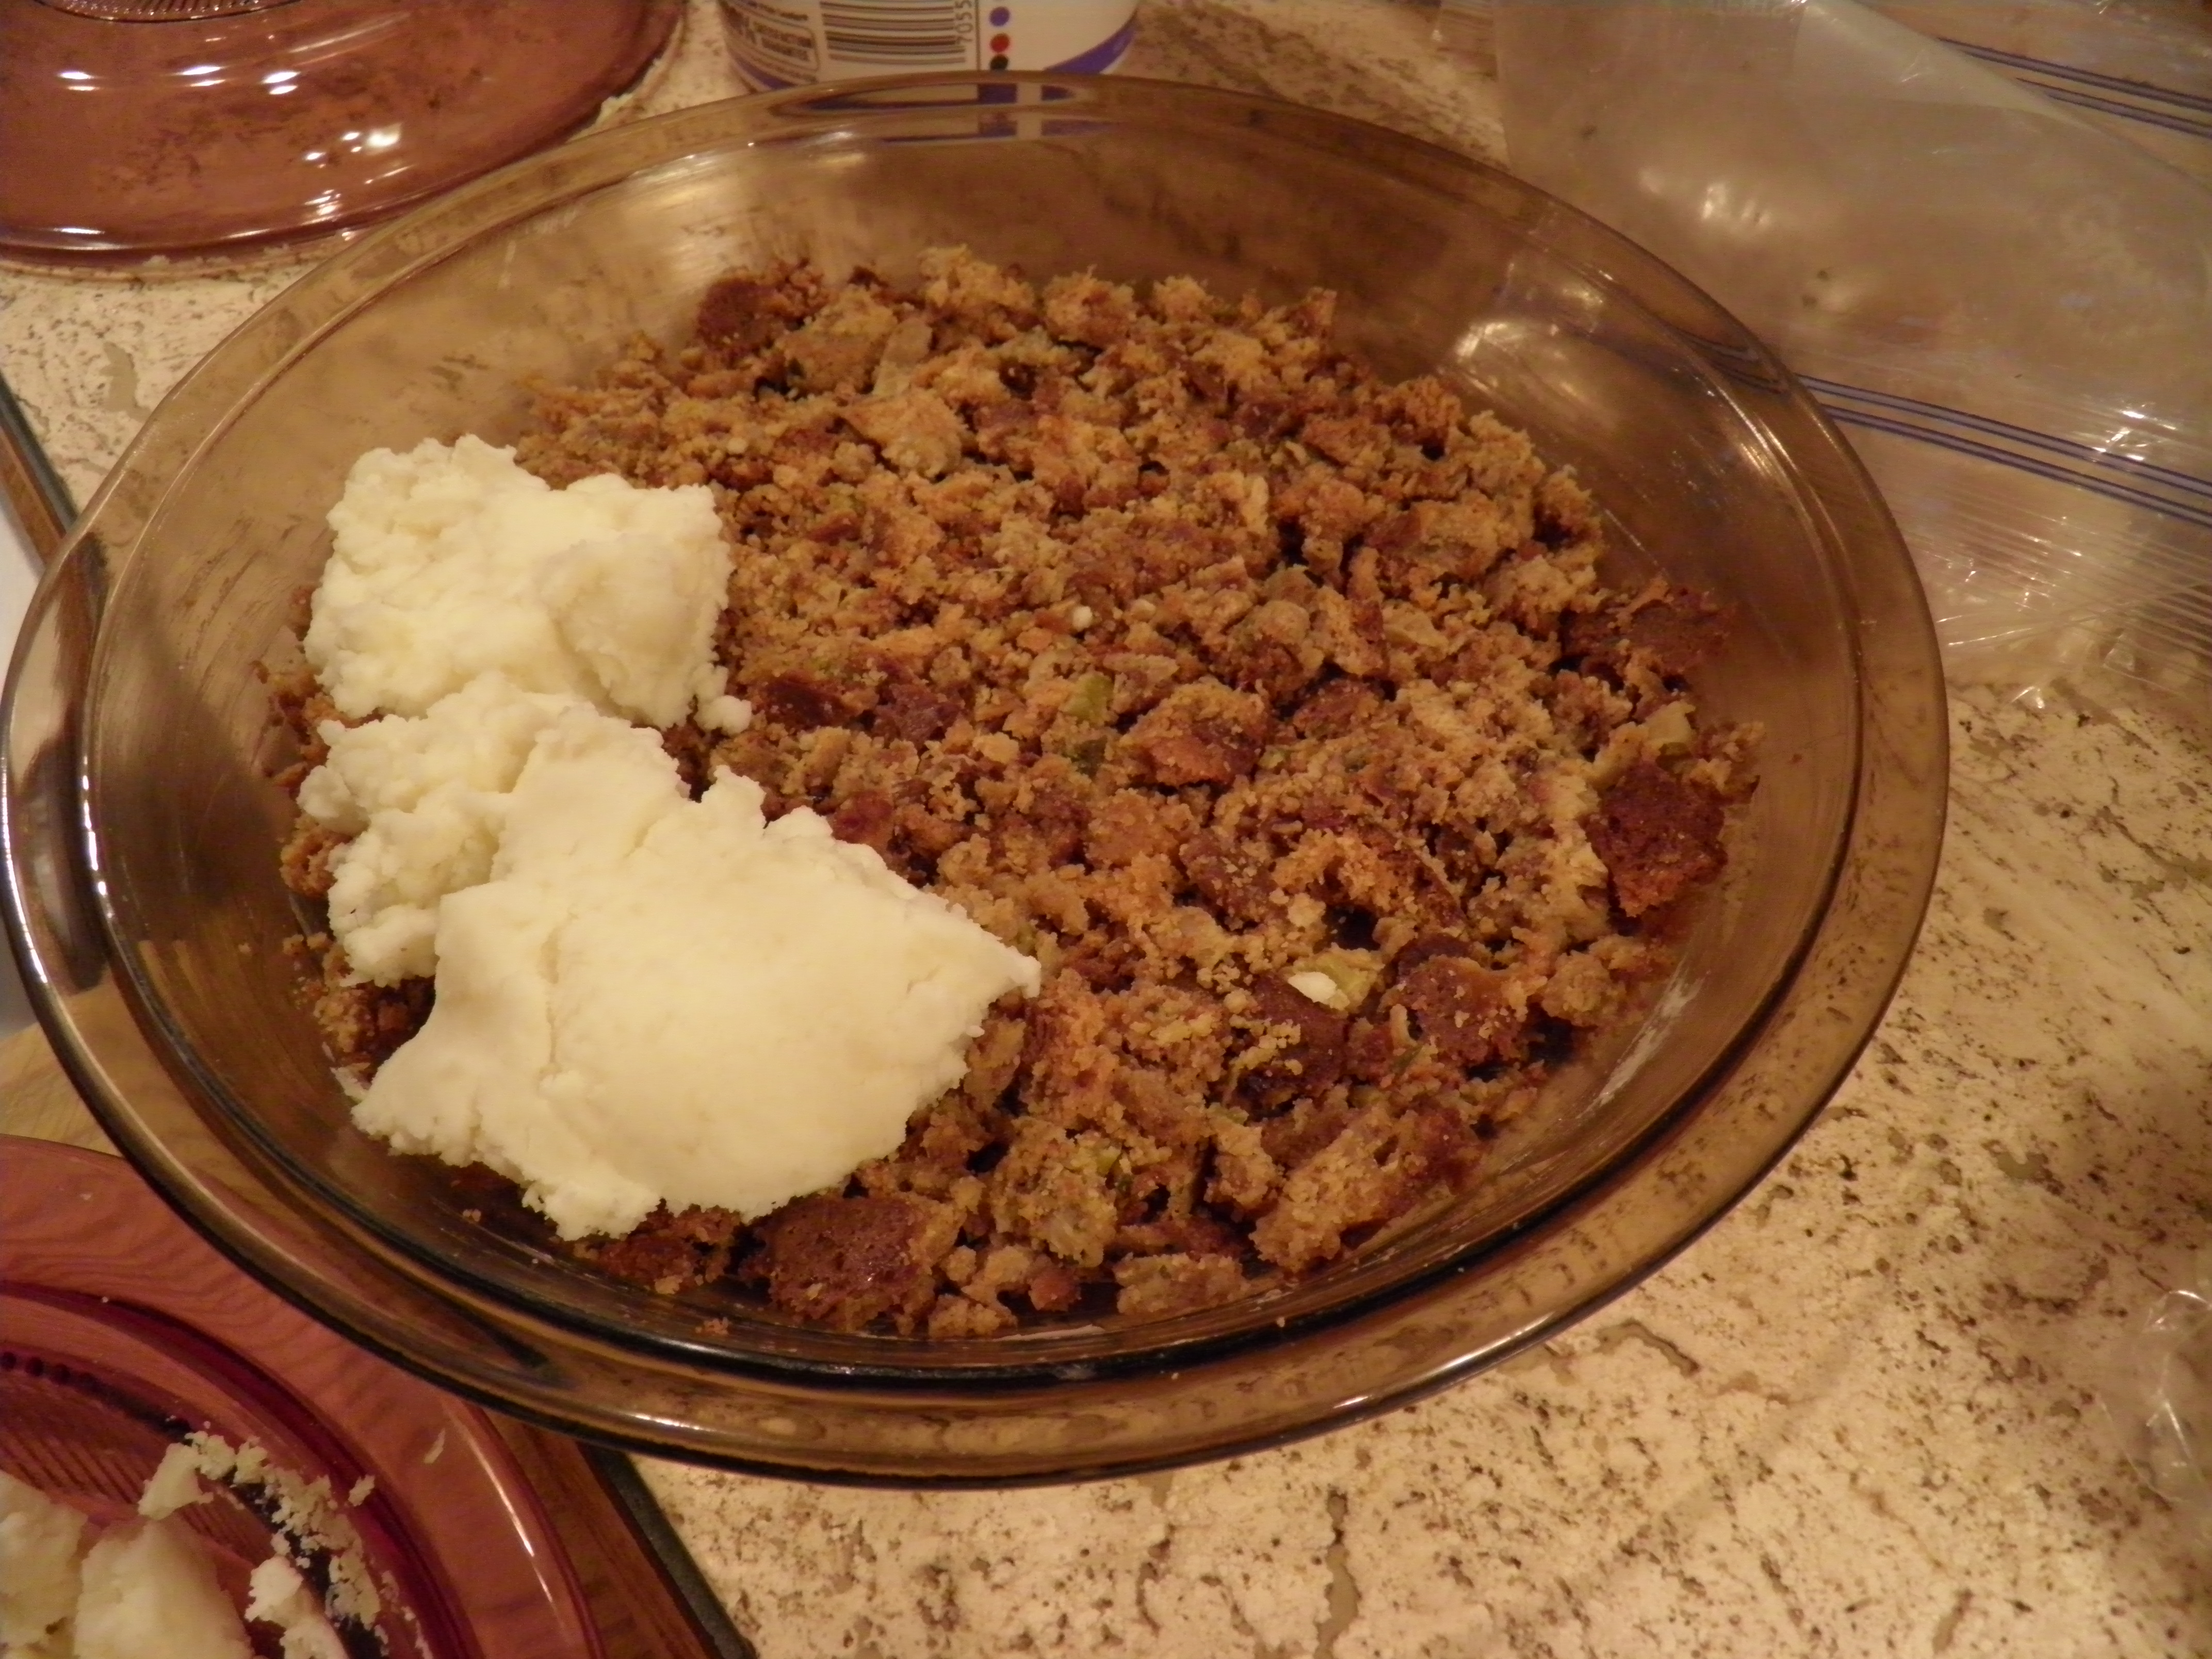
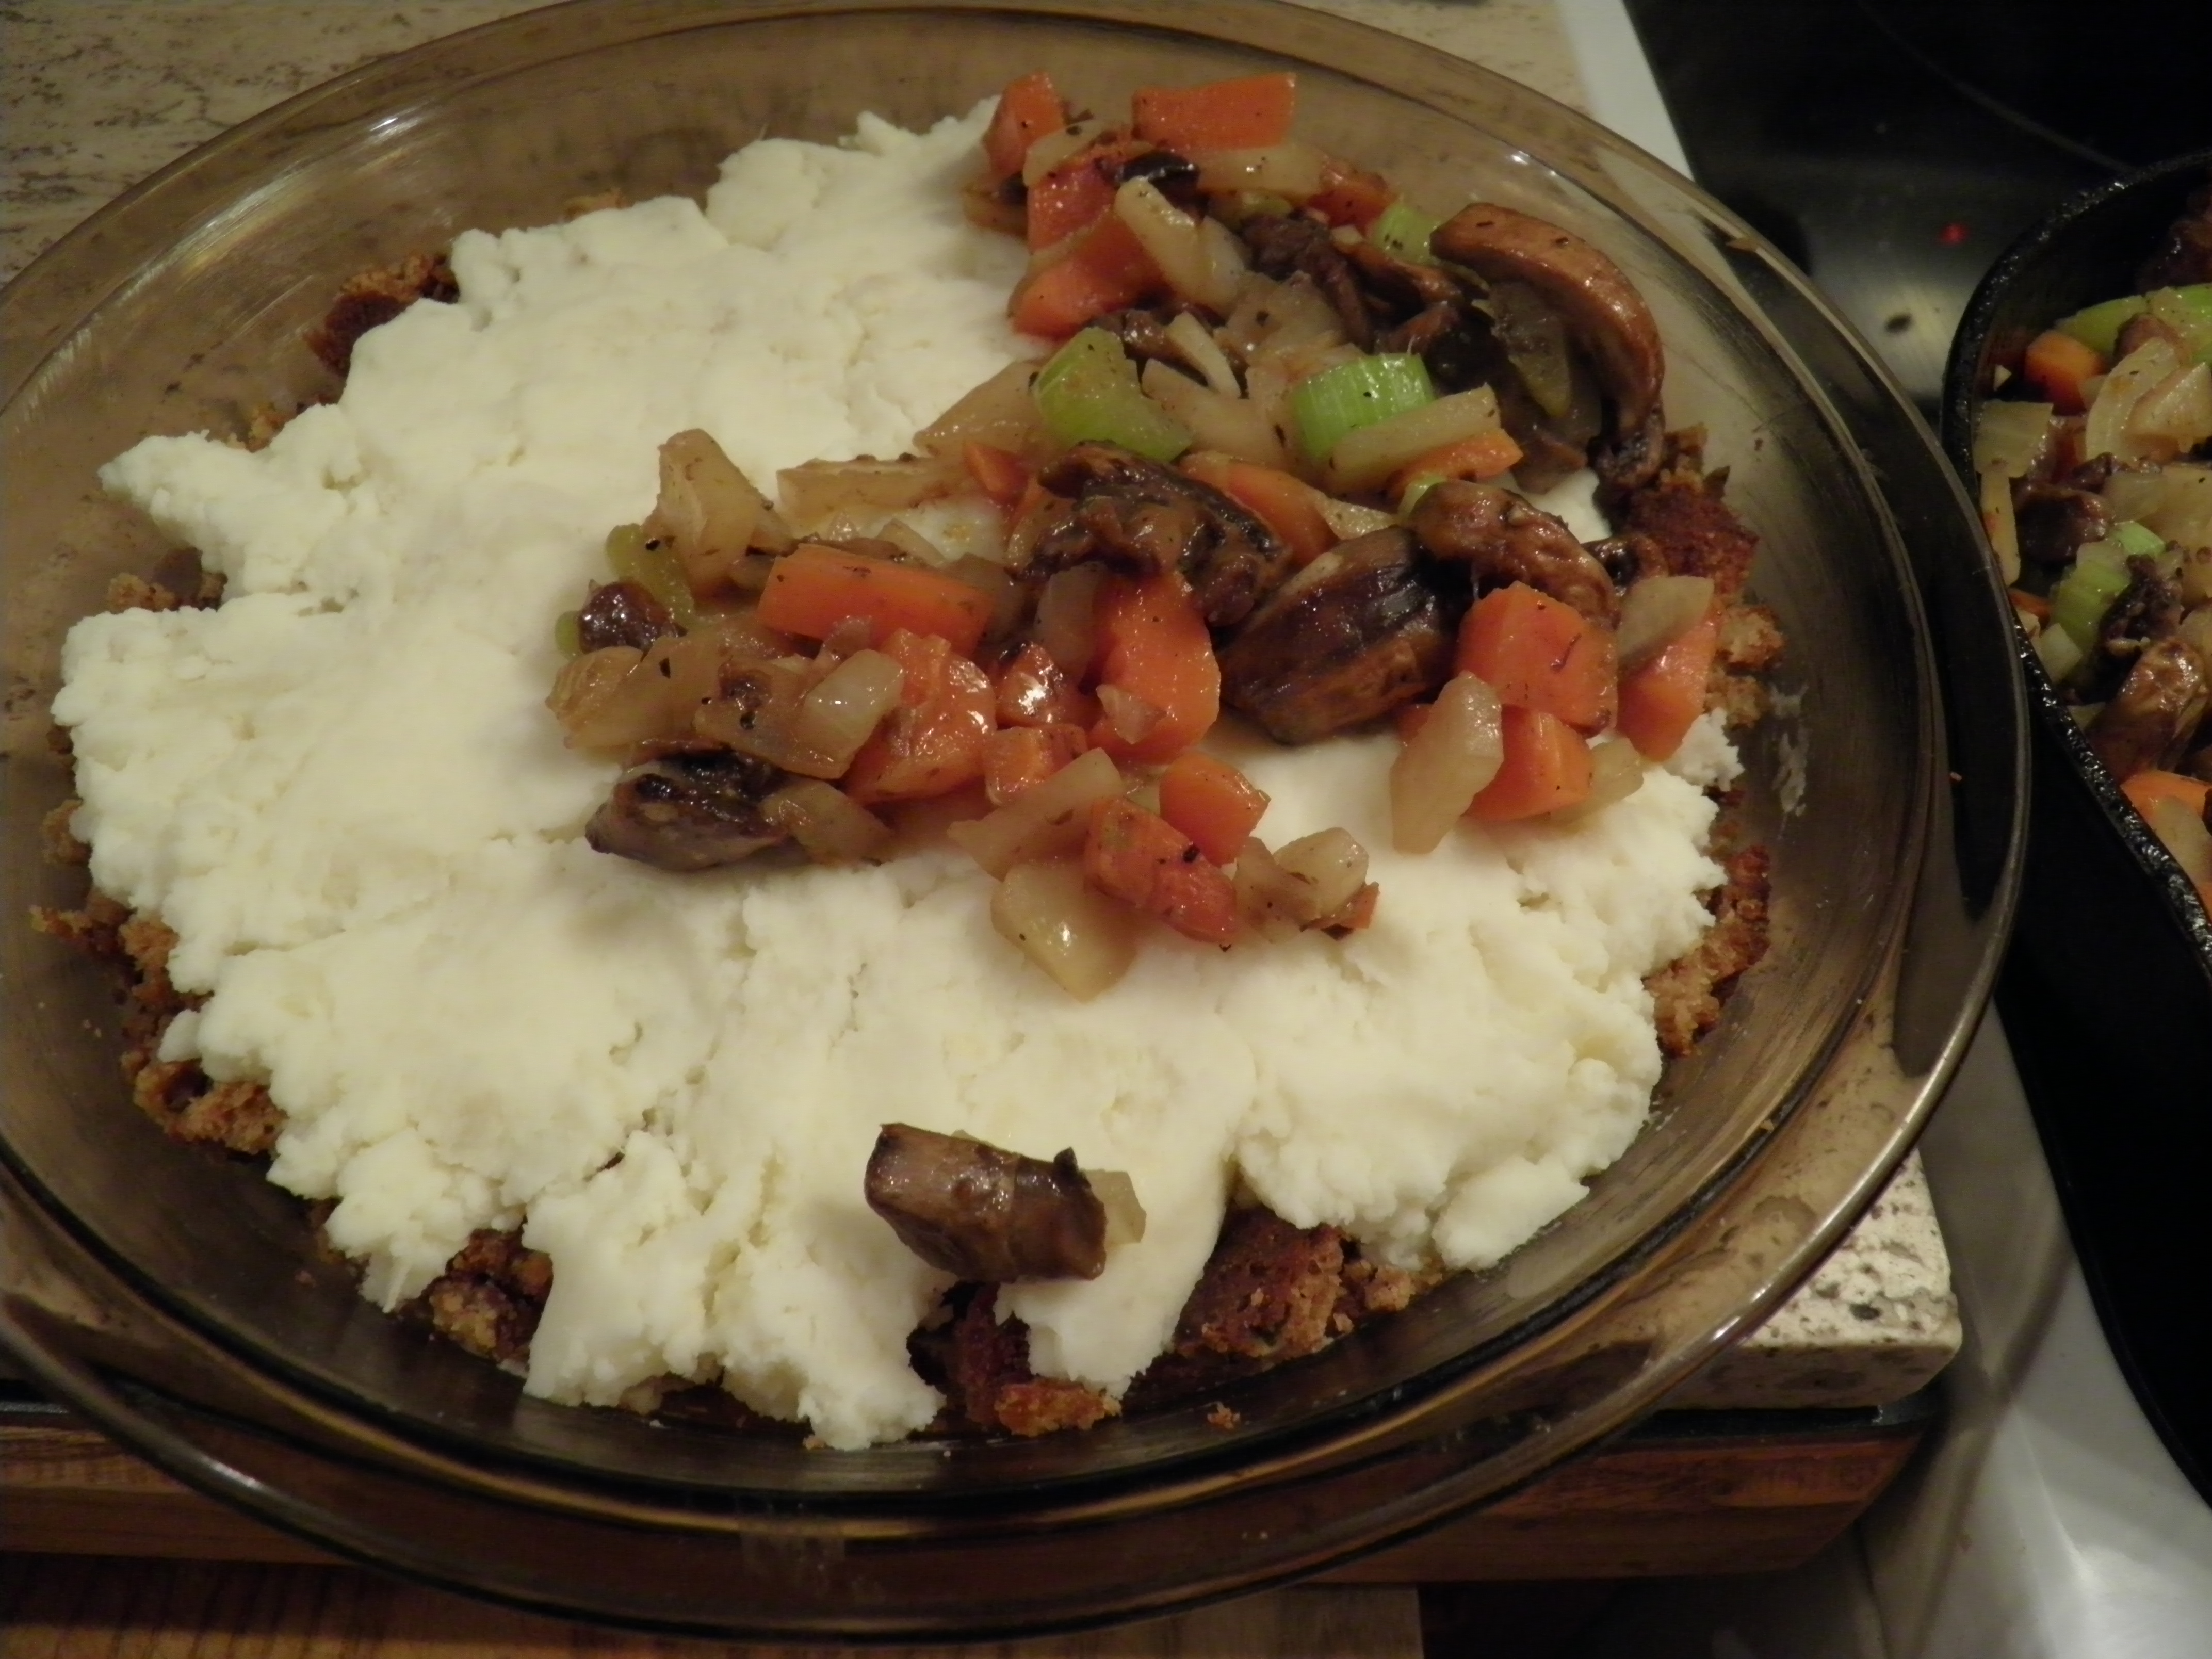
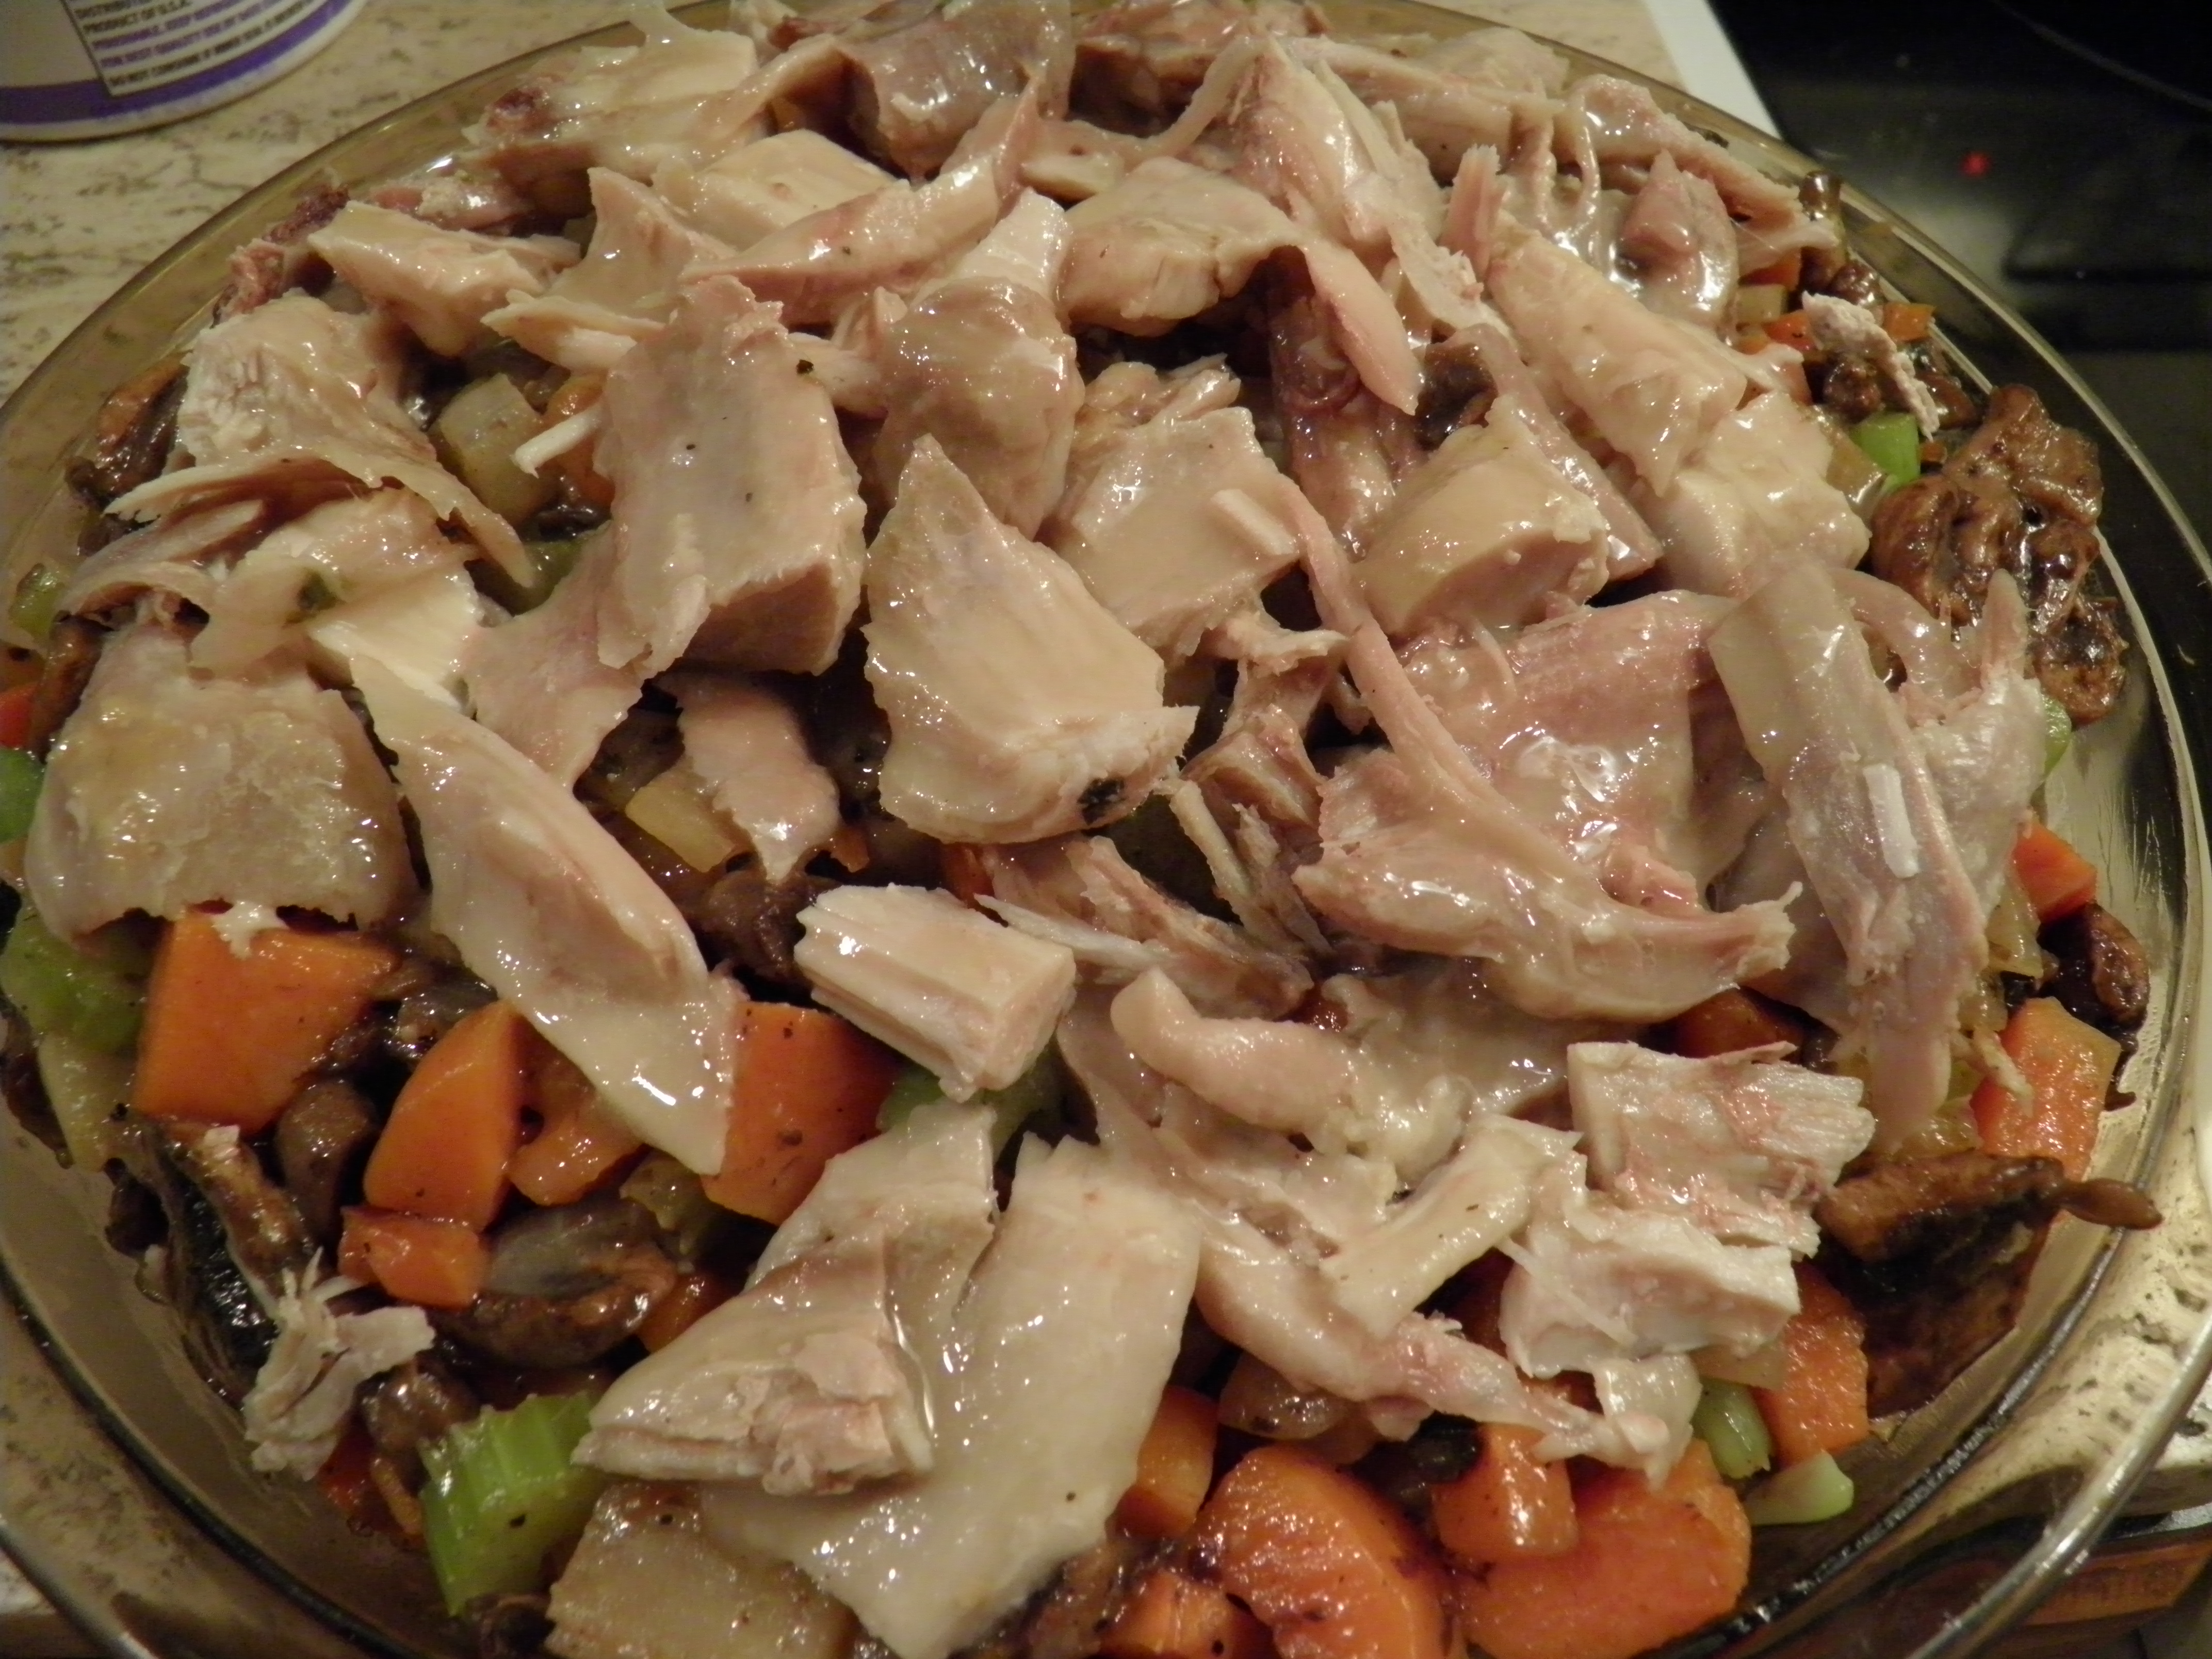
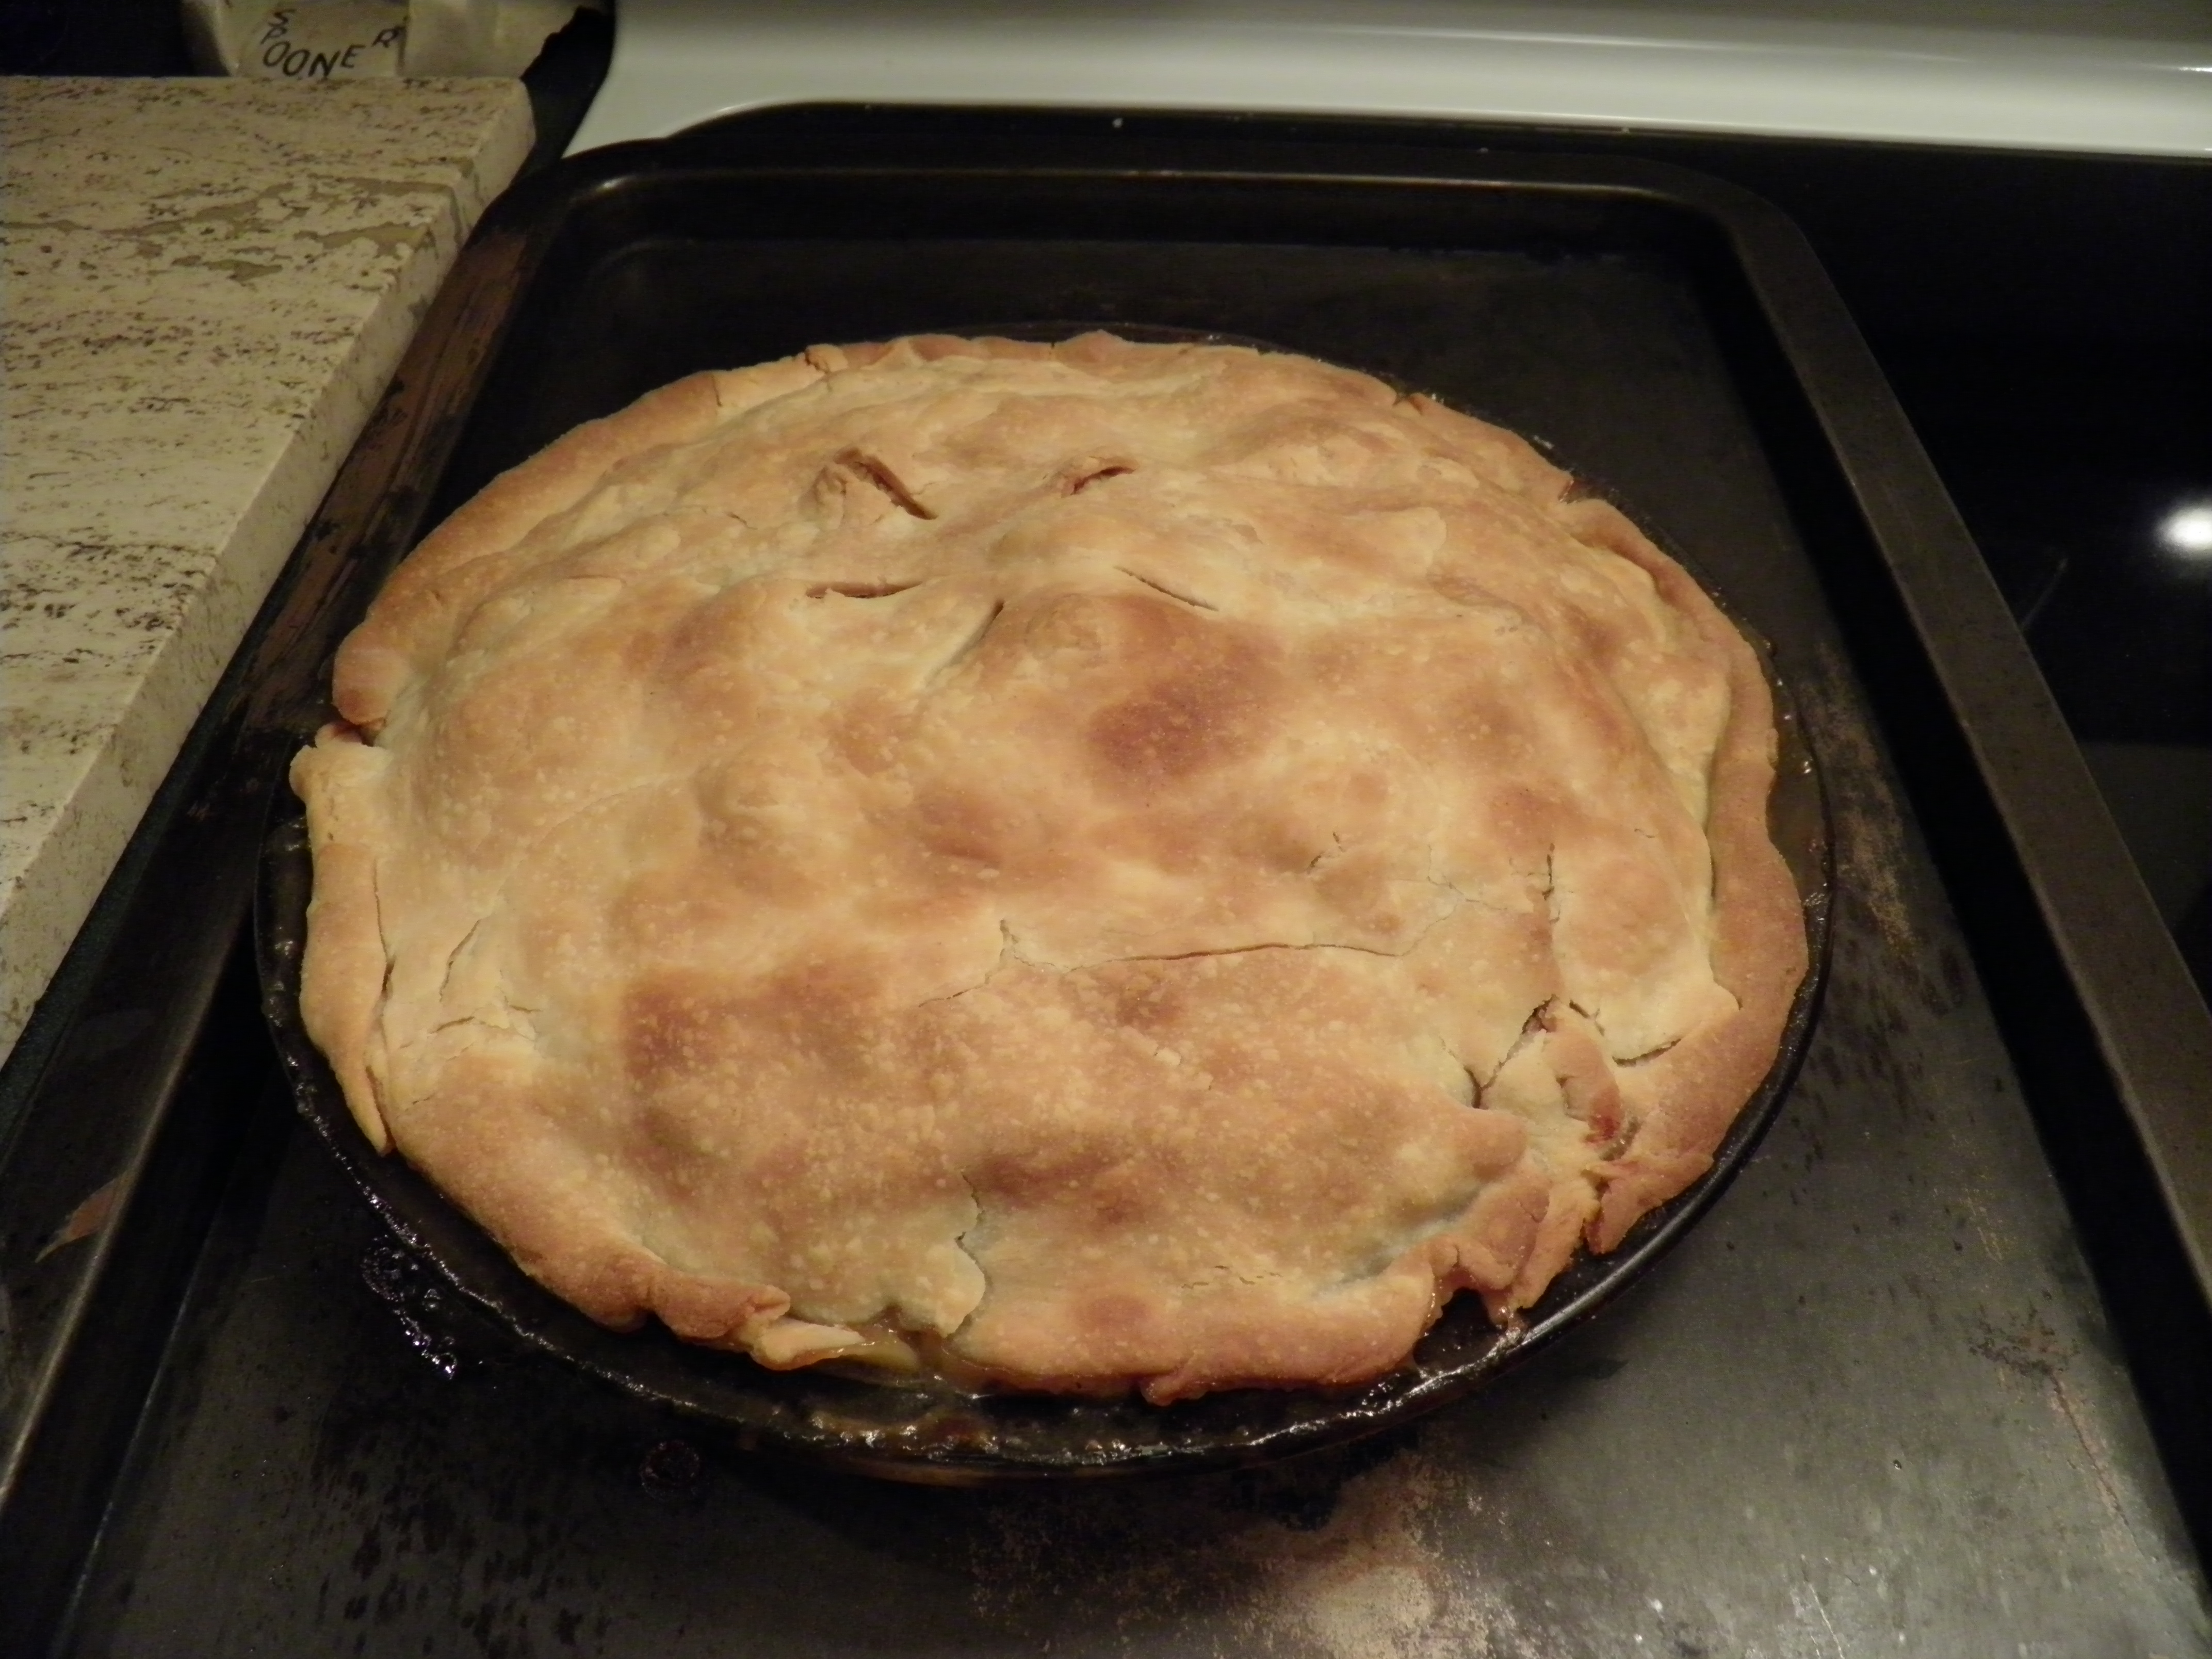
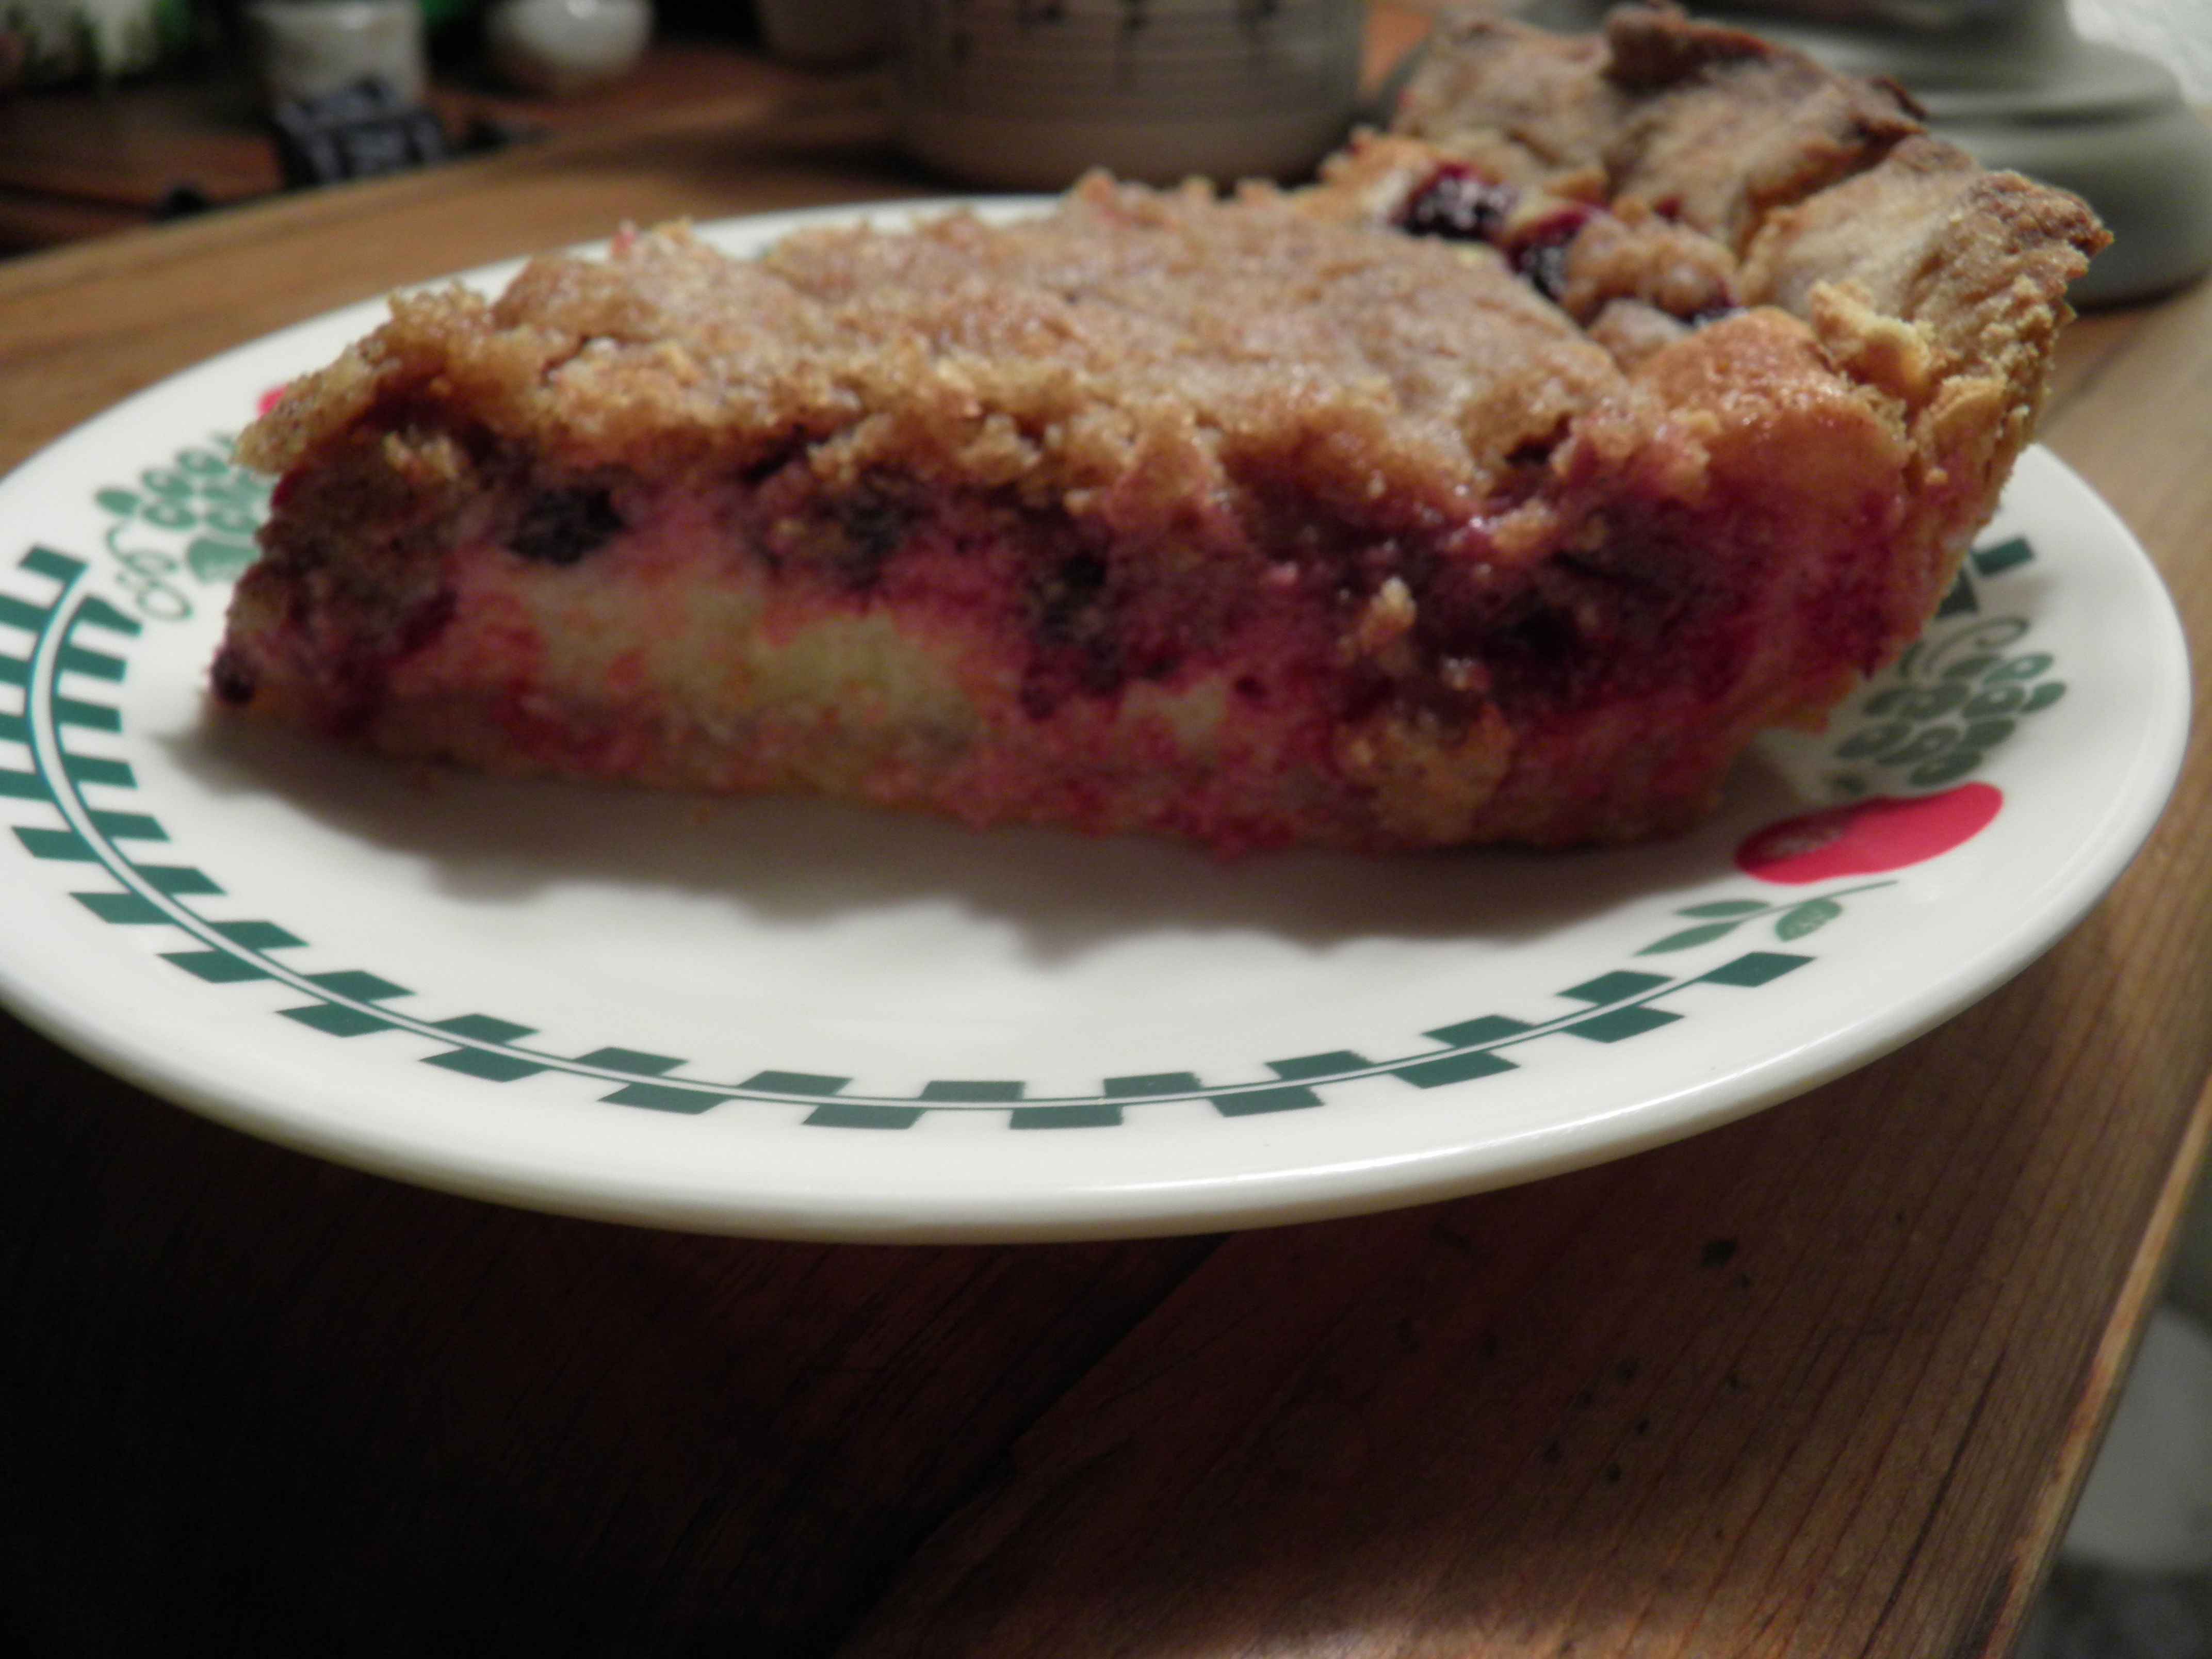
So, now I have this beautiful, rendered bear fat, and what am I going to do with it? I tasted the fat, and it has no flavor. None. No meaty taste, no gamey taste. It is virtually flavorless, which will make it fine for flaky pastry doughs (bear pot pie and pear mincemeat pie coming up!), and I’m looking forward to trying it in biscuits with bear roast and dumplings on a bear stew. I’m going to try frying with it. I’ve heard of duck fat fries although I have not eaten them. Maybe I’ll try bear fat fries. Or bear fat doughnuts! And I’m really considering making some bear tamales, with bear meat in the filling and bear fat in the masa. I plan to use it in recipes as lard would be used, and I expect to have to experiment. So stayed tuned for these and other adventures with rendered bear fat.

OLYMPUS DIGITAL CAMERA

OLYMPUS DIGITAL CAMERA

Now for a brief foray into philosophy. Rendering the bear fat was a day’s work. I had time to do other things as the fat was cooking down, and it wasn’t an arduous process, from grinding to cooking to straining. But I would probably have done it even so, because I think it’s important to follow a “waste not, want not” practice. (It’s one thing to have a waste not, want not philosophy; it’s another altogether to put it into practice!) I grew up that way, raised by parents who had themselves grown up in poverty and who struggled their way out during my lifetime. I’ve lived through lean years, when all we had to eat was what Mama grew or scavenged and put in the freezer or jars, and what Daddy brought home with a bullet (or hook) hole in it, whether it was in season or not.

But there’s more to it than that for me. I don’t have to try to find a way to use every scrap of a vegetable or fruit harvest, or an animal. But I just don’t want to waste any of what I’m given. That’s dishonoring the gift. If an animal gives up its life so I can eat, I show respect by not wasting a bit of it, from scraps to bones to fat. I show respect for the Creator, the earth, and the life that grows on it by being a wise steward of what’s given me for my life. And if that means cooking down deer bones for stock or rendering bear fat for baking and frying, I’ll do it. And I’ll feel good about it.

Standard
Gluten-free, Leftovers, Main dishes, Recipes

Turkey Pot Pie

I love Thanksgiving leftovers. I’m perfectly happy to eat turkey, stuffing, mashed potatoes, gravy, and cranberry sauce for days afterwards. Days. But eventually, I start wanting to do something different with my leftovers.

On Day 3, I put two turkey dinner plates with the works in the freezer. I also made mashed potato cakes from the over-abundance of mashed potatoes for brunch on Sunday and still had some left over. What to do? Then the light bulb clicked on. Turkey pot pie.

The thing that clinched this dish, turkey pot pie, was the fact that I had a little bit of pie dough left over too. I also had some mushrooms that needed to be used before they became unusable. I have a lot of carrots in the fridge from my garden (and more in the garden), and I had some raw turnips already peeled and cut which were left over from the raw veggie plate.

I didn’t have a lot of cornbread stuffing left over, but I had the thought to use it for the bottom crust of the pot pie. I’ve never done this before, but I figured it could go one of two ways. Either the stuffing would crisp up and form a crunchy crust on the bottom, or it would absorb the juices of the other filling ingredients and become moist and succulent again. And either way would be fine. It turned out the second way, with the stuffing absorbing the juices of the rest of the filling, and it was delicious. So here’s how I did it, complete with pictures.

Thanksgiving Leftover Turkey Pot Pie

(all measurements are approximate—use your judgement and your taste with the layers, add ingredients that you like, such as peas)

1 ½ cups leftover stuffing (link to my gluten-free cornbread stuffing)

2 cups leftover mashed potatoes

2 cups diced carrots

2 cups diced turnips (optional)

½ cup diced onions

½ cup diced celery

1 cup sliced mushrooms (optional)

Salt and pepper to taste

2 cups leftover turkey meat, light or dark or both, chunked

3 tablespoons butter or olive oil

½ cup leftover turkey gravy

1 unbaked pastry circle for top (I make a gluten-free crust that’s really good.  Recipe coming soon!)

Preheat oven to 425 degrees. Melt butter or heat oil in large skillet. Add carrots and turnips and sauté for 5-10 minutes, or until carrots start to caramelize.  Add onions, celery, and mushrooms. Salt and pepper lightly. (Remember, there will be salt in the stuffing, the gravy, and the mashed potatoes.) Sauté vegetables until mushrooms have released their liquid and the liquid has mostly been cooked away or absorbed. Stir frequently.

OLYMPUS DIGITAL CAMERA

OLYMPUS DIGITAL CAMERA

While vegetables are sautéing, butter or spray oil the bottom and sides of a nine-or-ten inch pie plate. Crumble stuffing between your fingers and press it onto the bottom of the pie plate, and up the sides if you have enough and want to. Dollop the mashed potatoes over the stuffing and press into a compact layer.

OLYMPUS DIGITAL CAMERA

OLYMPUS DIGITAL CAMERA

OLYMPUS DIGITAL CAMERA

OLYMPUS DIGITAL CAMERA

Spoon the sauted and softened vegetables evenly over the mashed potatoes. Layer the meat over the vegetables, and spoon the gravy (warmed if it has solidified) over the meat.

OLYMPUS DIGITAL CAMERA

OLYMPUS DIGITAL CAMERA

OLYMPUS DIGITAL CAMERA

OLYMPUS DIGITAL CAMERA

Roll out your pie crust, cut several vent slits in the top, and lay it over your filling. You can crimp the edges if you like. Place the pie on a cookie sheet to prevent it from bubbling over onto the bottom of your oven.

OLYMPUS DIGITAL CAMERA

OLYMPUS DIGITAL CAMERA

Bake for 15-20 minutes, or until crust is browned and juices are bubbling inside the pie. Remove from the oven and cool on a rack for 15 minutes to allow the pie to set. Don’t worry, it will still be hot when you cut into it!

OLYMPUS DIGITAL CAMERA

OLYMPUS DIGITAL CAMERA

I was able to remove cut pieces with a spatula, but it would have been easier to dish it up with a big spoon!

OLYMPUS DIGITAL CAMERA

OLYMPUS DIGITAL CAMERA

Absolutely delicious!


Standard
condiment, Recipes, Uncategorized

Hot Pepper Jelly

I made hot pepper jelly two years ago, and at that time, I had to buy the jalapenos from the local farm stand because I didn’t have any red ones. You can make hot pepper jelly from green peppers, but the color won’t be as pretty, and the heat will be a bit sharper, not quite as mellow and fruity as when ripe, red peppers are used. This year, I had an abundance of red peppers and none of my previous batch of jelly left, so it made sense to make some more this week with the peppers I’d let ripen.

OLYMPUS DIGITAL CAMERA

OLYMPUS DIGITAL CAMERA

I used a mix of ripe jalapeno and Serrano peppers. Serranos are just a bit hotter than jalapenos, but I knew from my previous experience that the heat of the peppers mellows into a nice, sustained warmth in the mouth after they’re cooked down with vinegar and sugar. Don’t be afraid of hot pepper jelly if you’ve never tried it before. This recipe isn’t hot. It won’t burn your mouth. I suppose if you used a really hot pepper, like a habanero or the very hot Thai chiles, it might. But, made with jalapenos or Serranos, this doesn’t.

Now, if you do want a hotter jelly for some unfathomable reason (some people just like to torture themselves, I guess!), don’t use more peppers in the recipe.   Do use a hotter pepper, like a habanero, or whatever you prefer, and use the same amount as the recipe calls for. This is so you don’t upset the acid balance of the recipe and create something that could be dangerous when the jar is opened.

You can, of course, use commercial pectin to make hot pepper jelly. I’ve seen the recipe for it on the Sure-Jell instructions. (I make a batch of strawberry jam with Sure-Jell for Dennis every spring, because he likes everything sickly sweet.) I don’t make my hot pepper jelly that way, and everybody who’s tried my jelly has liked it because it isn’t too sweet. I’m able to reduce the sugar in the recipe because instead of commercial pectin, I use apple pectin stock that I make each year when I’m processing my apples, and then freeze in 1 cup measures, so I always have it on hand when I want to make a jam that needs more pectin than the fruit contains (like hot pepper jelly, green tomato marmalade, or peach jam). Of course, if you use commercial pectin, you’ll also be using roughly twice the amount of sugar. That’s why I love jams and jellies made with apple pectin stock. The natural pectin in the apples allows for concentrating the natural sugars in the fruit while the jam or jelly cooks down, and while some sugar is needed, it’s generally about half of what you need when commercial pectin is used.

You might think that the longer cooking time would produce an over-cooked tasting jam or jelly, but it doesn’t. Because there is less sugar used with this method, the taste is much fresher, and the flavor of the fruit comes through much stronger. I will never go back to making jam or jelly any other way (except of course for that batch of strawberry jam each year for my husband’s sweet tooth). I’ve linked the recipe for apple pectin stock. Scroll down on that post, past the other apple recipes, to find how to make it. This stuff lasts a long time in the freezer. I’ve had some carry-over from year to year, and I’ve used some that’s been in the freezer for two years. It is perfectly fine, so if you don’t use your stock up in a year, don’t throw it out.

Now, to the recipe!

Hot Pepper Jelly

(makes about 7 half-pints)

8 ounces (by weight) ripe, red hot peppers (Jalapeno, Serrano, or your choice–*see Notes)

2 large red bell peppers, cleaned of seeds, and roughly chopped (about 4 cups—*see Notes)

2 cups cranberries (fresh or frozen) or roughly chopped black, red, or purple plums (*see Notes)

2 large lemons, sliced (peel on, seeds don’t matter)

6 cups of vinegar (white or apple cider, but make sure it’s 5% acidity)

5-6 cups of sugar

2 cups water

3 cups apple pectin stock

Wearing gloves, slice the hot peppers in half and place them in a large (at least 6 quart) non-reactive pot (ceramic coated or stainless steel). If you want a milder jelly, remove the seeds and ribs of the peppers. (I leave them in.) Clean the bell peppers, removing seeds and membranes, and roughly chop (*see Notes). Add to pot. Add the cranberries or chopped plums, and the sliced lemons. Pour in the vinegar and add the water and apple pectin stock. Bring the pot to boiling over high heat. Reduce heat to medium high and continue to boil for 20 minutes. Stir occasionally to prevent solid pieces from sticking to the bottom. (Prepare yourself for fumes from the boiling vinegar and capsaicin released from the peppers. The vinegar keeps the capsaicin in check, but it’s pretty potent itself.)

Prepare to drain the liquid off the solids by lining a colander with several layers of cheesecloth or nylon tulle. (I prefer the tulle—smaller holes and easier to maneuver and wash.) Place the lined colander over a large bowl.

When all the peppers have softened, pour the contents of the pot into the lined colander to drain. Stir occasionally to release liquid from solids, but don’t press. You want to keep all the solids out of the liquid so the jelly will be clear. Let the colander drain for about 30 minutes, or until dripping slows or stops. In the meantime, wash out the big pot (there will be a sort of red scum on the sides that you don’t want in your jelly) and get ready to use it again.  Now is a good time to prepare your water bath canner and jars, as well.  Jars should be sterilized!

OLYMPUS DIGITAL CAMERA

OLYMPUS DIGITAL CAMERA

Pour off and measure the liquid in the bowl. You should have about 8 cups of liquid. If you don’t have enough liquid, return the solids to a pan, add as much water as you are missing from the 8 cups you should have (if it’s more than a cup, also add additional vinegar, ¼ cup for a cup of water, ½ cup for 2 cups of water), and cook again, on lower heat, for another 15 minutes. Be very careful to keep the solids from sticking and scorching at this point. Strain again, and measure liquid. You want 8 cups of liquid in total before you move on to the next step, which is boiling down your jelly. If you end up with a quarter cup more or less, that’s okay.

OLYMPUS DIGITAL CAMERA

OLYMPUS DIGITAL CAMERA

Pour the liquid into the clean pot. Add 5 cups of sugar, stir until dissolved, and bring to a boil on high heat. Let the mixture boil for about 15 minutes, stirring occasionally, and then taste it. I ended up using 5 2/3 cups of sugar in mine, and I added the additional sugar 1/3 cup at a time, until I got the combination of sweetness and heat I was looking for. Don’t worry if the liquid tastes a bit bitter at this time. That bitterness cooks out as the liquid comes up to the jellying point. Continue to boil and stir the liquid until it reaches the jellying point, between 20-30 minutes, depending on your altitude. (It takes about 40-45 minutes for me, and I live at about 4500 feet.)

OLYMPUS DIGITAL CAMERA

OLYMPUS DIGITAL CAMERA

You can use a candy thermometer to measure the temperature, which will tell you when the jellying point has been reached at 220 degrees. I have one. I don’t use it. Because of my altitude, I prefer to use the cold plate method. Place a small ceramic or china plate in the freezer when you strain off the liquid. It should chill for about 30 min. before you start using it to test your set. I start testing at about 20-30 minutes cooking time, when I can see that the jelly liquid has reduced by about half. I place about half a teaspoon of the liquid on the cold plate, put it back in the freezer for 1 minute, and then push at the dab with my finger. If the dab wrinkles, the jelly will set. If it doesn’t, it’ll be syrup. I continue to test every five minutes until I get a good wrinkle on the plate. At that point, it’s ready to go in the jars. I pull the jelly off that burner and put it on the front one, on low, to keep it at a very low simmer, just barely a bubble breaking the surface, while I get it in the jars. This is very important, because if you over-cook the jelly, it will become gummy and set too hard. But you want the jelly very, very hot when it goes into the jars. (As you ladle in the jelly, you may notice that as it cools, it starts to string a bit and stick to the sides of the pan. That’s a good sign you’re going to get a good set, but keep the temperature low so that it doesn’t cook any further.)

The jars should have been sterilized in a boiling water bath canner for ten minutes before you pour in the jelly. Ladle the jelly into one jar at a time, cap it with flat and ring, and place it in the boiling water bath canner to stay hot while you fill the rest of the jars. Process the jars in the boiling water bath canner for 5 minutes, adjusting for your altitude (I have to add 5 minutes to all my processing times because of my altitude). Remove the jars after processing and allow to completely cool before removing rings and cleaning jars, if necessary. Always test the seal on the jars before storing. Any jar that doesn’t seal can be stored in the fridge and used first.

Notes:

*8 ounces is about 16 jalapenos or 20 Serranos. I mixed mine and weighed them so I wouldn’t disturb the acid balance. If you use a hotter pepper, please be sure to weigh them so you aren’t guessing on the acid needed.

*I chopped my red bell peppers in the food processor this time, and then I remembered why I wasn’t supposed to do that. It chops them too finely. You want the pieces larger so that no pulp strains through when you drain it. This is to keep your jelly nice and clear. I used 4 layers of tulle when I strained, so I was okay. Whew!

*Cranberries vs. plums: These fruits are added primarily to naturally color the jelly, which tends to be a bit pale without them. However, they also add pectin from their skins, and I find it helpful to achieve a good set. If I didn’t have any plums or cranberries, I would add another cup of apple pectin stock and reduce the water by a cup, and just enjoy a paler pepper jelly. The original of this recipe, from Liana Krissoff’s Canning for a New Generation (I highly recommend this book—it’s taught me so much), says that “a handful of papery red onion skins” can also be used to color the jelly. I have not tried this and don’t think I ever will. While you can’t taste the plums or cranberries (I’ve used both), I like the color they give along with the added pectin. I used frozen cranberries this year and got a beautiful color and good set.

OLYMPUS DIGITAL CAMERA

OLYMPUS DIGITAL CAMERA

OLYMPUS DIGITAL CAMERA

OLYMPUS DIGITAL CAMERA

I love this hot pepper jelly on a cracker with cream cheese, on a cracker with bear liver pate, on a cracker with cream cheese and fresh crab (coming, hopefully, in November!). You see the theme? If you’re working on game day finger goods, it’s nice to have a jar of this delicious, spicy jelly on hand. The guys really seem to love it. This jelly is also great on hot, buttered cornbread as an accompaniment to various mild soups, like potato, bean, or a fish chowder—and as a glaze for roast pork loin, it’s killer! Now that I’ve replenished my stock, I’m looking forward to finding new ways to use this wonderful condiment.


Standard
Recipes, Side dishes

Crab and Ricotta Jalapeno Poppers

OLYMPUS DIGITAL CAMERA

OLYMPUS DIGITAL CAMERA

We just had a big weekend with old friends and family. In honor of the October hunting season, I made Bear and Mushroom Fricassee for Saturday’s meal, but on Sunday, it was football and snacks and then pulled pork and coleslaw sandwiches, which my son brought. Among the snack food on the table was a plate of bear liver pate, some homemade charred salsa, and a new one for me, jalapeno poppers. Jalapeno poppers with crab and ricotta cheese.

I make my own ricotta from milk either soured or on the edge, and have for some years. I freeze it in Ziploc bags, so I have it whenever I need ricotta, usually for my Eggplant Lasagna with meat sauce and lots of cheese. However, yesterday morning, when I needed to get two half cartons of milk out of the fridge (somehow when we were camping we ended up with two cartons that were now past expiration) to make room for the leftovers I knew we’d have, I decided to use the cheese right out of the strainer.

I had planned to make crab cakes as well, but I was talked out of it the night before by my son, who didn’t know what time the hunters would be getting back from the hill. But then I remembered that Cristy, a Facebook friend, had said that crab was good in jalapeno poppers. So instead of going with another recipe I’d found, my friend, Karen, and I came up with our own.  And they were great!

Crab and Ricotta Jalapeno Poppers

12 medium jalapeno peppers, either red or green

½ cup ricotta cheese

½ cup crab meat (fresh, frozen, or canned)

¼ teaspoon of Cajun or Creole seasoning, more if you prefer

2-4 tablespoons of grated parmesan cheese

Hot smoked paprika for sprinkling

2 tablespoons chopped chives or green onion tops

I got a small package of crab out of the freezer and thawed it in cold water in the sink. This is Dungeness crab my husband and brother pulled out of the Pacific Ocean last November, and we picked it and froze it in food saver bags. It is still great! Of course, you could use any kind of crab, fresh, frozen, or even canned.

I went out to the garden and picked about a dozen medium-sized, red and green jalapeno peppers. I left the stems on them when I rinsed and dried them, and I cut them in half through the stems so that each pepper (or almost) had a little stem attached for a handle. Then I used a small, sharp knife to clean out the seeds and ribs in each pepper half. I placed them on a foil-lined cookie sheet, and cranked the oven up to 425 degrees.

I mixed about a half cup of freshly-made ricotta with about a half cup of thawed crabmeat. I added about a ¼ teaspoon of Cajun seasoning. Ricotta is cooked with some salt, and crab is cooked in salty water, so you don’t need to add much salt to this mixture. I like the Cajun or Creole seasoning because it has some herbs and a little spice in it, but crab is so delicate, you don’t want to overwhelm it with too much seasoning.

While I ran back out to the garden to grab some fresh chives and green tops from my winter onions, Karen filled the jalapeno pepper halves with the crab and ricotta mixture. As each half was filled, I sprinkled them with a little grated Parmesan cheese, and then a tiny bit of hot smoked paprika.

Into the oven they went for about 15 minutes, and then I turned on the broiler for about 3 minutes for a little extra browning on top. When they came out of the oven, I sprinkled the tops with chopped chives and green onion.

They turned out beautifully, and I learned why they are called jalapeno poppers. It’s because you can just pop them in your mouth in one delicious bite! It sounds kind of crazy, but they went really well with our champagne cocktails made with prosecco and sparkling moscato and my homemade fruit beverage syrups.

Our food made up for the fact that our team lost miserably! Well, maybe, kinda, sorta. It was such a miserable game, we all ended up outside around the patio table with our food and drink, and I don’t think anybody watched the end of the game! We were having such a good time, I forgot to take a picture of the jalapeno poppers when they came out of the oven.  These are actually the leftovers.

OLYMPUS DIGITAL CAMERA

OLYMPUS DIGITAL CAMERA


Standard
Dairy, Desserts, Gluten-free

Blackberry Sour Cream Custard Pie

I owe the inspiration for this pie to two people: my friend, Wes Reid, who brought me an Apple Sour Cream Custard Pie one day many years ago (his partner, Lori Farias, had baked it), and my friend, Tara Johnson, who mentioned in a Facebook post that she was making a blackberry cream pie. Lori’s apple pie recipe evolved into my Rhubarb Sour Cream Custard Pie last summer. Tara’s blackberry cream pie turned out to be a riff on the Pioneer Woman’s blackberry cheesecake squares. But Tara’s choice of words got me thinking. I had Loganberries (a thornless blackberry) still ripening. Hmmm . . . would a sour cream custard work with blackberries? How would the cinnamon streusel topping go with the blackberries? I had to give it a try.

For some reason, I had a brain freeze when I got out my 10” pie plate and rolled out my gluten-free pie dough. Duh . . . the recipe is for a 9” pie! So my pie turned out a bit thinner than it should have. You’ll see that in these pictures.

OLYMPUS DIGITAL CAMERA

OLYMPUS DIGITAL CAMERA

OLYMPUS DIGITAL CAMERA

OLYMPUS DIGITAL CAMERA

In a 9 inch crust, the custard layer would be thicker.  It is typical for the fruit (both rhubarb and blackberries) to float to the top of the custard as it bakes.  I made a few adjustments to the sour cream custard filling because although rhubarb is quite sour and releases a lot of water when it cooks, I’ve seen the juice that cooked blackberries release, and I had a feeling that they might water the custard down too much. Other than the goof with the pie crust size, the pie turned out perfectly! So here is the adjusted recipe, and I sure hope you still have some blackberries so you can try it. If not, you can use frozen blackberries, but thaw them and drain the juice off first. (Save it to drink—yummy—or make a syrup out of it to pour over some vanilla ice cream on top of the pie later!)

Blackberry Sour Cream Custard Pie

One 9-inch, uncooked pastry crust. See my gluten-free version if you like; I used some *homemade vanilla sugar in the crust for this pie.

Filling:

1 ½-2 cups blackberries (if you rinse them, drain them really well before adding to pie crust)

3 Tablespoons flour* (see notes)

1 cup sugar + ¼ cup sugar (keep separate)

1/8 teaspoon salt

2 large or extra-large eggs (I used my chickens’ eggs, which are a bit small, so I used 3 eggs)

1 cup sour cream

1 teaspoon vanilla extract

Streusel topping (recipe below)

Heat oven to 400 degrees.

Roll out pastry crust and place in 9 inch pie plate. Crimp edges as you prefer. Sprinkle blackberries on crust. Sprinkle 3-4 tablespoons of reserved ¼ cup of sugar over blackberries. (How much sugar you use depends on how sweet or tart your blackberries are. Taste them, so you can decide how much sugar you want to use.)

For custard filling: Mix the flour, 1 cup of sugar, and salt together. Beat eggs, add to sugar mixture along with sour cream and vanilla extract, and mix well. Pour over blackberries in crust.

OLYMPUS DIGITAL CAMERA

OLYMPUS DIGITAL CAMERA

Bake at 400 degrees for 15 minutes. Reduce oven temperature to 350 and bake an additional 30-35 minutes, or until custard is set in the center. While the pie is baking, prepare the topping.

Streusel Topping:

¼ cup softened butter (not melted)

1/3 cup flour* (see notes)

1/3 cup sugar* (see notes)

1 teaspoon cinnamon

Optional: scrapings from 1 vanilla bean* (see notes)

Mix topping ingredients together to make a streusel, set aside.

When custard is set, remove pie from oven and increase temperature to 425 degrees. Gently sprinkle topping evenly over the pie.

OLYMPUS DIGITAL CAMERA

OLYMPUS DIGITAL CAMERA

Bake at 425 degrees for 8-10 minutes, or until topping is bubbly.

OLYMPUS DIGITAL CAMERA

OLYMPUS DIGITAL CAMERA

Remove pie from oven and cool thoroughly on a rack. You can eat this pie cooled, but it is best chilled with a dollop of fresh whipped cream on top. Store in fridge, covered.

Notes:

*I bumped up the vanilla in this recipe in several ways: more vanilla extract than usual in the custard (and I used my homemade vanilla extract), vanilla sugar (scraped vanilla beans buried in a jar of white sugar) in the pie crust, and vanilla bean seeds in the topping. Why? Vanilla and blackberries go very well together! Vanilla adds the illusion of sweetness to a tart berry without adding more sugar.

*For the streusel topping, I used brown sugar this time, and I liked it with the blackberries. I have used white sugar and coconut palm sugar in previous versions of this pie (apple and rhubarb), and they all work quite well.

*I also used brown rice flour instead of all-purpose flour to keep it gluten-free.  I’ve discovered that brown rice flour is a perfectly acceptable substitute in all applications in this recipe (and many others).

I wish I’d been inspired to make this pie earlier in the summer, when blackberries were more plentiful. If you still have blackberries or can find them at a market, I hope you’ll give this pie a try.  My wild berries have been gone for a month, and the Loganberries are nearly done now, too. However, the sour cream custard idea is still inspiring me. Who knows where I’ll go with it next? I did can a whole lot of blueberries this summer . . . .


Standard