
I grew up with that adage. We had very little, so it was important not to waste what we did have, although I can’t say that as a child, I never wanted anything. However, with those lessons in my pocket, I’ve learned to make things with what I once would have thrown away. This post is about a couple of those things: fruit vinegar and pectin stock. And I’m not talking about steeping fruit or herbs in store-bought vinegar. I’m talking about making vinegar from scratch.
For years, I threw away the apple peelings and cores from my applesauce and apple pie making. I didn’t throw them in the garbage; they always went in the compost pile. But still, I wasn’t utilizing them as I’ve since learned to do. I’ve learned to make vinegar, really good vinegar, with my apple scraps. I’ve also learned that other fruit scraps make delicious, exotic-tasting vinegars as well.
Apple is my basic vinegar-making fruit. I use a lot of apple cider vinegar. I like the taste of it for salads and in cooking, fruity and slightly sweet. The idea that I could make vinegar from my apple scraps lit me up like a Christmas tree. I made my first try in 2009, with peelings and cores from the first good crop of apples from our little tree in the garden. That first batch of vinegar was rich and dark and delicious, and I was hooked. I’ve experimented since then with other fruits as well: peach, plum, grape, and blackberry. Here’s the easy process for making vinegar from fruit scraps. There are more difficult ways to do this, and you can add ingredients like sugar, but why bother when this method works reliably? First, the basic instructions for apple, and then some tips for making other fruit vinegars, and finally, apple pectin stock for jelly-making.
Apple Scrap Vinegar
Allow your apple peelings, cores, and scraps to brown for several hours. (This is convenient, because if you’re like me, you’re making applesauce or apple butter or apple pie filling, which is why you have the peels in the first place!) Wash out a large jar and fill it with browned apple scraps. Don’t cram or crowd the jar but fill within a couple of inches of the neck; cover scraps with distilled water if your water is chlorinated. Cover the jar with several thicknesses of cheesecloth, nylon tulle, or any other clean, breathable fabric you have on hand. Secure the cloth around the neck of the jar with a rubber band, or if the fabric is not too thick, the ring portion of a 2-part canning lid. This keeps fruit flies out of your vinegar-to-be. Place the jar on a plate to catch any overflow during fermentation.

You can leave the jar on your counter, on a shelf in the cupboard, anywhere out of direct sunlight but where you will remember to stir it every day.
And that’s it. Stir it every day. Let it sit. In a few days or a week, you’ll notice some bubbling. If you filled the jar a little too full, it might even bubble over onto the plate. If so, clean up the plate and outside of the jar, stir down the contents, and replace the cloth on top of the jar with a clean one. (The only fruit that caused overflow for me was grapes, and I filled the jar too full to handle the amount of fermentation.)
In a week or so after fermentation begins, a grayish scum will begin to form on the top of the liquid in your jars. This is the “mother” or “mother-of-vinegar” and it looks nasty but is just part of the process. It’s hard to believe that this scum is what makes that beautiful clear amber liquid, but it does. If any scraps float to the top of the jar and become moldy, fish them out. But don’t let a couple of moldy scraps freak you out, because as the vinegar acidifies, it kills off any mold. After a few weeks, you’ll begin to notice a vinegary smell coming from the jar. You can stop stirring at this point and let the acidification process work. When it smells good and strong, usually at least a month or maybe two, it’s time to taste.
Stir the jar once more and then strain the vinegar from the apple peels by pouring it all through a fine-mesh wire sieve into a clean glass bowl. Let the peels drip for a couple of hours to get all the liquid off of them. You can mash a little—it’s fine. Don’t worry about any small particles still left in the vinegar. You’re going to strain again, later. When the vinegar has settled, pour a small amount into a spoon and taste it. It should taste strongly acidic and just slightly sweet. If it isn’t strong enough, pour the vinegar back into the jar that held the peels and cover it once again with the cloth. (You don’t need to put the peels back in the jar, just the vinegar.) Let it sit for another week or longer, until the taste satisfies you. The vinegar will continue to acidify as long as it has air because it is a living organism. The “mother” will probably re-form. This is a good sign that your vinegar is alive and working and will be very healthful when you begin to use it.
When the vinegar is strong enough to suit your taste, prepare your bottles. These must be glass, and should have plastic or rubber stoppers, not metal. (I use old olive oil bottles, lemonade bottles, any glass bottle with a plastic stopper. Olive oil bottles with metal caps lined with plastic work fine. Do not use cork.) The bottles and stoppers should be washed in hot, soapy water and then immersed in boiling water for 10 minutes. This sterilizes the bottles and will allow your raw vinegar to keep indefinitely. (I just used up the last of my 2009 batch, and it was as good as the day I bottled it.)
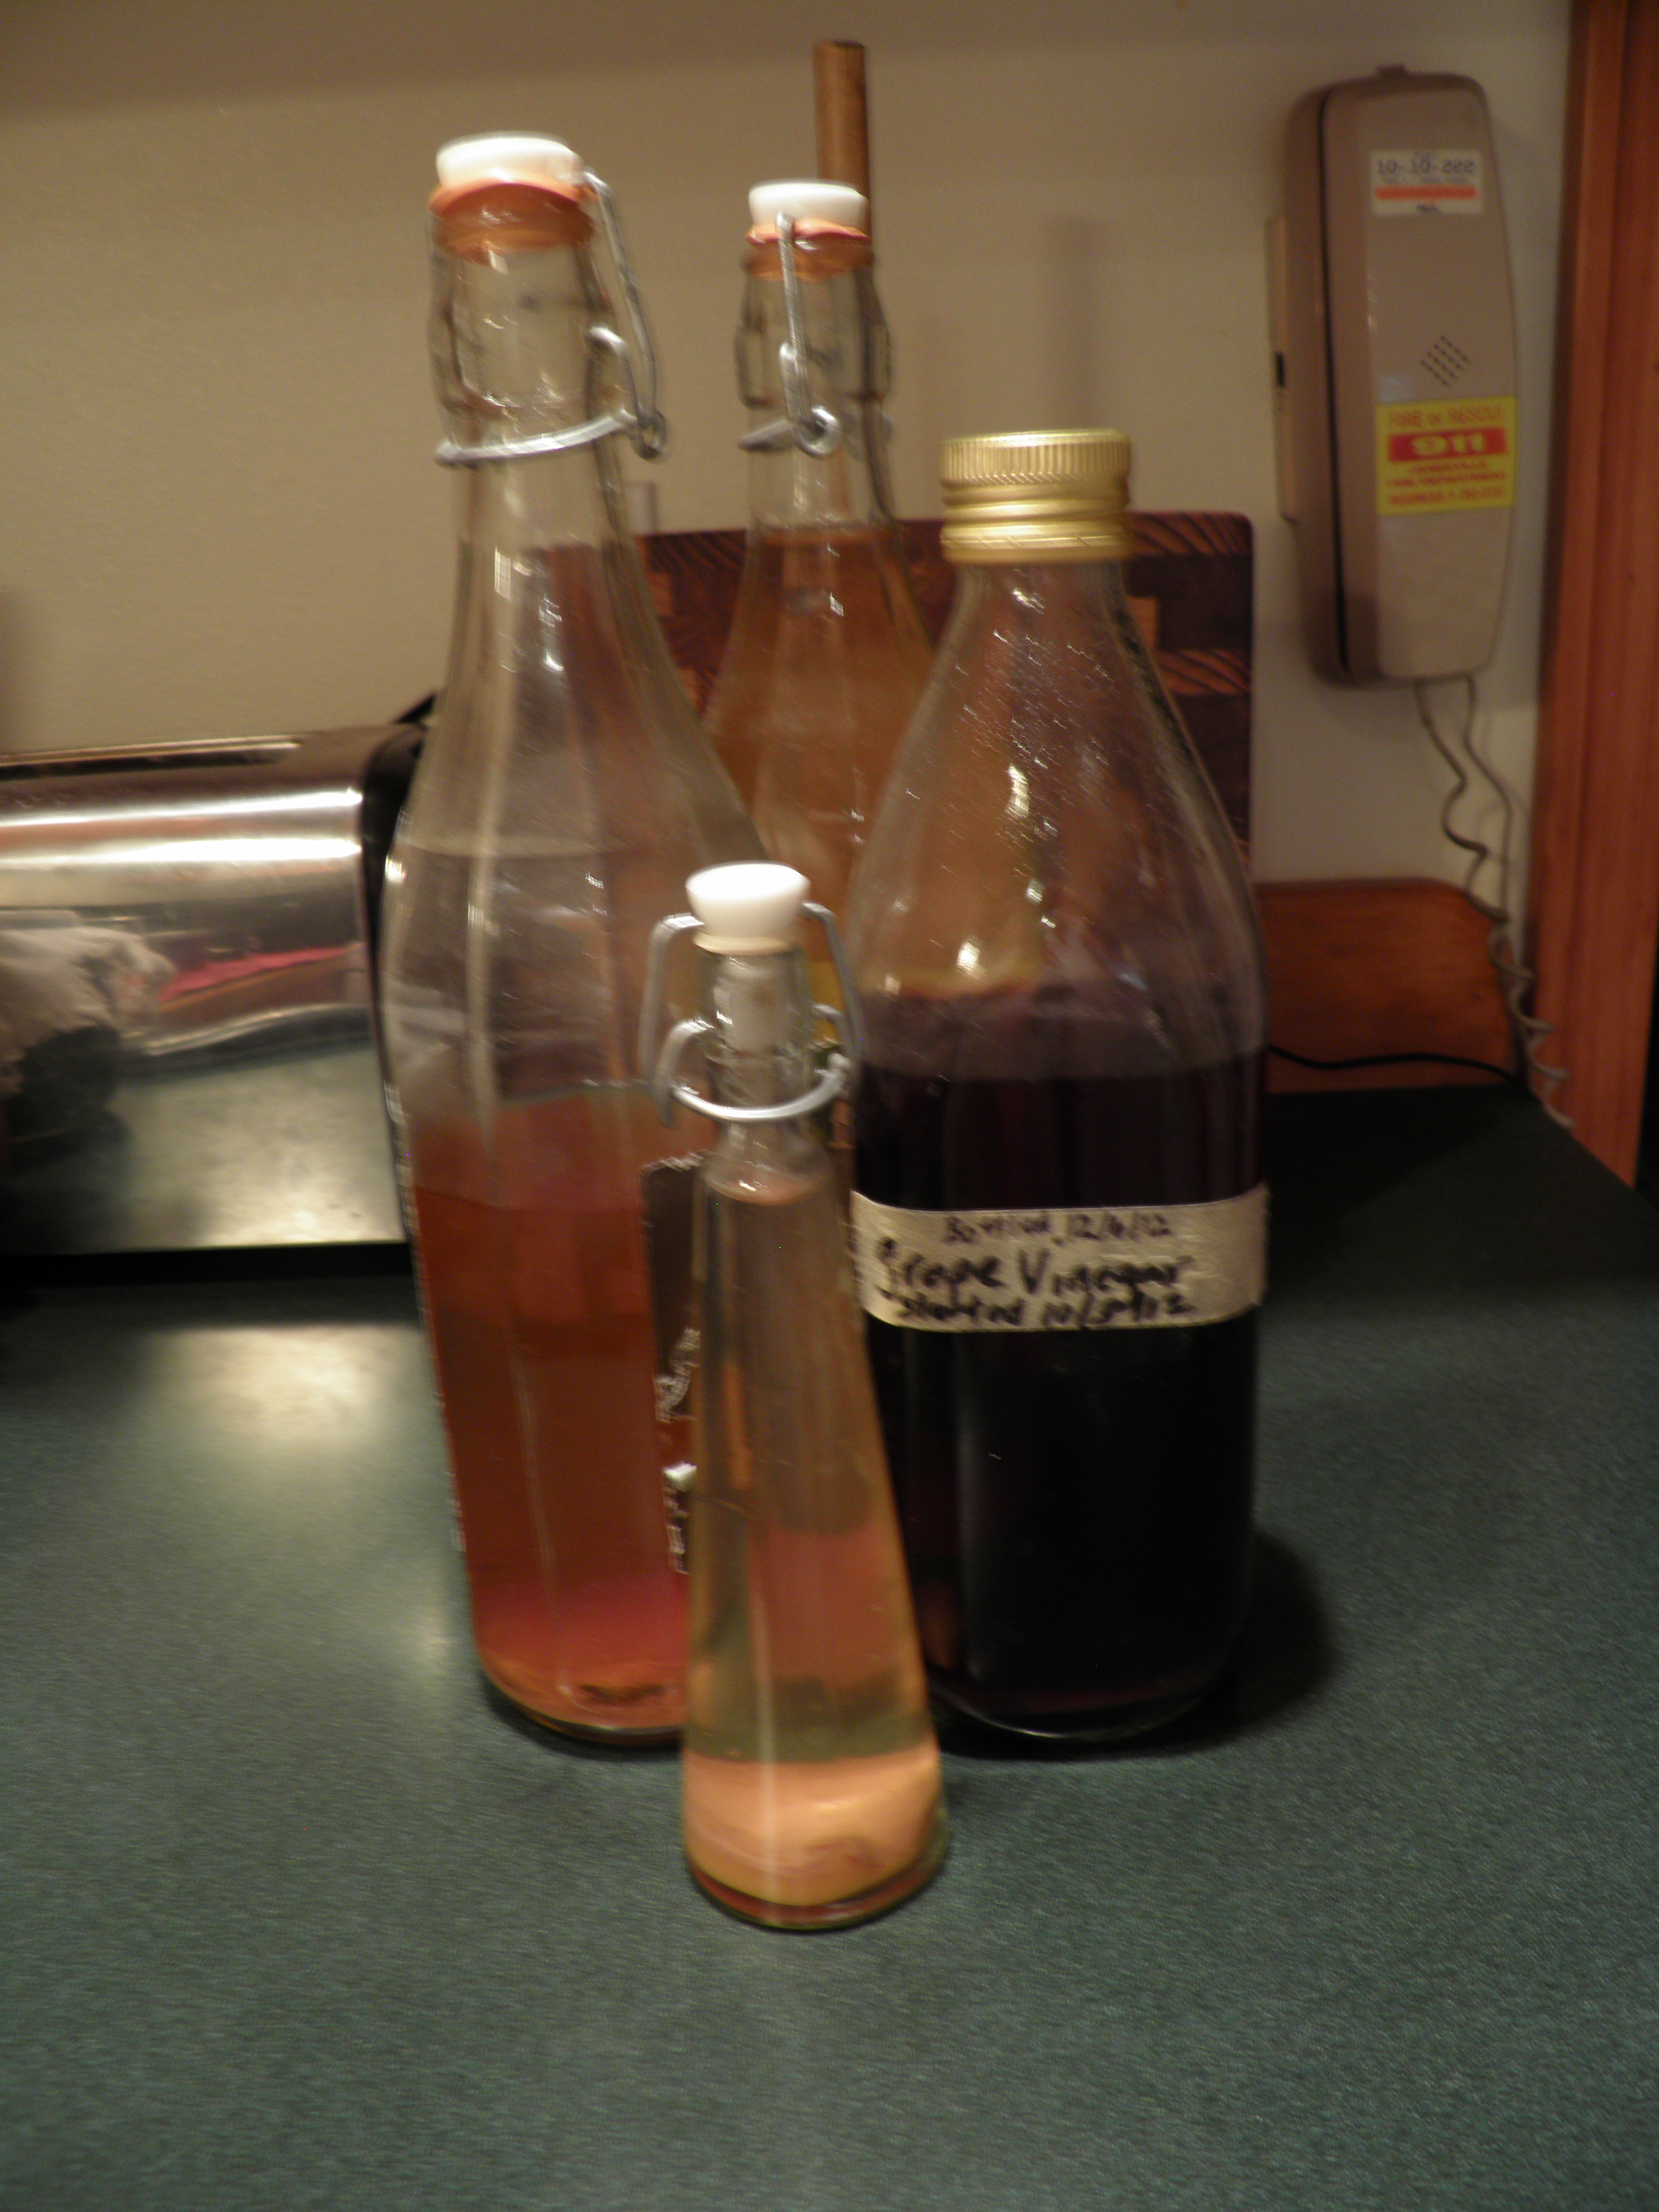
Strain the vinegar through several layers of cheesecloth or nylon tulle. Pour into cooled, dry bottles and stopper tightly. If you bottled your vinegar in clear bottles, it’s best to store them away from light. Do not worry if the mother forms in the bottom of the bottles. In fact, if you wish to, you can save the mother and add it to your next batch of vinegar the following year, speeding up the fermentation process. Some people swear by the health-giving properties of mother-of-vinegar. One sufferer from rheumatoid arthritis told me that the mother was helpful for reducing inflammation when applied to the joint.
You can follow this basic process with any fruit scraps to create exotic vinegars. I have successfully made both peach and grape vinegars from peach peelings and grape skins leftover from jam-making. With peelings from peaches that have been scalded to remove the skin more easily, it’s important to also add a few scraps, the bruises work fine, to the jar. Scalding kills some of the enzymes or bacteria that start fermentation. It might also be helpful to add a little sugar to the jar. This year, I added a tablespoon of organic palm sugar to a quart jar of peach peelings to jump start fermentation, and it seems to have worked well. Grapes will ferment readily on their own. Make sure to give them a little extra room in the jar. Currently, I also have plum pit vinegar and blackberry vinegar started. For the plums, I used the pits of Santa Rosa red plums that were left from jam-making. They are not freestones, so there was quite a bit of flesh left on the pits. I put all the pits in a large jar and covered them liberally with distilled water. This jar has developed a mother on top and is smelling like vinegar. I started this jar on August 8th. For the blackberry vinegar I started last week, I crushed two cups of my blackberries in a quart jar with a wooden spoon and covered them with about two and half cups of distilled water. I also added the dregs, about two teaspoons, of two bottles of red wine, just because it seemed like a good idea.

Always use distilled water for vinegar-making. One year, I forgot to buy distilled water prior to apple processing day, and I didn’t have time to run to town to get any. I used tap water. I learned why I shouldn’t use tap water. We have good well water, but it is hard, with a high mineral content. The vinegar worked just fine, but the minerals caused it to be cloudy. It took two years in the bottle to clarify, but it tastes good.

What to do with the leftover peelings after the vinegar has drained away? Now they go to the compost pile. If I still raised chickens and pigs, they’d get a treat, but instead, I’m feeding the worms that feed my garden. There’s small-scale environmental justice for you.
Apple Pectin Stock
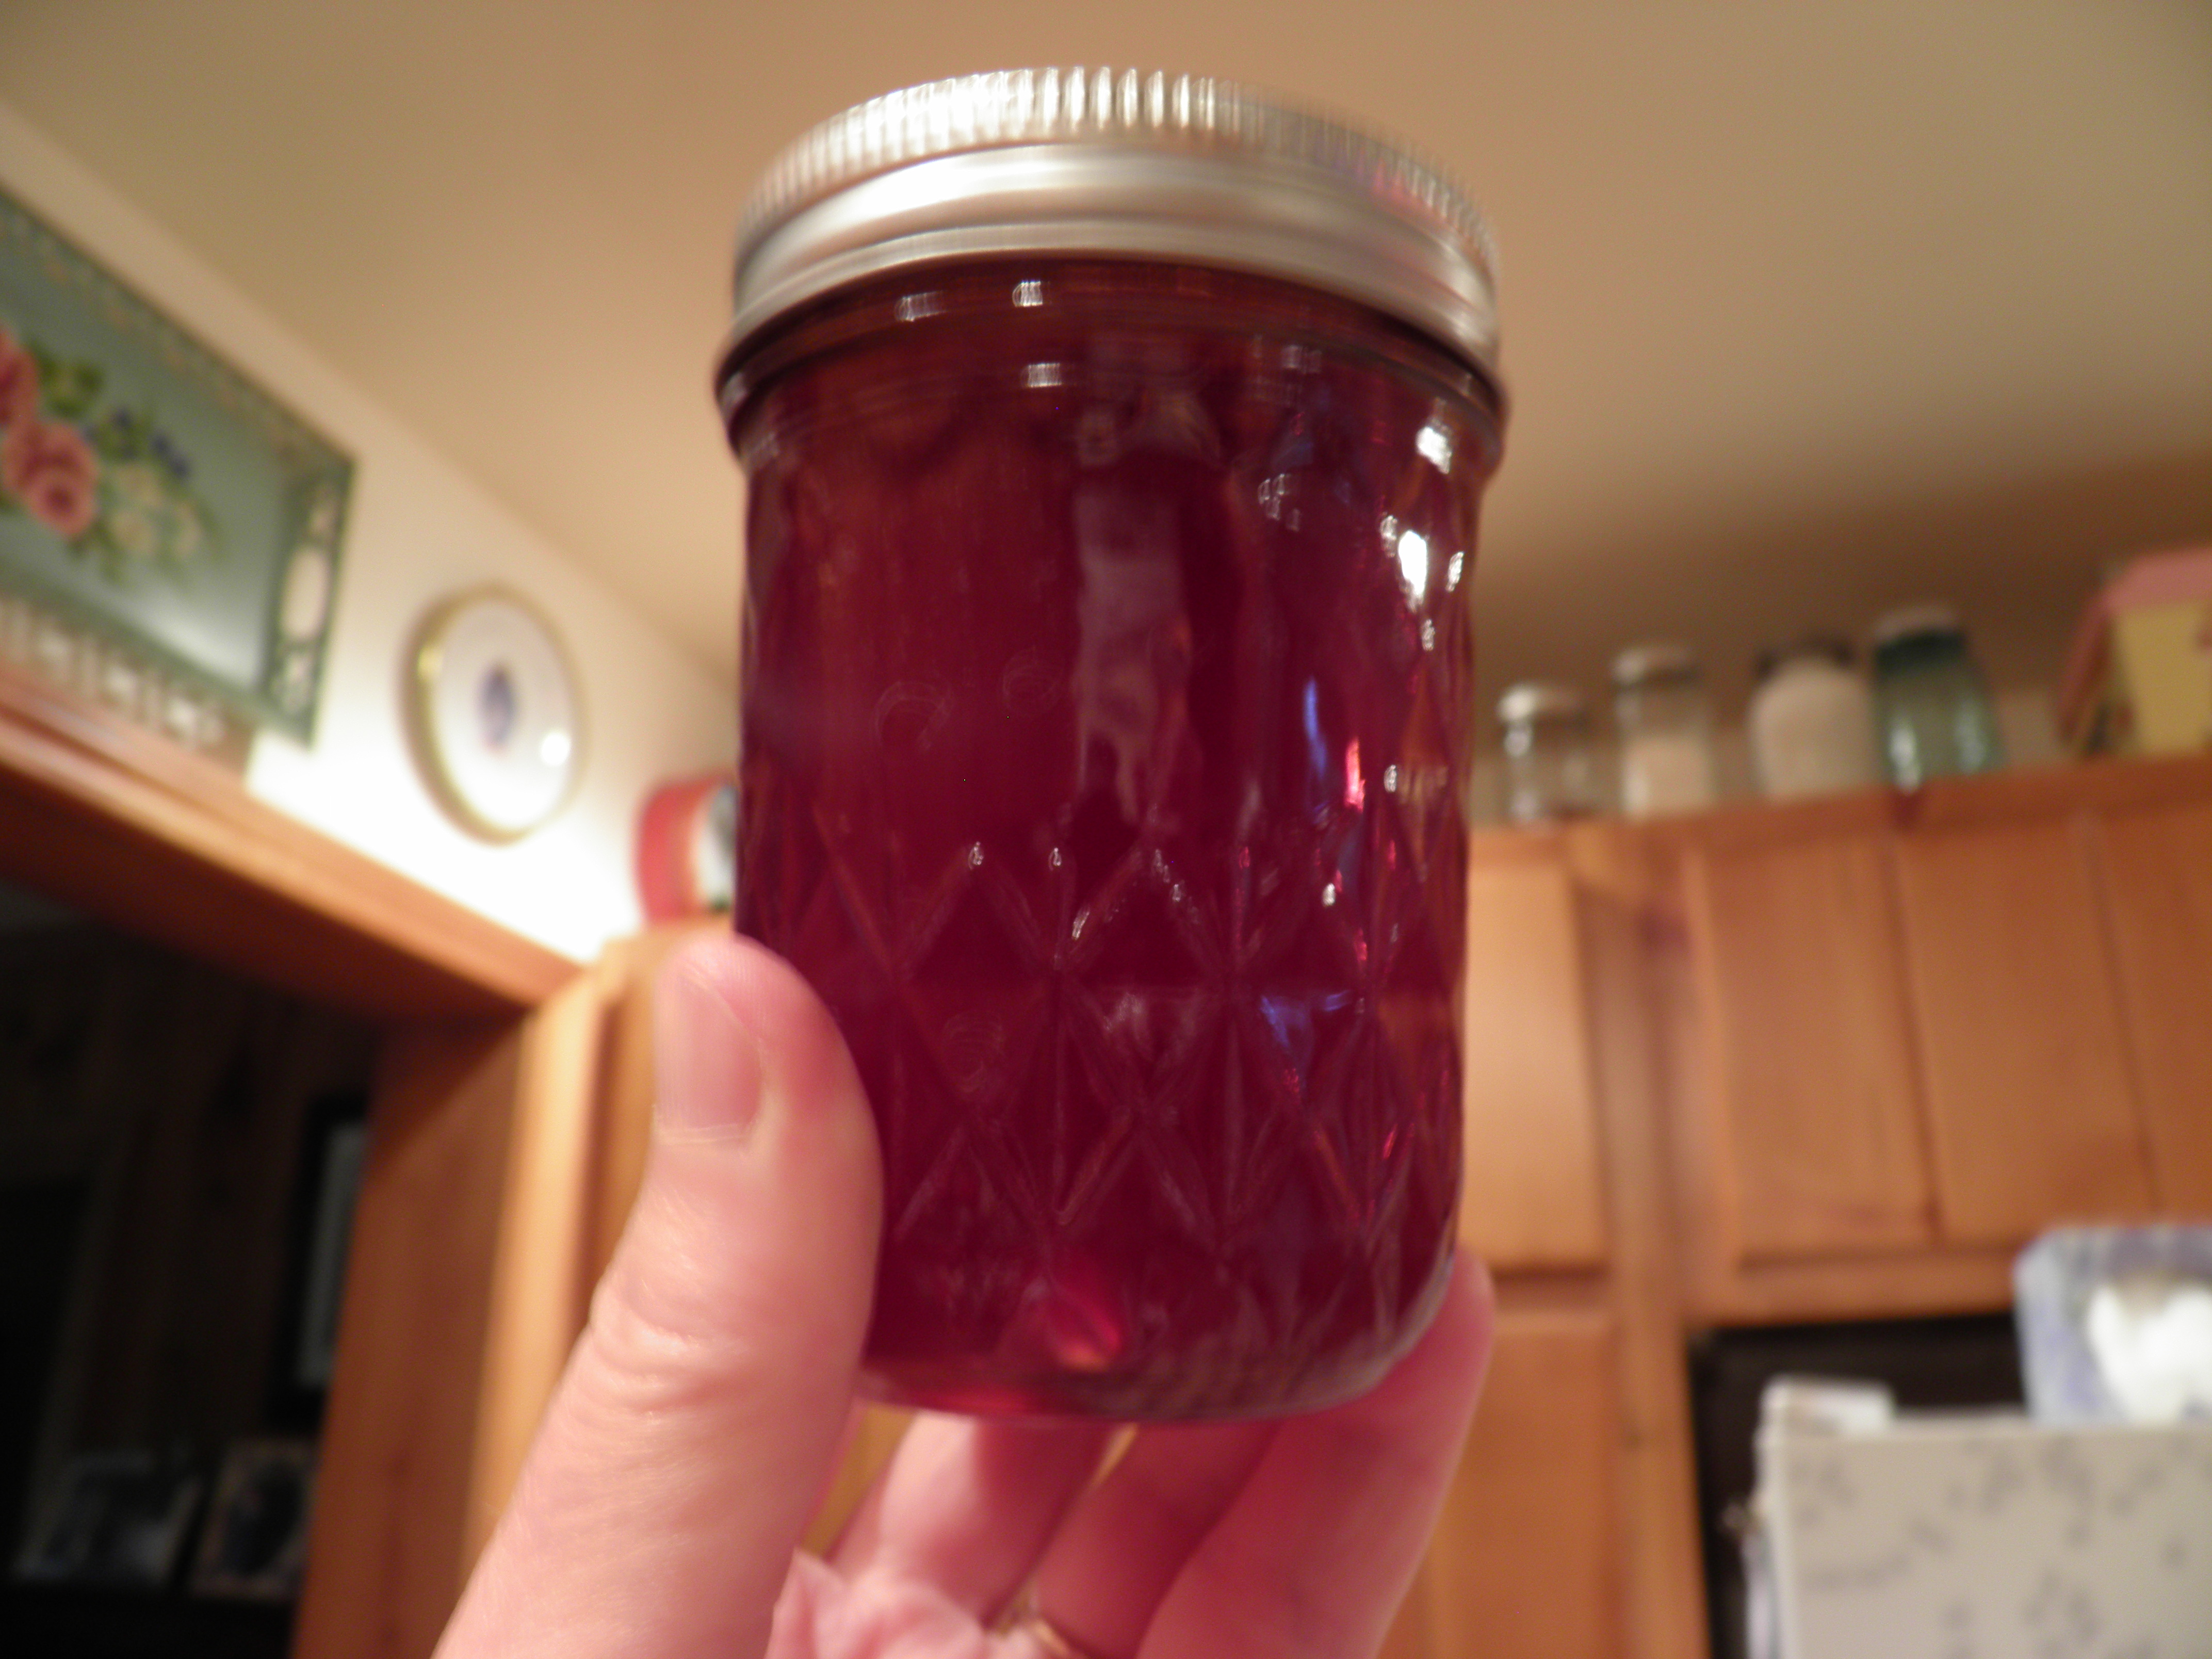
I also use my apple cores and apple peelings for apple pectin stock. Apples contain large amounts of natural pectin, which is why they used to be added to other fruits to help get a thicker preserve. Crabapples in particular are rich in pectin, and there were many fruit and crabapple blends to be found on pioneer pantry shelves. Besides crabapples, green apples contain the most pectin; so a good pie apple, like Pippin, Granny Smith, or my favorite, Gravenstein, will also make the best pectin stock. Convenient, yes? Apple pectin stock can be added to fruits that don’t have enough pectin on their own to set up in a jam or jelly, or fruits which must be peeled before preserving, such as peaches or mangoes, thus affecting the set. Apple pectin stock is easy to make. Here’s how I do it.
As the cores (and peels, when the vinegar-making jars are full) come off the peeler (we use the kind that peels and cores and slices at the same time), I drop them into a pot with acidulated water. This is just water with several tablespoons of lemon juice added. You can use bottled lemon juice for this, no need to squeeze fresh. The lemon juice helps to keep the cores from browning. Some browning is inevitable, but you don’t want your pectin stock brown if you can help it because it will darken the color of any light-colored fruit you add it to for jelling purposes. Put just enough water in the pan to cover the cores, and as you have to add water, add a tablespoon more lemon juice for every couple of cups of water.

When the pot is full, and you’ve cored all your apples, bring the pot to the boil and cook for about 20-30 min., or until the cores are tender. Then strain the liquid through a fine-mesh wire strainer lined with a couple of layers of cheesecloth, nylon tulle, a tea-towel, a jellybag, or an old cotton pillowcase that you’ve dedicated for this purpose. The liquid will be beige or a pale brown, and slightly viscous. It will look and feel slick. That’s what you want; it’s how you know you’ve extracted the pectin from the cores and peels.
When the liquid has all drained through, stir it and then it can be packaged for the freezer in 1 or 2 cup measures. I use quart ziplock storage bags for this. I lay them out on a cookie sheet in the freezer until they have frozen hard and flat, then gather them into gallon storage bags before I stash them on the fruit shelf. This way, I have pectin stock all ready for next spring and summer’s jelly-making. I add it to diced peaches for peach jam, and it sets up beautifully. I’ve added it to wine for making wine jelly. It can be used as a substitute for commercial pectins whenever the peel of a fruit has to be removed before jam or jelly-making. Today, I used it for making jalapeno jelly, as pictured below. I was surprised by how clear the jelly came out. The color of the jelly comes from the nine Santa Rosa plums I added instead of food coloring. The plum skins also helped add pectin to the ingredients of the jelly, which have no pectin on their own.
I love being able to use something I once threw away, like fruit scraps. To me, finding a use for every bit I possibly can is wise stewardship of the resources I’ve been blessed with. When I use my scraps, I’m respecting the earth that grew this food. I’m giving thanks to the God who made me capable of picking, preparing, and preserving this food. And I know that what I’ve made is healthful because I know exactly what went into my vinegars and jams. No GMOs in this stuff!

Pingback: Pears, pears, pears! | Garden, Forest, Field
Strange my comments did not show. Something may be wrong. Did this show? I wonder how many others got lost in cyber space. I will message my questions.
Ok!
Okay, left another message and it didn’t save either it appears. Is this showing? I wonder how many others got lost in cyber space. Messaging you.
Yes, I can see this one. Must have been some kind of hangup in Word Press, I’m guessing.
Excellent tutorial/instructions. Looking forward to trying both of these. I’ve never made vinegar. I love making jams and jellies without added commercial pectin. This will be a nice boost. Thanks!
Thanks, Shari. Let me know if the post doesn’t answer your questions.
Pingback: Thanksgiving Dishes | Garden, Forest, Field
Pingback: Science Experiment: Homemade Ginger Ale | Garden, Forest, Field
Pingback: Roasted Vegetable Stock | Garden, Forest, Field
Pingback: Glazed Pork Roast with Chinese Plum Sauce | Garden, Forest, Field
Pingback: Garden, Forest, Field
Pingback: Charred Salsa | Garden, Forest, Field
Pingback: Homemade Buttermilk Ranch-Style Salad Dressing | Garden, Forest, Field
Pingback: Berry Vinaigrette Salad Dressing for Spring Greens | Garden, Forest, Field
Pingback: Hot Pepper Jelly | Garden, Forest, Field
Pingback: Raspberries: Cordial, Jam, Vinegar | Garden, Forest, Field
Pingback: Pumpkin/Winter Squash Soup | Garden, Forest, Field
Pingback: All-Natural Cinnamon Pears in Brown Sugar Syrup | Garden, Forest, Field
Pingback: Green Tomato Marmalade | Garden, Forest, Field