Canning, condiment, Recipes

Vanilla-Infused Cranberry-Rhubarb Butter

There are such things as happy accidents, even in the kitchen. This is the story of one.

I have been cleaning out the freezer to make room for the current crop of berries: raspberries, blackberries, boysenberries, loganberries. I always freeze these berries before making jams or other kinds of preserves from them for a couple of reasons. One, I’m too busy in the summer when they’re ripe to deal with them; two, they render more juice after being frozen and thawed. So in my quest to make more space in the freezer, I found a quart bag and gallon bag of rhubarb which I’d sliced and frozen I will not say how long ago. Let’s put it this way—I considered throwing it away, but just couldn’t bring myself to do it. Surely there must be some way to use it, I thought. I started trawling the internet for rhubarb jam recipes, but all of them called for fresh stalks, and I wasn’t sure how frozen would work. Then I came across a couple of rhubarb syrup recipes. Ooooh, that should work, thought I. While I was in Denver with my daughter, we’d paid a visit to the Ikea store and found some rhubarb syrup for making cocktails and spritzers. It was very good. So the thought of using my old rhubarb for syrup struck a chord. The recipe I settled on is at http://www.thekitchn.com/recipe-rhubarb-syrup-pantry-recipes-from-the-kitchn-84304#recipe.

However, as usual, I can’t leave well enough alone. I had eight cups of previously frozen rhubarb, and I put it on to cook with less than the amount of water called for in the recipe because when it thawed, the rhubarb released a lot of water. I used the amount of sugar called for in the recipe but doubled it because I had twice the amount of rhubarb.   And I threw a vanilla bean in the pot because I have some beans that must be used soon, and because I saw a rhubarb jam recipe that called for a vanilla bean, and I thought, why not?  I got the rhubarb, sugar, vanilla bean, and water simmering on the stove and went out to pull beets. (I also pickled beets the day I made the cranberry-rhubarb butter.) By the time I came back, the rhubarb had really broken down. As in, it was thick! How was I going to make syrup out of this stuff? Also, it was an unattractive beige-y green color. I wanted it red. Most of my rhubarb is not red, so I am used to the greenish color in pies, but in a syrup, I wanted red. Also, if I was going to make jam out of the pulp, as suggested in the recipe, I wanted it to be a toothsome color. Beige-y green is not toothsome. So I threw in a handful of red plums from the orchard tree and a handful of boysenberries Dennis had just brought in. They made no difference at all to the color and no discernable difference in taste.

What did I have, bar food coloring, to turn this rhubarb mess red? Well, beets, but I didn’t think that combination would taste all that great. I went back to the freezer. Didn’t I have a bag of cranberries in there somewhere? Yes, I did. I’d bought extra cranberries at Thanksgiving and frozen them, thinking I’d try some kind of cranberry jam at some point. I had about a quart. I started throwing them in by the handfuls, hoping to see some change in color, until I had thrown in the whole bag. At that point, I tasted the mess and decided that it needed more sugar, although I could have lived with it as it was. I added another cup of sugar. I still wasn’t satisfied with the color, so back to the freezer I went. Wasn’t there a bag of whole cranberry sauce in there? I made too much at Thanksgiving and froze the extra in sandwich bags, then put them in a gallon bag to keep them together. I’d been using it up one bag a time with roasted Cornish game hens. Yep, there it was, the last bag, about a cup and a half of cranberry sauce (which is just cranberries, sugar, and water). I threw that in the pot as well, and finally, as it melted, I had a nice reddish color.

All right, what was I going to do with this stuff now? It had been cooking for some time at this point, and was looking very jam-like, but fibrous, from the broken down rhubarb. It tasted delicious, and at this point, I knew I had a winner in the taste category, but I wasn’t sure what the final product would be. I decided to see if I could get a little syrup out of it, because I thought it would please my daughter. I couldn’t find my jelly bag (remember, I’ve been gone from home for a month—I found it later that day at the bottom of a basket of clean laundry, and for the life of me, I still can’t remember what I used it for before I left!), so I had to improvise with some nylon tulle stuffed into a cone colander. I left the cranberry-rhubarb stuff dripping and went on to work on my beets.

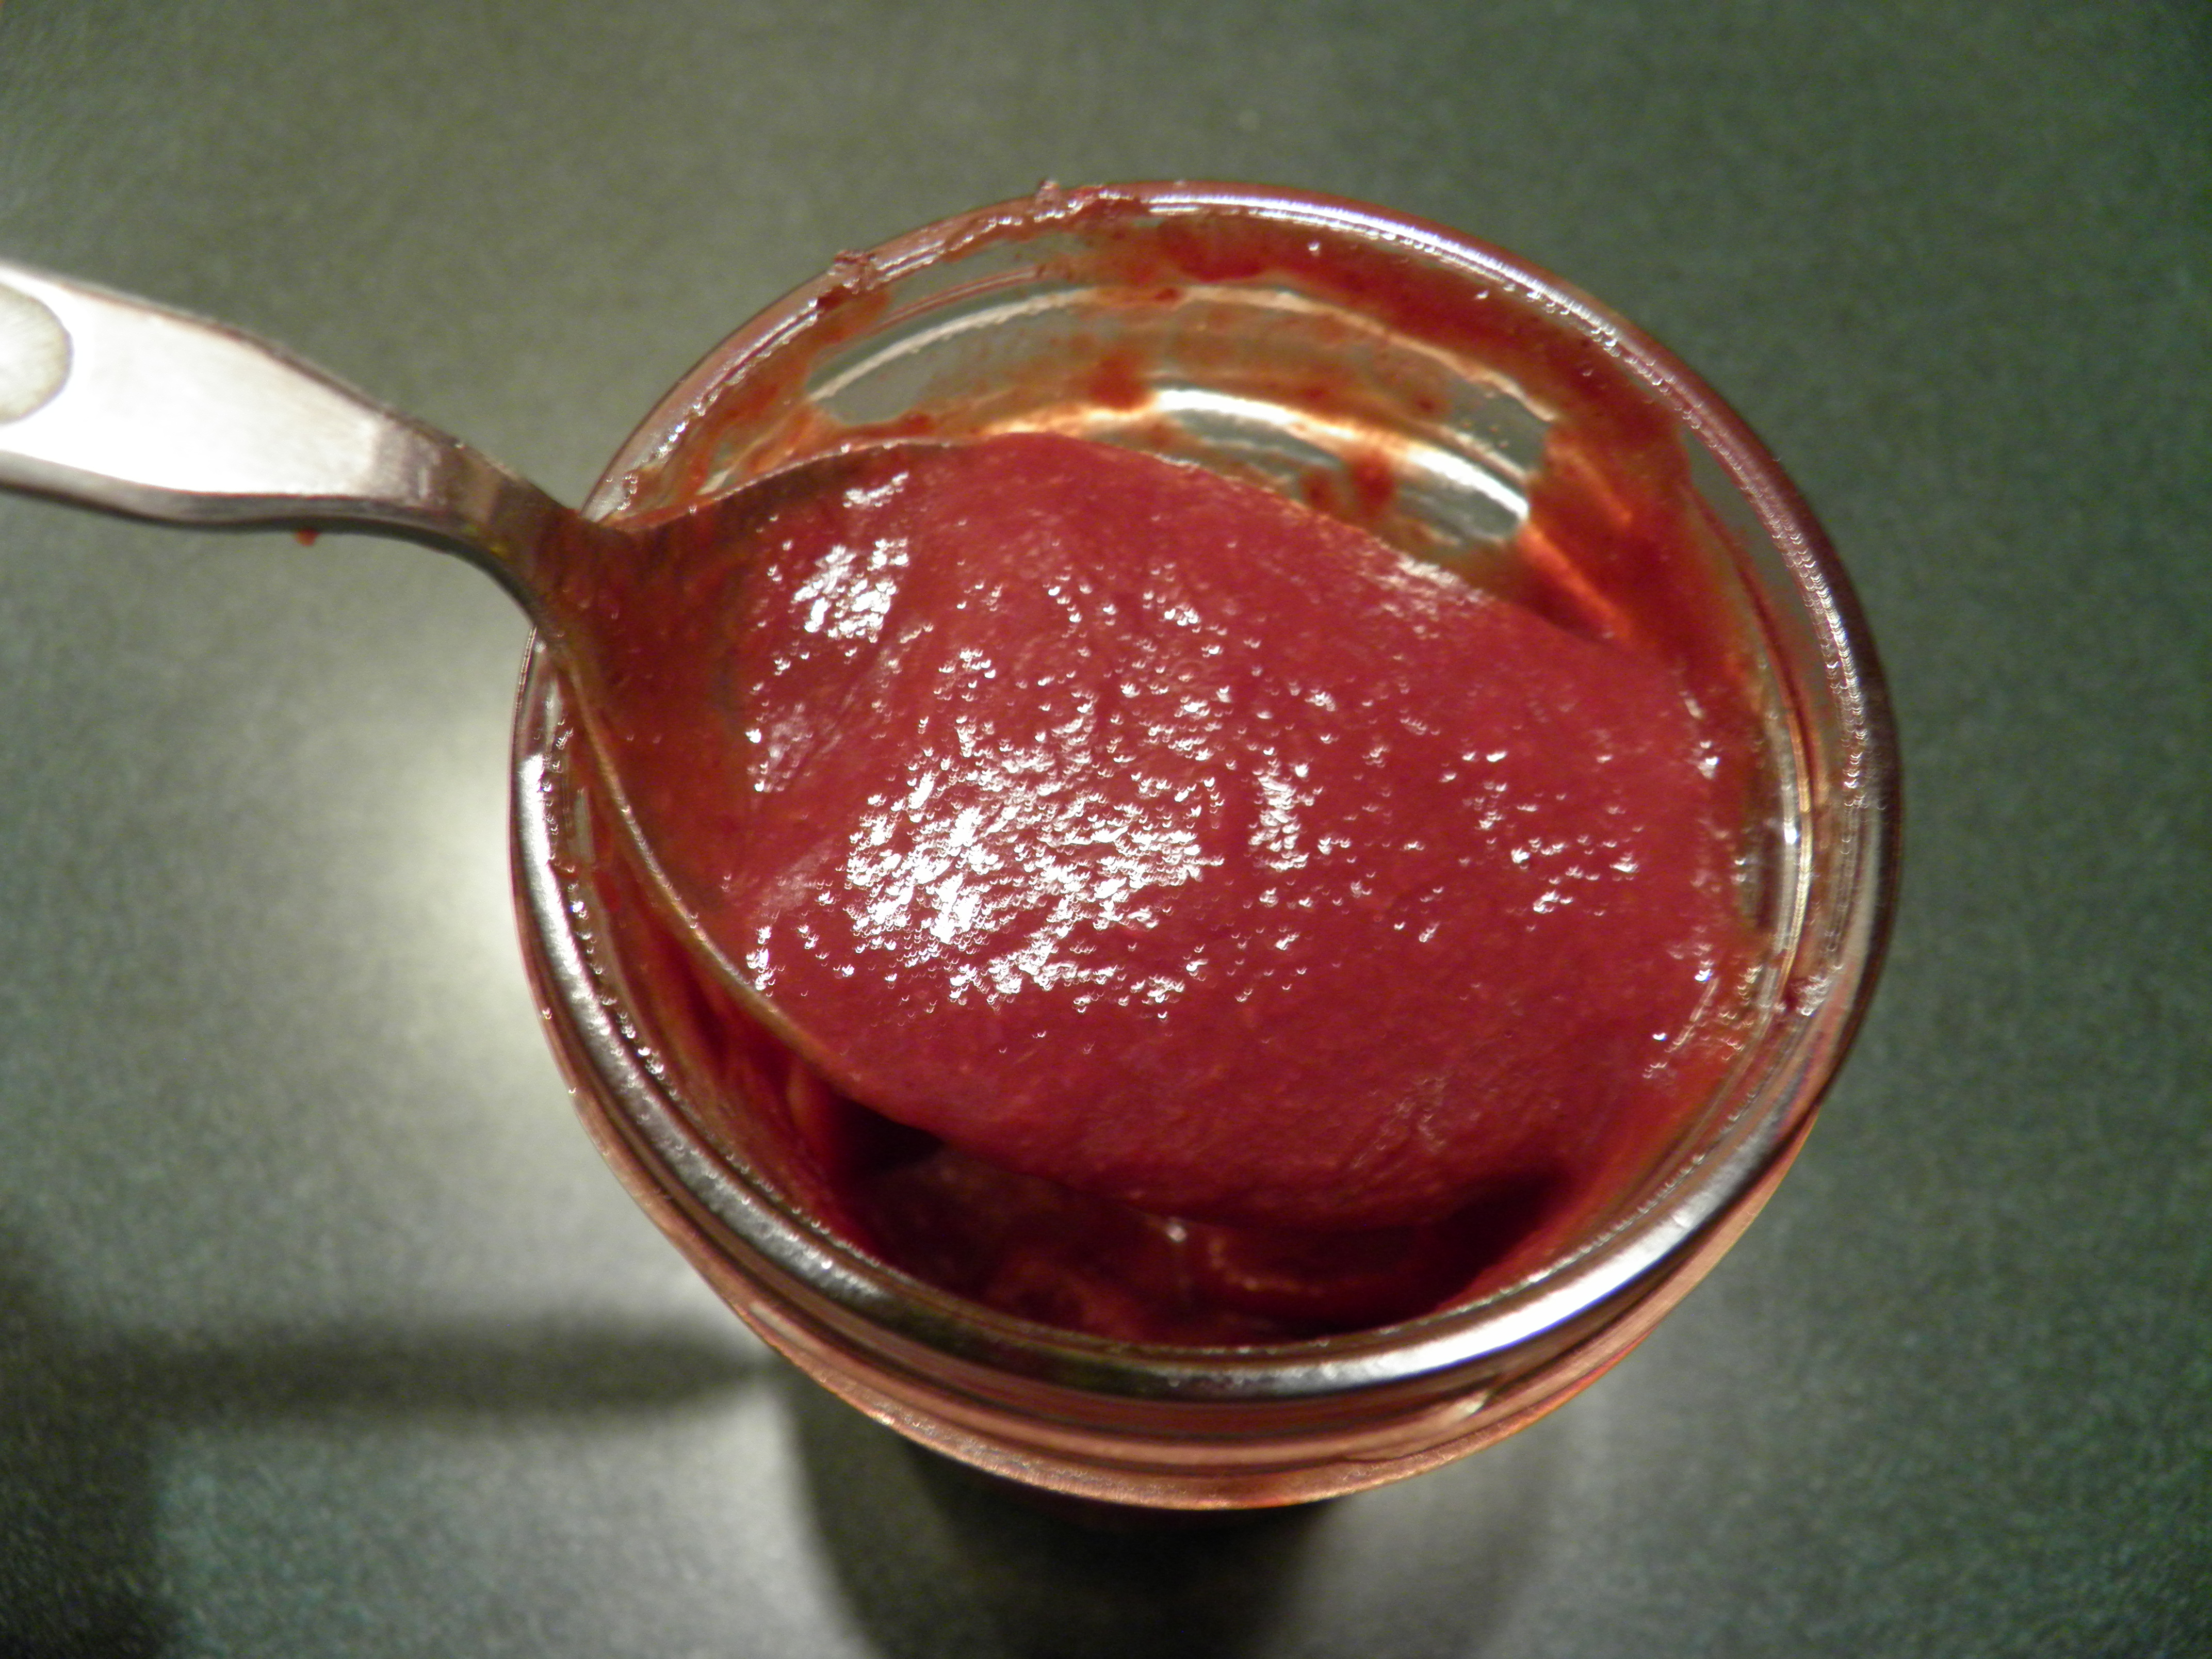
After a couple of hours, with the beets boiling, I returned to the stuff. I had about 2 ½ cups of red syrup in the bottom of the pan under the colander—good enough, says I. I removed the syrup, bottled it in a jar, and got it processing in the water bath canner, while I started rubbing the solids through the colander. I do this the old-fashioned way, with a hardwood pestle. I gave my Squeezo Strainer to my son. I just like the process with the pestle, the way I grew up doing it with my mom.

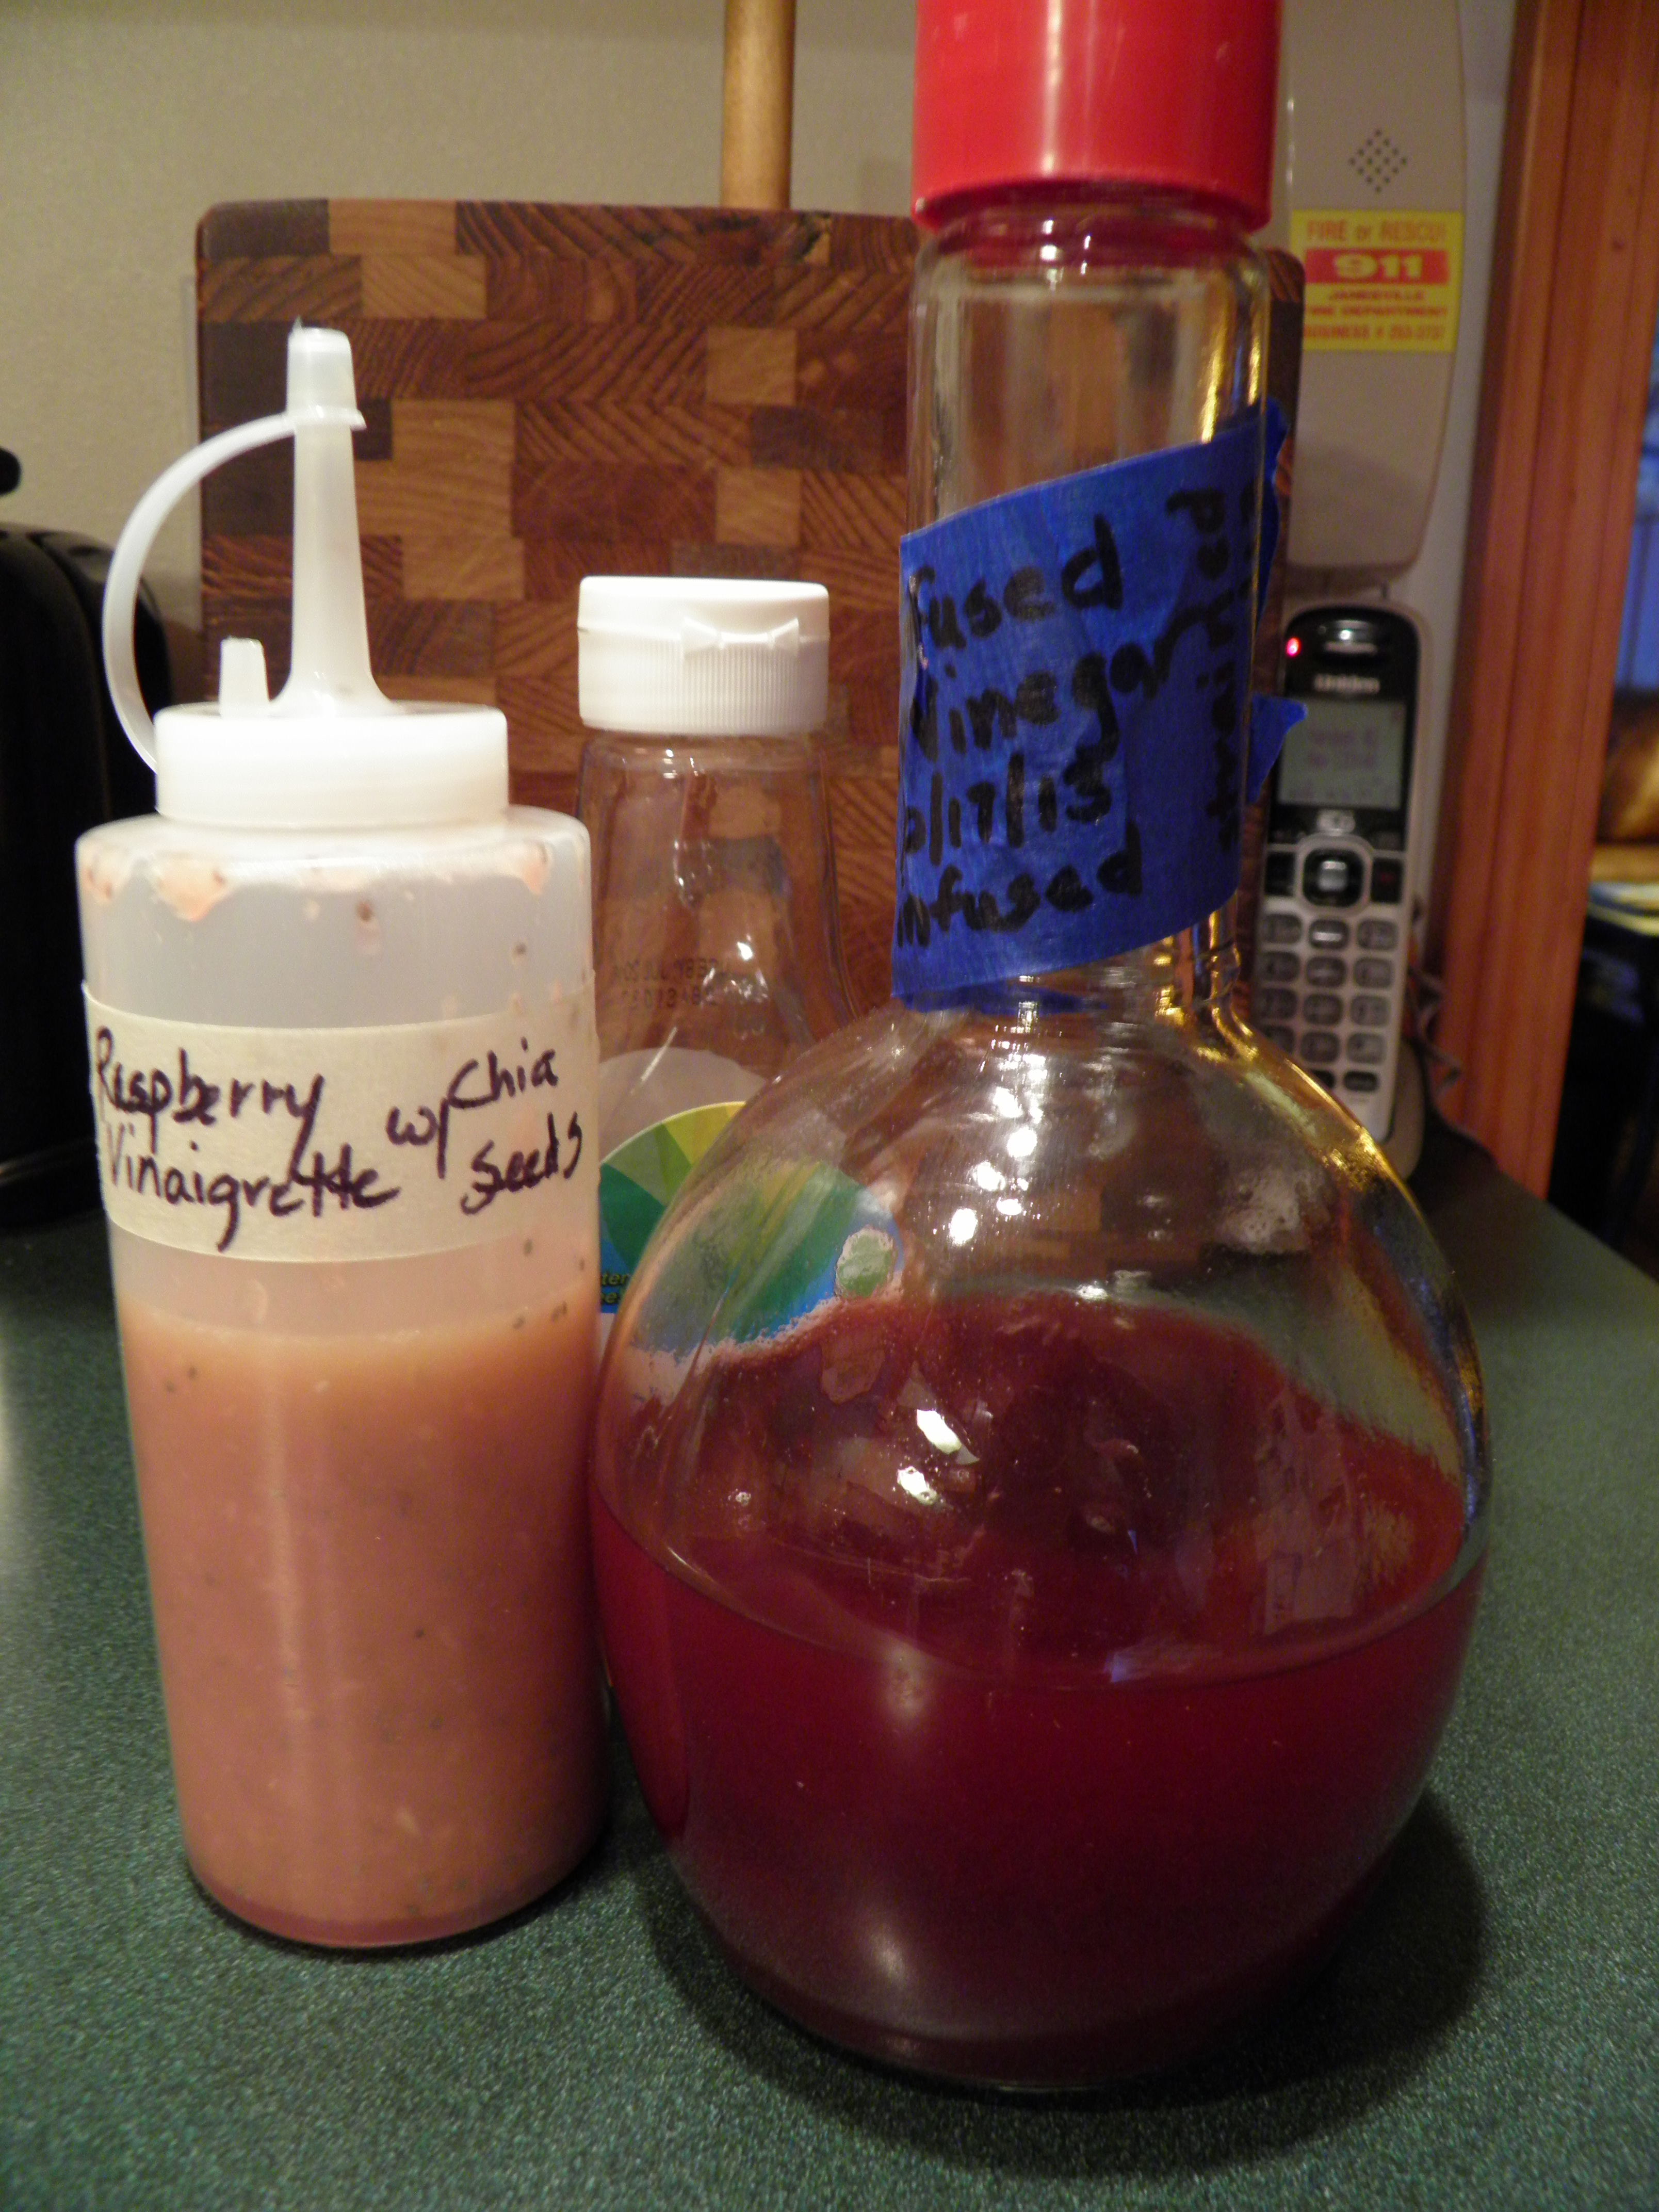
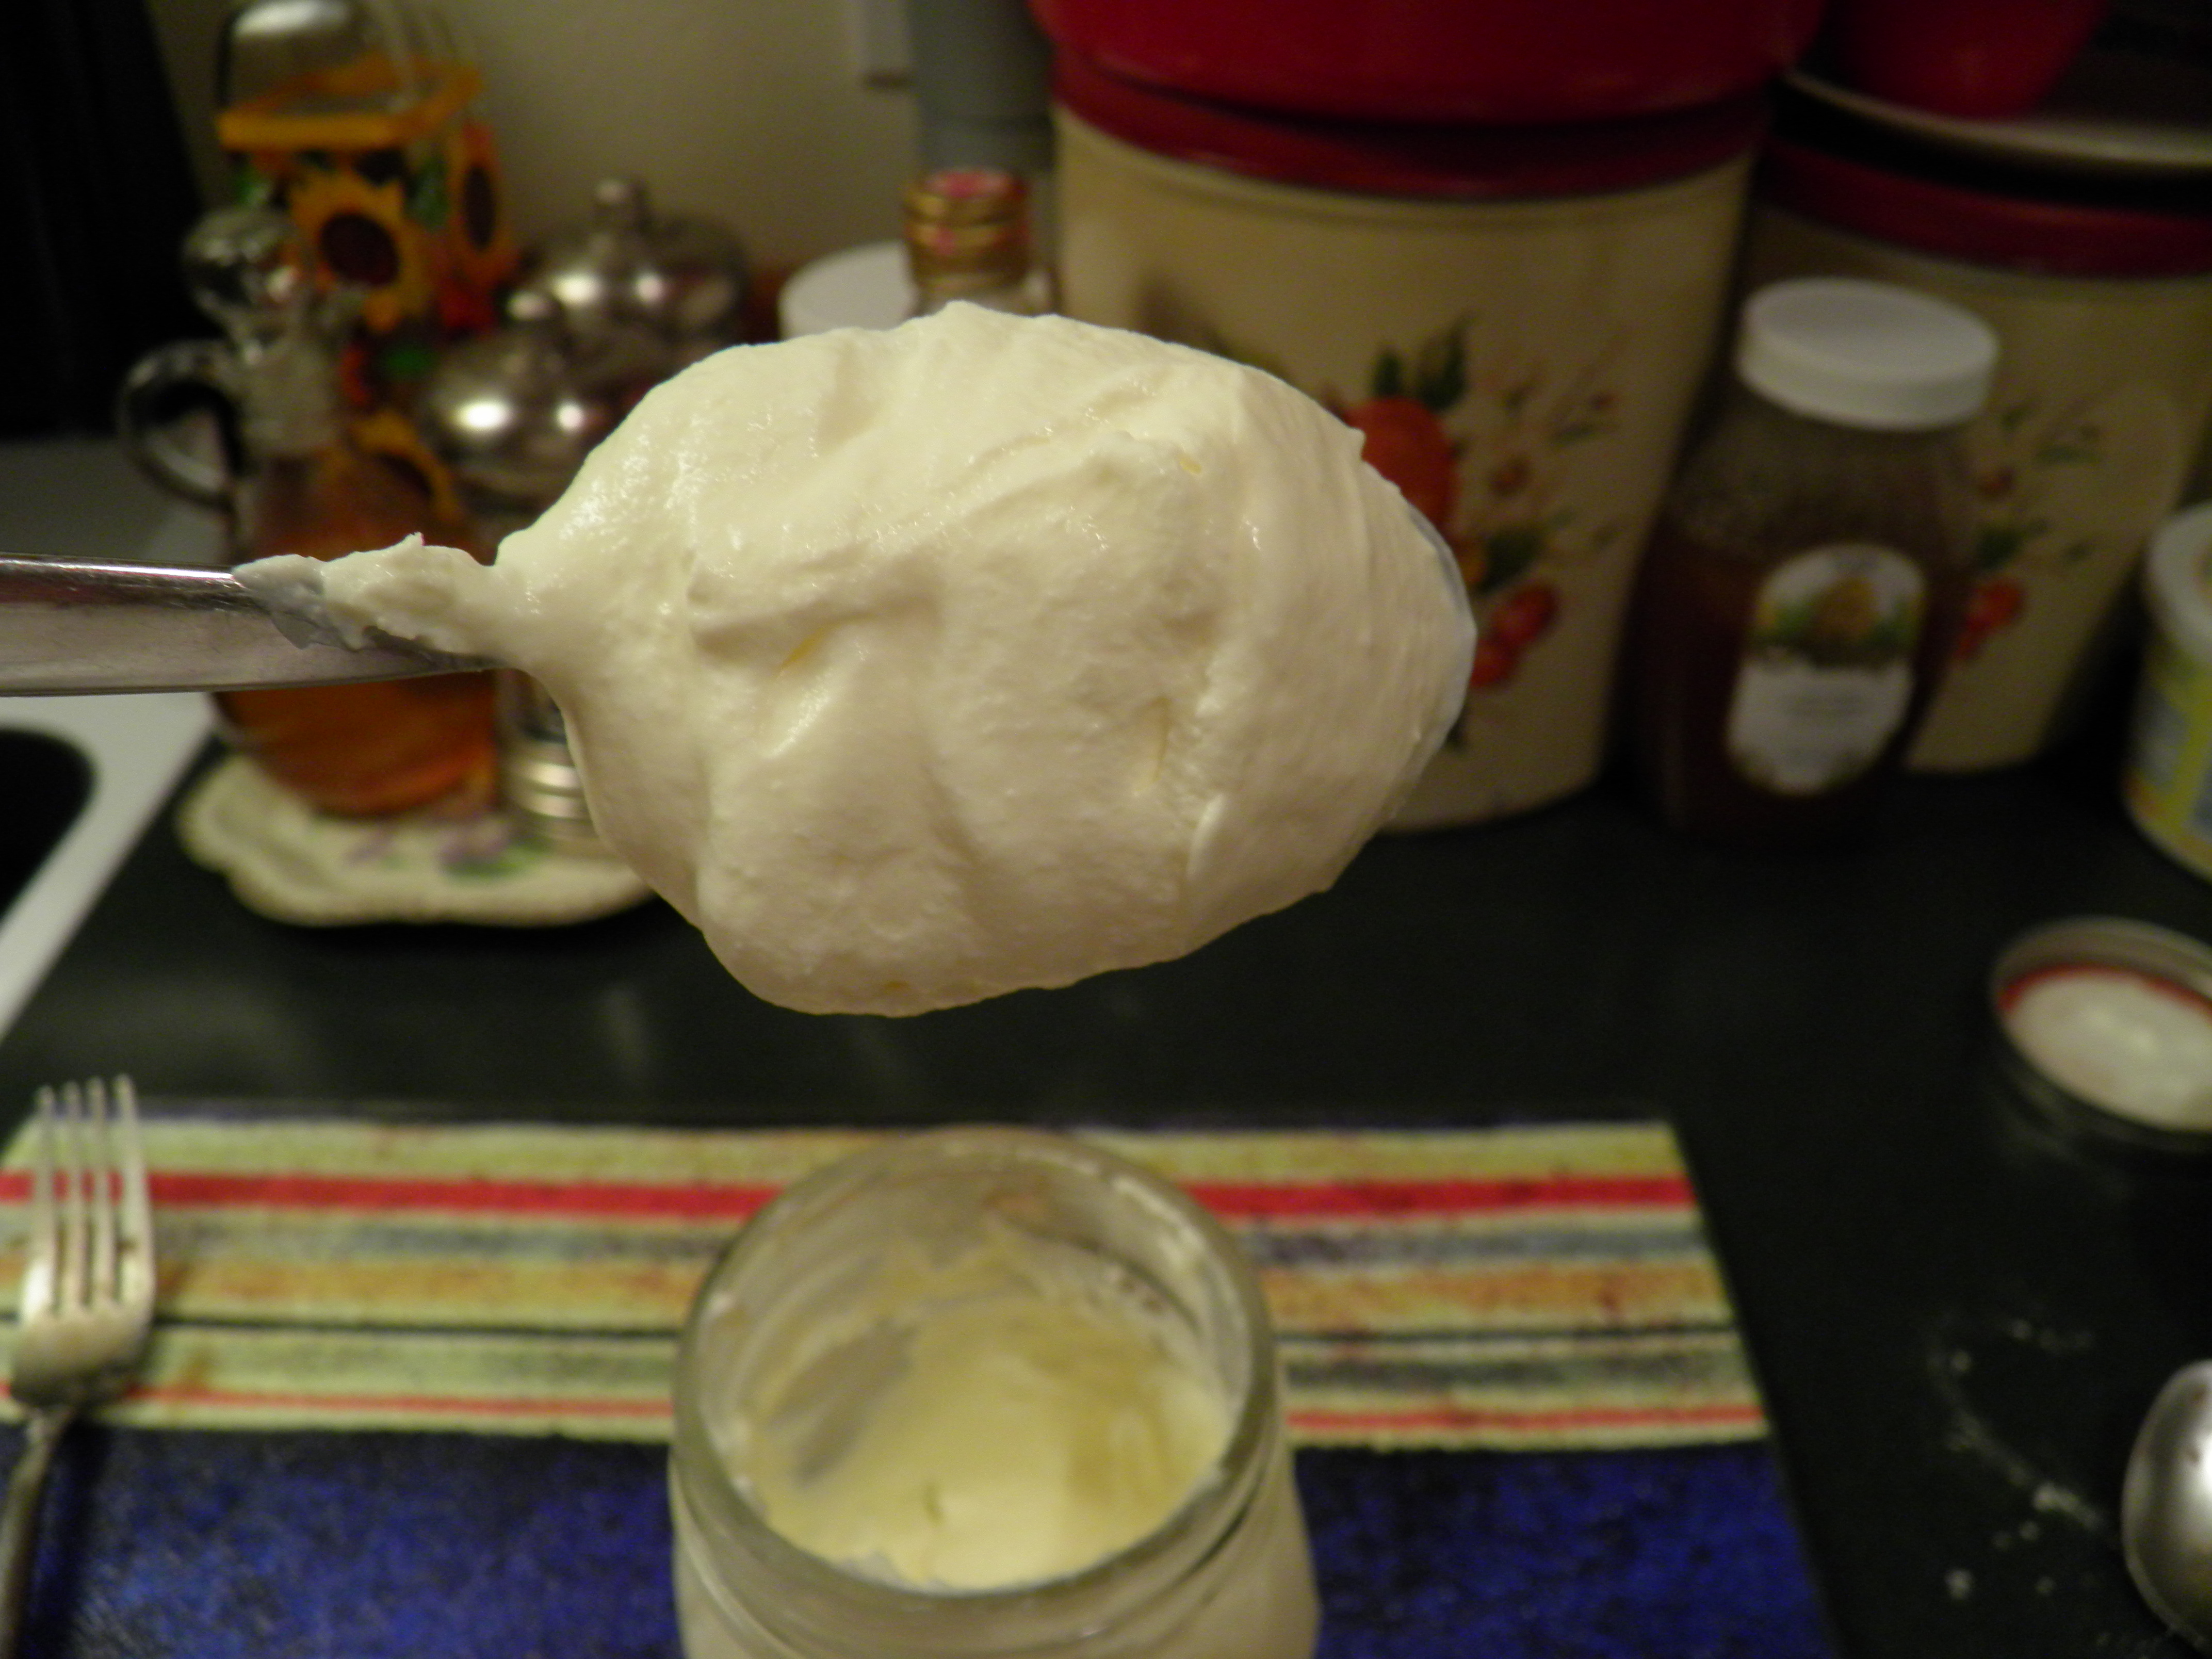
I ended up with 7 1/2 pints of what I’m calling vanilla-infused cranberry-rhubarb butter. That’s because the consistency of it reminds me very much of apple butter and pear butter: smooth and spreadably thick, rich, glossy, and, by the way, delicious. The pectin in the rhubarb and cranberries thickens and glosses up the butter, just the way apple skins and pear skins do with those kinds of butters. It’s tart-sweet, just the way I like preserves, and you can taste both the cranberries and the rhubarb. Who knew that would be such a great combination? I didn’t. But, yum. Here’s the recipe, should you be inclined to try this yourself.  And by the way, the beets turned out beautifully too.  You can see some of the heirloom beets in the front row of the pic below, cranberry-rhubarb syrup and butter on the right.

003

Vanilla-Infused Cranberry-Rhubarb Syrup and Butter

8 cups sliced rhubarb, along with any juice (mine was frozen, then thawed)

4 cups cranberries (mine were also frozen)

1 ½ cups of homemade cranberry sauce (see directions below)

1 split vanilla bean

5 ½ cups sugar

3 cups water

Boil all ingredients together until rhubarb and cranberries are soft. Taste and add more sugar by ½ cup measure until desired sweetness is reached. Remove vanilla bean. If you wish to render syrup, pour the fruit and juices into a jelly bag and hang until it stops dripping. Syrup can be processed as is in sterile pint or half-pint jars in water bath canner for 10 minutes, or thickened by boiling and reducing, then processed for 10 minutes in boiling water bath canner.

OLYMPUS DIGITAL CAMERA

For butter: Strain the fruit mixture through a cone colander or other strainer to remove fibers and cranberry skins. If the resulting mash is not thick enough, it can be reduced on the stove top or in the oven until desired thickness is achieved. (I recommend a 300-degree oven, as reducing on the stove top leads to splatters on walls, as my kitchen will attest.) Reheat to boiling, spoon into sterile, hot pint jars and process in water bath canner for 10 minutes.  Always adjust processing times for your altitude, if necessary.

OLYMPUS DIGITAL CAMERA

Now, if you’re not making whole-berry cranberry sauce at Thanksgiving, why not? It’s simple, delicious, and you will know exactly what three ingredients go into it!

Homemade Cranberry Sauce

12 oz. bag of whole cranberries

1 cup water

1 cup sugar

Heat water and sugar to boiling, add cranberries, watch ‘em pop! Bring to boil, lower to simmer for 10 min. Remove pan from heat and cool to room temperature to allow sauce to thicken before refrigerating. This stuff keeps forever in the fridge, and it can be frozen and thawed months later.

Standard
Dairy, Desserts, Garden and Greenhouse, Gluten-free

Rhubarb Sour Cream Custard Pie

A recipe for Rhubarb Cream Pie was floating around Facebook a few weeks ago, and I shared it to my timeline. It reminded me of the Sour Cream Apple Pie recipe I was given years ago by my good friend, Wes Reid. Sour Cream Apple Pie has been a family favorite for many years, and if I were to forego making it for every holiday get-together, I would be in serious trouble.

A couple of weeks ago, I had rhubarb in the garden ready to pick, so I decided to try to adapt the Sour Cream ApplePie recipe, subbing in rhubarb and sour cream and a streusel topping, and see what happened. Oh, my goodness gracious, it might be even better than the Sour Cream Apple Pie. Dennis and I only got to eat one piece each before we had to catch the red-eye flight out to Denver, so my friend and neighbor, Yolanda, took it home with her when she came to water my plants. She said it was really good, too. With all that rhubarb in the garden, I thought I’d be making the pie again before I posted the recipe, so I didn’t take a picture of it.  But trust me, if you like rhubarb, and even if you think you don’t, you’ll want to try this recipe.

So here it is, and you’ll only find the recipe here, my friends: Rhubarb Sour Cream Custard Pie.  It can be made with gluten-free flours and lower-glycemic sweeteners as well.  You’ll need an unbaked pie crust to put it in. My recipe for gluten-free pie crust is linked at the end of the post.  Or use your favorite pastry crust recipe, or really streamline your pie baking and buy a crust.  I did it myself during the busy  years!

Custard Filling:
1 1/2 cups fresh rhubarb, diced
2 tablespoons flour*1/8 teaspoon salt
2 eggs (beaten)
1 cup sugar
1 cup sour cream**

In a large bowl, mix together all ingredients except rhubarb. Put rhubarb in unbaked 9” pie shell and pour mixture over the rhubarb. Bake in 400 degree oven for 15 min., then reduce heat to 350 and bake for additional 30 min.

While custard is baking, mix the topping:

Streusel Topping:

1/3 cup sugar***

1/3 cup flour*

1 tsp. cinnamon

¼ cup softened butter

Mix well and sprinkle over pie at end of first cooking period. Return to oven at 400-425 degrees and bake for ten minutes to form streusel crust on top of custard. Cool completely before cutting. Store in fridge.

Notes:

*I used brown rice flour in the custard filling and in the topping. It worked just fine to thicken up the custard and to crisp the streusel topping. If you are gluten-free, brown rice flour is a pretty good substitute for wheat flour for all kinds of applications. (Maybe I need to write a post about that!)

**I used homemade sour cream when I made this pie. Follow the link for the directions for making homemade sour cream.

***I also used coconut palm sugar this time instead of white sugar in the streusel topping because I wanted to see how it would taste and work in that application. It was fine. I did not use coconut palm sugar in the custard filling because rhubarb is so tart, I was afraid the coconut palm sugar would not be sweet enough. When I get home and can experiment some more, I’ll try it in the custard filling also, just to see. Sugar is sugar, whether you use more or less, but if I can use organic and less, I will, and I got a smoking deal on organic coconut palm sugar at Grocery Outlet not too long ago, so I have plenty with which to experiment.

The Sour Cream Apple Pie recipe is on my Thanksgiving post, so I’ll link it for you here in case you want to try that pie as well. Also linked is my gluten-free pie crust recipe, made with gluten-free flour from WinCo’s bulk foods section, which I have recently learned is probably from Bob’s Red Mill. I have been using bagged Bob’s Red Mill gluten-free baking flour here in Denver, and it is identical to what I buy in bulk at WinCo. although twice the price.  Buy bulk if you can.

Happy pie baking! Use that rhubarb while it’s fresh. It’s good for you.

7/28/15:  I finally remembered to get a picture of this pie for this post, but before I could, a piece was already gone!  Yeah, it’s that good.

OLYMPUS DIGITAL CAMERA

OLYMPUS DIGITAL CAMERA

Standard
Dairy, Fermenting, Recipes, Side dishes

Coleslaw Dressing with Yogurt

As some of you know, I’m away from my garden for a few weeks because of a family emergency. I have had to entrust the garden and greenhouse to the care of family members and neighbors at a critical time, but I appreciate their efforts to keep everything alive for me. I have no idea what I’ll find when I get back home at the end of the month, but I’ll be grateful for whatever survives. In the meantime, I thought I’d share a recipe with you.

In a recent post about making homemade yogurt, I alluded to a recipe for coleslaw dressing that has become a family favorite. I made coleslaw for a picnic in the park yesterday here in Denver and received many compliments, even though I wasn’t able to make the dressing with my homemade yogurt, which I think makes it even better.

The ingredients for the dressing can be mixed up days in advance, but I like to mix the dressing into the shredded cabbage shortly before serving, so it doesn’t get too watery.  I will say, however, that this dressing won’t make your cabbage go limp if you mix it up the day before. I had to do that for this picnic, and while the dressing did pull some water out of the cabbage, it was still crisp and the coleslaw was tasty.

Very few people shred their own cabbage these days when packaged coleslaw mix is so readily available at the store. I rarely shred a whole cabbage any more, either (although I did for the picnic on Saturday), unless I have one fresh from the garden. The food processor makes this less of a chore, but slicing can also be done with a sharp knife. The key is to get the cabbage into thin shreds. You always want to slice (both with the knife and the processor), not chop. Chopping bruises the cabbage and will cause it to release more water, thus making your coleslaw more at risk for decreased flavor and limp texture.

This recipe makes enough to dress about half a medium-sized, shredded cabbage and about 3 medium carrots, also shredded, or one large bag of pre-shredded coleslaw mix from the store. I always add 2-4 tablespoons of minced white or red onion to the cabbage and carrot mix before dressing. Too much onion will overpower the slaw, so be careful with it, but it’s a necessary addition to colelsaw in my opinion.

Coleslaw Dressing

(makes about 1 cup)

½ cup mayonnaise

½ cup plain yogurt*

2-3 tablespoons of sugar**

2-3 tablespoons of apple cider vinegar (I use my homemade apple vinegar for more probiotics)

½ teaspoon salt

¼ teaspoon ground black pepper


Mix thoroughly, until dressing is creamy and smooth. It should taste a little sweet but tangy. Toss with shredded cabbage, carrots, and minced onion until well mixed. Serve immediately or within 24 hrs. (It will get watery the longer it sits, but leftovers are good!)

Notes:

*I think homemade yogurt really is best, and my son agrees with me, but any good quality plain yogurt will do. Greek yogurt will make a thicker dressing because the whey has been strained out of it. Why is homemade yogurt better? It’s tangier, and it contains more probiotics, which incidentally, aid in the digestion of the cabbage.

**You can substitute a different sweetener if you like. Honey or agave syrup would be fine. I have used both powdered and liquid Stevia and Splenda. Start with small amounts and taste as you go. For liquid Stevia, I recommend starting with about ¼ teaspoon and adding drop by drop to reach desired sweetness.

I don’t have my camera with me, so I wasn’t able to take a picture of the coleslaw I made on Friday night, but hey, you know what coleslaw looks like. You also know how a good, traditional coleslaw should taste: tangy, a little sweet, a little bite from the onion, and some good crunch from the cabbage and carrots. It’s a favorite salad with our family (my son says he’d be in heaven if he had a lifetime supply of the stuff always in his fridge). I especially like it as a side dish with oven-fried chicken, barbecued spareribs, or pulled pork. Follow the links for my recipes for those dishes in the archives.

Standard
Recipes, Side dishes

Spring Greens

We had our first taste of spring greens from the garden this week. Well, really, most of them were from the greenhouse. I let some spinach and romaine volunteer in there; thus, we have greens ready to pick when the lettuce I planted outside in the garden is still so tiny you can barely see it. I did have some fall spinach overwinter in the garden, but the leaves are tough and small compared to the tender young greens from the greenhouse.

OLYMPUS DIGITAL CAMERA

It’s sacrilege to cook these greens, so I prepared a salad with them. But what sort of dressing to use? In my husband’s mind, there is no salad dressing but ranch. However, I knew ranch dressing would smother these delicate greens. I needed something light and spring-like to honor spring greens. And then it came to me. I had raspberry-infused apple-scrap vinegar in the fridge which I had yet to use in anything. How about some version of a raspberry vinaigrette? It was so good, I have to share the combination and the dressing with you.

I used both baby spinach and baby romaine for my greens; you can use any mix you like, but if you’re buying packaged salad greens, I’d go for the spring mix. Toss them with this delicious raspberry vinaigrette salad dressing, and then arrange the greens on salad plates. To the greens, add thinly-sliced red bell peppers and peeled, thinly-sliced cucumbers. Drizzle a bit more dressing over the top, then sprinkle each plate with toasted, sliced almonds and grated cheese. I used a very low-fat Cabot white cheddar, which was delicious. Freshly grated parmesan or Romano, in big shreds, would also be delicious.

OLYMPUS DIGITAL CAMERA

I made the salad dressing with some raspberry-infused apple scrap vinegar I made last fall. Follow the link for instructions for making the infused vinegar. (Store-bought apple cider vinegar can be used to make raspberry- or blackberry-infused vinegar.) There are alternative ingredients (aren’t there always?) if you don’t happen to want to take the time or haven’t the ingredients to make an infused vinegar. (I can tell you, I’ll certainly be making more infused vinegar this fall if the robins leave me any raspberries.) The slightly-sweet and acidic raspberry vinaigrette was the perfect dressing to complement those tender, tangy new greens. I used chia seeds instead of the poppy seeds which are traditional in this kind of recipe, and they were wonderful.

OLYMPUS DIGITAL CAMERA

Raspberry Vinaigrette with Chia Seeds

(makes about ¾ cup)

2 tablespoons of minced onion

¼ cup raspberry-infused vinegar

2 tablespoons of honey

½ teaspoon dry mustard or prepared Dijon mustard

½ cup olive oil

2 teaspoons chia seeds


Mix all ingredients in blender or food processor (if using food processor, you can mince the onions with it) or with a whisk in a bowl. The mustard will help to emulsify the dressing, but it will separate slightly, so it should be shaken well before using. If you like a sweeter dressing, add more honey a teaspoon at a time until the sweetness level is right for your taste buds.

Now, if you don’t have any raspberry-infused vinegar, and don’t want to make it, for whatever reason, you can make this dressing without it. Simply substitute white wine vinegar or even rice vinegar for the raspberry-infused vinegar, and for the honey, substitute raspberry jam or preserves. Again, taste your dressing to see if you’d like it sweeter. My version isn’t very sweet, as I don’t happen to care for sweet salad dressings.

Why chia seeds instead of poppy seeds? Why, for the increased Omega 3 content, of course! They add the same slight crunch, and virtually no flavor, so feel free to leave them out, if you wish.

This antioxidant-rich salad dressing complimented the fresh spring greens beautifully. I can’t wait to pick more so that I can use the rest of the dressing.  And then, I’ve got some blackberry-infused vinegar to play with!

OLYMPUS DIGITAL CAMERA

Standard
Dairy, Fermenting

Homemade Yogurt

This is another installment in the “Fun with Dairy” series.  I’ve made yogurt at home for years.   Homemade yogurt is so much better than its store-bought counterpart, it’s astonishing. You can find any number of directions on the internet for making yogurt at home, and because of that, I’ve resisted blogging about making yogurt. But because so many people ask me how I do it, and because not all methods of making homemade yogurt are good ones, and because I’ve found a method that works without fail for me, I’ve decided to share it.

First, here’s what you need to make homemade yogurt:

Two pots, one large enough to hold the other, and the top one, the one you’ll cook the milk in, should be non-reactive (stainless steel, glass, enamel or porcelain-coated)

A candy thermometer (not strictly necessary but helpful)

A stainless steel spoon (don’t use wooden or silver spoons)

1-2 quarts of milk

1-2 tablespoons of plain, active-culture yogurt

Making yogurt isn’t difficult, but there are some important things to know. I’ve only had one failure in years of making it at home, and that one time was because my stove hood was dirty; the steam from the water jacket condensed on it, and a drop of dirty water fell into the milk.  That batch never thickened, and that little lesson taught me just how fragile lacto bacilli actually are. They do not like competition from other bacteria! (It also taught me to clean my stove hood before a yogurt-making session.) I’ve read about making yogurt in a crock pot.  I cook meat in my crock pot—and remember, lacto bacilli do not like competition from other bacteria.  It would be difficult and much more time consuming to sterilize the crock pot vessel than to use two separate pots.   I once tried making it on the stove without the water jacket, and the milk had a tendency to scorch before it got hot enough unless it was stirred constantly. So here’s the water jacket method I use, and it’s actually pretty easy. You can walk away from it and do other things while the milk is heating, and it will never scorch.

I fill my 13 quart stockpot 3/4 full with hot water, and start it heating on high. I invert my 6 quart stainless steel soup pot over that, stick my stainless steel spoon and candy thermometer into the boiling water, and let it boil for 10 minutes to sterilize the inverted pan and utensils.

OLYMPUS DIGITAL CAMERA

Then I turn the top pan, draining the condensed steam out of it, and put it into the bottom pan, so I have a big double boiler. The thermometer and spoon go in the top pan along with 1 or 2 quarts of milk, depending on how big a batch of yogurt you want to make.  Milk of any fat content can be used, although more fat produces a thicker, creamier yogurt. I usually use 1% milk.

Then, with the large pot underneath boiling, the milk heats in the top pan. Stir and skim off the milk skin occasionally, until the milk reaches a temperature of 170-185 degrees. I live at altitude, so the best I can ever do is 180 in a water jacket set-up. This heating kills off any bacteria left in the milk that would interfere with the lactobacillus reproduction. I think this is less important with store-bought pasteurized milk, but I always do it anyway. (If you don’t have a candy thermometer, and have no plans to buy one, you want to heat the milk until it is very frothy.)

Then, the milk has to cool down to 110 degrees. It’s very important that the milk be cool enough when the yogurt culture is added, or the l. bacilli will die. It is also important that the milk be warm enough to wake up the yogurt culture. It’s kind of like Baby Bear’s porridge: it has to be just right. You can place the pan containing the milk into a bowl of cold water to hasten the cooling process if you’re in a hurry, but keep monitoring it, or it will cool too much and have to be reheated. I put mine on the cold marble slab in my kitchen and keep scooting the pan around on the slab to find another cool spot after 5 minutes or so. (Usually, I’m loading or unloading the dishwasher while I’m waiting for the milk to cool, so no time wasted there.) I’ve made yogurt without a thermometer, and I learned that the right temperature is just a little warmer than blood heat. If you’ve ever seen or heard of testing a baby’s bottled milk on your wrist to see if it’s the right temperature, this is the same thing. Just dribble a little of the milk on your wrist. For babies, the milk should feel neither cold or hot—that’s blood heat, about 98 degrees. For yogurt, the milk should feel warm, but not hot on your wrist. That should be about 110 degrees.

For the starter, use only plain, active-culture yogurt. It can’t have sugar or pectin or anything in it except milk or cream, and active l.bacillus cultures, but again, any level or percentage of fat in the starter yogurt is fine. I often use non-fat yogurt as my starter when I need a new culture.   Use 1 tablespoon yogurt as starter to each quart of milk.

Gently stir the yogurt into the heated and cooled milk, cover with a tight-fitting lid, and put the pan in a warm, cozy place to culture for 8-24 hours. Don’t move it or stir it while it is culturing. 8 hours will create a yogurt that firms up when cooled in the fridge, but a 24 hr. culturing period eliminates virtually all of the lactose in the milk because those beneficial critters eat it all up.

Some attention to the various ways to keep yogurt warm enough while it is culturing is in order here. A temperature of about 80 degrees is ideal. Some people put their yogurt in a warmed oven which is then turned off, but the light is left on.  Some folks with gas ovens say the pilot keeps the oven warm enough.  Others use heating pads (you have to have an old-fashioned one that doesn’t have an auto shut-off for this to work, and let’s face it, they’re a fire hazard), and still others are able to use the top of the fridge, which is usually warm. If the house is warm enough, the yogurt may be fine on the countertop.

My house tends to be cool, so I’ve worked out a couple of different methods that work for me at different times of the year. In the winter, when the heating stove is on, I park the pan, covered with its tight-fitting lid, on the slate hearth. In the summer, when the cooler is running, I put the pan in my laundry room (which doesn’t get any cool air from the swamp cooler) and stash it on top of or next to the big freezer, which pumps out a lot of heat. In the spring and fall when the laundry room is too cold or the heating stove is not yet in use, I use a drinks cooler. This is an easy method that can be used all year round. A portable cooler will keep heat or cold in, as required. In this case, we want to keep in heat. I fill the empty milk carton with the hot water from the big pan (the water jacket), stash it in the cooler next to the covered pan of yogurt and close the lid.  24 hours later: yogurt. No muss, no fuss.

When the yogurt has finished culturing  (it should be fairly solid, other than a bit of whey on top, when you tilt the pan), whisk the finished yogurt to smooth it out, then pour or dip it into clean containers, and chill in the fridge. Don’t worry if the yogurt seems thin after whisking. It thickens again as it cools. For Greek-style yogurt, you can drain it right away through a cheesecloth-lined colander if you wish, or cool it and drain it later. If you drain it long enough, you’ll end up with a yogurt cheese, a soft, spreadable cheese reminiscent of goat cheese, which can be served on crackers plain or flavored with herbs and other additions.

As the yogurt sits in the containers, whey rises to the top. This should just be stirred back into the yogurt unless the whey is desired for a different fermenting project. Always save a couple of tablespoons of yogurt for the next batch. The yogurt shouldn’t be more than a month old before it’s used for a new batch, or the lacto bacilli might die. If a batch of yogurt is too thin after chilling, it’s time to buy a new container of plain, active-culture yogurt at the store for a new starter. I do this about every 3-6 months. I guess the critters just get tired.

I am never without homemade yogurt in my fridge. We’re hearing a lot about probiotics these days and the health benefits of a strong immune system that’s boosted by probiotics. Homemade yogurt is probiotic, but more than that, it’s delicious.

I eat a small bowl of homemade yogurt every night. I usually mix a spoonful of one of my low-sugar jams (raspberry, peach, apricot, strawberry, nectarine, and various other combinations) into my yogurt, but my favorite thing to mix into it is homemade lemon curd. Tart, slightly sweet, creamy, lemony goodness. It’s dessert that’s good for you.

OLYMPUS DIGITAL CAMERA     OLYMPUS DIGITAL CAMERA

But I also do a lot of other things with my homemade yogurt. I use it in my coleslaw dressing, in my sourdough starter, as a replacement for sour cream if I’m out, in clafoutis (a wonderful French country dessert), in dips or as a spreadable cheese, and in many other dishes. At some point, I’ll pass along those recipes, but for now, I hope this post has given you the impetus to try making something really good for you at home. And just so you know, if the yogurt fails to culture for some reason, you can still make ricotta out of the milk, so nothing is wasted.


Standard
Dairy

Making Ricotta Cheese

This is another installment in my Fun with Dairy series, and it was sparked by my friend, Gretchen, who wanted to learn to make ricotta.  This past week, Gretchen came over to help Dennis and me prune our fruit trees, and we spent 20 minutes in the kitchen, making cheese out of some sour milk I had in the fridge, before going out to work on our poor little trees which have never had any real pruning done to them. They were in sorry shape. Gretchen just shook her head and said, “Oh, my,” each time we moved on to a different tree.

OLYMPUS DIGITAL CAMERA

As we started on the cheese, Gretchen confessed to me that friends of hers were dismayed by the fact we were going to use sour milk. I used to throw sour milk away too, if I couldn’t use it all for pancakes or biscuits before it got chunky and nasty. Then I learned to make ricotta. I call this ricotta, but technically, it’s not, since true ricotta is made from whey leftover from hard cheese-making; thus, its name in Italian means “re-cooked.” The milk for this cheese is only cooked once, although I have been known to cook it twice if for some reason I thought not enough of the curds had separated from the whey first time around. This mainly happens when I use full fat milk and add heavy cream or half and half to it, which I do when they go sour on me!

You can use milk of any fat content, although I don’t recommend using fat-free milk. You don’t get much out of it. The higher the fat content, the more cheese you’re going to get. Since we usually use 1% milk in the house, that’s what my ricotta is usually made of, although sometimes I will buy milk with a higher fat percentage for various reasons and end up using it to make cheese. I always mark the fat content of the cheese on the container when I stash it in fridge or freezer, so I know which dishes I want to use it in. I like to use the lower fat cheese in my lasagna, because there is also mozzarella in it, another source of fat.

The milk/half & half/cream does not have to be sour. You can make the cheese with fresh milk. But surprisingly, after the cheese is made from sour milk, it doesn’t taste sour. I think Gretchen might have been a little skeptical about this, but I proved it to her when we tasted our final product. Perhaps it is the addition of the acid which changes the flavor, or perhaps it is the separation of fat and protein from the whey. I don’t know, but I know it works! Here’s how to do it.

First, you need a large, heavy-bottomed pot or pan, a colander or strainer that will sit up over a bowl large enough to hold two quarts of liquid, and some cheesecloth or other clean fabric that will allow liquids to pass through but will hold onto solids. (I use an old, fine-cotton pillowcase that I have dedicated only for straining cheese and yogurt.) You’ll also need a container to keep the cheese in, and a container for the whey, if you wish to save it for baking. The whey can be added to breads, quick breads, cakes, etc. in place of water, or added to smoothies. It still contains some protein.

Before you begin to cook the milk, rinse the cheesecloth in hot water and squeeze it out. Then line the colander or strainer with the cloth and place it over the large bowl. Squeeze 1 or 2 lemons, enough to make 3 tablespoons of juice, and strain out any seeds. (White wine vinegar or rice vinegar, unflavored, can be substituted for the lemon juice if lemons are not in season.) I recommend doing this prep work before you start heating the milk, so you don’t get distracted and let the milk scorch.

Place the milk (with any cream-type additions you want to make) in the pan or pot. To two quarts of milk, add 1 teaspoon kosher salt. (Cut down the amount of salt and lemon juice or vinegar proportionately if you have less milk). Turn the burner on medium to medium-high, and stir the milk with a wooden spoon. Stir frequently to prevent the milk from sticking and scorching on the bottom. It’s best to babysit the milk fairly closely. A bit of sticking isn’t a problem, but if the milk scorches (that is, if you start scraping black fragments up from the bottom of the pan), it will ruin the cheese. I am a champion multi-tasker in the kitchen, but this is one preparation that can go south on you pretty quickly if you step away while it’s cooking. Yes, I learned this the hard way!

Bring the milk to a full, rolling boil, stirring continuously once it really starts to heat up. Drizzle in the lemon juice or vinegar, reduce the heat to medium-low, and cook until the white curds separate from the yellowish whey. The lower the fat content of your milk, the smaller the curds will be, and the higher the fat content, the larger the curds. It may not look like you have much cheese until you strain it, and then you’ll be surprised.

You only need to cook the mixture until you can clearly see the separation of curds and whey, and this usually only takes 3-5 minutes after the addition of the acid, whether lemon juice or vinegar, or a combination of the two. I combine lemon juice and vinegar frequently when I have not quite enough juice from one lemon and don’t want to cut another just for a teaspoon or so of juice. In this case, I’ll add a teaspoon of rice vinegar or white wine vinegar to make up the difference. I have even added a teaspoon of bottled lemon juice.

At this point, I will add a caution. You can use bottled, reconstituted lemon juice for this instead of fresh lemon juice, but you may find, as I have, that it takes more bottled juice to separate the curds from the whey. I think this is because when you squeeze a fresh lemon, you’re getting some of the oils from the peel into the juice, and this bumps up the acidity level. I have tried my homemade apple scrap vinegar as well, and it was not acidic enough. I had to add rice vinegar that time to get the curds to separate.

When the curds have separated from the whey (and the whey will look yellowish but still a little milky), carefully pour off the mixture into the cloth-lined colander or strainer. If your bowl isn’t big enough, you may have to pour off some of the whey that drains through right away. Be careful and watch out for tipping and spillage. (You can tell by my cautions what kinds of accidents I’ve had, right?)

It only takes a few minutes for the whey to drain away from the curds if you have the right cloth in your strainer. The longer you leave the cheese to drain, the harder and more solid it will become. I have gone on to other things and left my cheese to drain several hours, and it becomes a brick! 10-20 minutes is about right to get a nice, soft, spreadable cheese, if you wish to flavor it with herbs, lemon zest, and garlic and spread it on crackers or crostini. If you let the cheese drain too long and it gets too hard and dry, you can always mix a bit of whey back into it to get it to the consistency you want. Let it cool to room temperature, and then put it in an airtight container. It can then be stashed in the fridge for immediate eating (it’ll keep a week) or in the freezer for future use. The whey also can be refrigerated for a week or longer (throw it out if it gets moldy) or frozen. Some people also dehydrate whey for protein powders, but I have not tried this. Remember that this whey is acidic and contains some salt, so that take that into account if you decide to bake with it or use it in smoothies.

I mostly use my homemade ricotta for making my Roasted Eggplant Lasagna, which is my all-time favorite Italian comfort food. In this recipe, the ricotta is mixed with eggs and parmesan cheese to create that creamy, thick layer in the lasagna, so I often let my ricotta drain past the spreadable stage, so there is less moisture in the lasagna.  However you use your ricotta, I promise you, you’ll enjoy it. Just ask Gretchen. She’s the one holding the cheese in the picture below.
OLYMPUS DIGITAL CAMERA

Thanks to Gretchen, our fruit trees look a whole lot better now too!  I am hopeful that those poor, neglected trees down in the back will take heart and begin to be more productive as they get healthier.  As for the little pie apple tree in the garden, while it might not bear quite as many apples this year, I’m betting the apples will be larger and the tree will maybe even start to straighten up now that it’s been pruned.  I’m looking forward once again to apple pies, applesauce, and apple butter in the fall.  And it hasn’t even bloomed yet!

OLYMPUS DIGITAL CAMERA

Standard
Main dishes, Side dishes

Oven-fried Chicken

Recently, a Facebook friend asked this question in a group I belong to:  Does anybody have a good oven-fried chicken recipe?  My hand went up immediately.  I do, I do!  I have been asked to share this recipe on the blog, so that it can be pinned to Pinterest.  How cool is that?

I have been oven-frying chicken for decades, and it is crispy and tender and delicious.  Not too long ago, I watched an old Good Eats with Alton Brown, and he fried chicken on the stovetop in a cast iron skillet filled with hot shortening.  Boy, that looked good, and I have a big cast iron skillet I can hardly lift, and a can of shortening I hardly ever use.  I thought I’d give it a try.  What a mess!  Grease splatters everywhere!  And frankly, while the chicken was okay, I didn’t really think it was as good as my oven-fried chicken.  Back to doing it my way.

The basic coating recipe came from the Betty Crocker cookbook my mom gave me when I got married in 1981, but the method is my own.  At some point, after oven-frying chicken in oil and butter as the original recipe called for, I realized there sure was an awful lot of fat in the pan after the chicken came out, way more than I’d put in to start with.  Oh, yeah, Jeanie, chicken skin is full of fat!  Well, I thought, if chicken skin is full of fat, and it renders out during the cooking process, why am I adding all this other fat?  I tried cooking the chicken without adding fat, and glory be, it works every time.  There’s only one trick:  the chicken must have skin.  Skinless breasts or thighs will not work in this recipe.  I could call this recipe No Mess, Lower-fat Oven-fried Chicken because the only fat in the dish (other than a spritz of cooking spray or a thin swipe of shortening or oil) comes from the skin on the chicken, which renders as it cooks.  But let’s just go with Oven-fried Chicken.  I’m all for simpler when it works.

Oven-fried Chicken

2-3 lbs. cut up chicken pieces

Basic coating mix:

1/2 cup flour (I have substituted brown rice flour since I went gluten-free, and it works well in this recipe)

1 teaspoon salt

1 teaspoon paprika

1/4 teaspoon pepper

You may also add any other herbs or spices you would normally add to your fried chicken breading. I sometimes use a blackened seasoning or Cajun seasoning mix instead of the salt above, and/or I’ll add poultry seasoning (ground sage, thyme, and parsley), or I’ll substitute hot smoked paprika for plain, or whatever takes my fancy at the moment.  You can also add a teaspoon of sugar to the coating mix.  I think this makes the coating brown a little darker as it oven-fries in its own fat (see last photo below).  You can also reduce the flour by two tablespoons and add two tablespoons of cornmeal for an even crunchier breading, although the flour produces a light, crispy coating.  Using plain flour cuts carbs as well; no need to use bread crumbs which add carbs.

Heat oven to 425 degrees. Put coating mix in a paper or plastic bag, shake it well to mix, and add no more than 2 pieces of chicken at a time, shaking to bread the chicken.  If you want a thicker breading on your chicken, dip it in milk first, shaking off excess before putting it in the bag.  If you like to marinate your chicken in buttermilk before frying, that works too; just drain off the excess buttermilk before you coat the chicken pieces.  I never do either one.  I just put the chicken straight from the package into the breading mix.  If I have any leftover breading mix, I seal up the bag and stash it in the freezer for next time.

Lightly spritz a 13X9 inch pan with cooking spray (or swipe a tiny bit of oil or shortening over it with a napkin or paper towel), and place your coated chicken pieces into the pan, skin side down. This allows the fat to render out of the skin, making it crispy and delicious.

OLYMPUS DIGITAL CAMERA

Bake for 30 minutes at 425 degrees; turn pieces over.  Don’t worry if the skin side of the chicken doesn’t look that brown or crisp at this point.  It will be after the next cooking period.

OLYMPUS DIGITAL CAMERA

Bake for another 30 minutes, and prepare to be amazed.  The chicken will be browned with a light, crispy breading on the skin.  Take it out of the pan, and drain skin side up on paper towels.

OLYMPUS DIGITAL CAMERA

This is how much fat rendered out of 3 chicken thighs.  It was about 2 tablespoons.

OLYMPUS DIGITAL CAMERA

You can use the pan drippings and browned breading bits to make gravy, if you wish. In our family, (oven) fried chicken gravy has always been made like this:

Scrape the chicken pan to get off the browned bits.  Drain two tablespoons of fat and the browned bits into a skillet or medium-sized sauté pan.  Heat on medium-high heat until sizzling.  Add two tablespoons of flour (I have used brown rice flour) and cook and stir for a minute or two until flour browns slightly.  Stir or whisk in 1 ½ – 2 cups of milk (depending on how thick you want your gravy) and bring to low boil, stirring constantly to prevent lumping or sticking.  You can thin the gravy down after it cooks a couple of minutes by adding more milk, if it’s too thick.  You can also cook it down if it’s too thin for your tastes.  Add ½ teaspoon of salt and ¼ teaspoon of pepper, and taste for seasoning, adding more if needed.  Serve over mashed potatoes.

Oh yeah, baby—no-mess, oven-fried chicken and mashed potatoes and gravy.  That’s comfort food made easy.

Standard
condiment, Dairy, Fermenting, Main dishes

Fun with Dairy: Homemade Sour Cream

This is the first part of a series I’m calling “Fun with Dairy.”  Part I:  Sour Cream.  I’ve discovered how to make sour cream, and I’m so enchanted with it, I have to share it with you.  In addition, I’ve made yogurt and ricotta cheese at home for years, and while I’ve resisted blogging about it thus far because there are plenty of instructions for making these things already on the internet, I’ve come to realize that not all of them are good instructions.  Sometimes those recipes are poorly written, and sometimes, there’s just a better way to do it, and sometimes, a combination of methods works better.  So, in future posts, I’ll deal with making yogurt, the foolproof way I’ve been making it for years, and ricotta cheese, which I make for my roasted eggplant lasagna.  There will be other “Fun with Dairy” posts in the future, but first, sour cream.  And as a bonus, at the end of this post is a recipe you can make with your delicious homemade sour cream.

I love sour cream, smooth and tangy.  I like to make veggie dips with it, and chip dips, and you cannot make stroganoff (see recipe below) without it.  And surprisingly, sour cream is ridiculously easy to make.

You only need three things to make sour cream at home:  a clean jar with a lid, some heavy (whipping) cream or half and half, and some buttermilk (cultured).  Oh, and a place on the counter to let the cream culture for a day or so.  Here’s how you do it.

Measure 1 cup of heavy whipping cream (or for lighter sour cream, less fat, 1 cup of half & half) into your clean jar.  Add ¼ cup of cultured buttermilk.  Put on the lid and tighten it.  Shake vigorously to incorporate the buttermilk into the cream or half & half.  Set the jar on your kitchen counter in plain sight where you won’t forget about it.  Wait 18-24 hours.  Open lid on jar.  The cream should have thickened enough to sit up on a spoon.  Taste it.  If it isn’t sour enough, you can leave it a few more hours, no more than 36 hours altogether.  Store in fridge.

Leftover buttermilk, which typically comes in quarts, can be portioned into smaller containers and frozen You can also make buttermilk salad dressing, the original ranch, which will probably be the subject of another post.  And if you add some cultured buttermilk to regular milk, you’ll get more buttermilk.  You’ll never have to buy buttermilk again.  More about that in another post.

After cooling in the fridge, the sour cream will thicken enough to actually mound on a spoon.  The lighter version made with half & half is as thick, and actually tastes more like commercial sour cream, as that made with heavy cream, which is richer-tasting.  Either version is good to use for a dip or anything else you’d use sour cream for (as a topping on burritos, nachos, or enchiladas, for example, or cheesecake).  In the pictures below, the photo on the left is of sour cream made with heavy whipping cream (you can see that it is yellower in the jar) and the photos in middle and on right are of light sour cream made with half & half and previously frozen buttermilk.

OLYMPUS DIGITAL CAMERA   OLYMPUS DIGITAL CAMERA   OLYMPUS DIGITAL CAMERA

Recently, I used my homemade sour cream in some stroganoff.  Stroganoff is typically made with beef, but I used . . . yeah, you guessed it, bear.  If you haven’t made stroganoff in a while, or if you’ve never made it, it’s time to give this old standard another look.  But don’t make the imitation stuff with canned mushroom soup, please.  I have no doubt homemade sour cream would improve the taste, but do use fresh mushrooms.  This homemade sour cream (the heavy cream version) gave the sauce a rich, tangy flavor that the Mighty Bear Hunter and I really enjoyed.

Here’s an easy recipe made with an economy cut of beef:  round steak.  You can also use stew meat, you just have to cook it a little longer to get it tender.  Can you use other red meats besides beef?  If you’ve been reading this blog for a while, you’ll know the answer is yes!  You can use venison, antelope, lamb, bison, elk, and, I imagine, moose (although that’s one meat I have yet to try.)

OLYMPUS DIGITAL CAMERA

Beef Stroganoff

1 ½ lbs. round steak or stew meat, cut against the grain into 1/8 inch slices

3 tablespoons olive oil or butter

1 ½ cups beef or roasted vegetable stock

2 tablespoons ketchup (or 2 tablespoons ground dried tomato skins)

1 clove garlic, minced

1 teaspoon salt

8 oz. fresh mushrooms, sliced (any small variety will do)

3 tablespoons flour (if you’re gluten-free like me, you can use brown rice flour)

1 cup sour cream

Heat oil or butter (or combination thereof) in 10 skillet over medium-high heat.  Saute mushrooms and onions for about 5 minutes.  Remove from pan, reserve.  Add another tablespoon of oil or butter if needed, brown meat strips, add garlic, cook for about 30 seconds.  Don’t let the garlic burn!  Add 1 cup stock, stirring to get the browned bits off the bottom of the pan, add the mushrooms and onions and their liquid, and the ketchup or dried tomato skin powder,and  heat to boiling.  Reduce heat, cover with tight-fitting lid, and simmer until meat is tender, 1-1 ½ hours.

When meat is tender, shake reserved stock with flour in a lidded jar until well-mixed, stir gradually into simmering meat mixture.  Bring to boil, cook for one minute, then stir in sour cream, heat through but do not let it boil!  Take off heat, serve over cooked, hot egg noodles (3-4 cups).  Traditionally, hot egg noodles are tossed with a tablespoon of butter and sprinkled with 1 teaspoon poppy seeds (try chia seeds for more Omega-3 fatty acids) before serving.  Makes about 6 servings.

Standard
Canning, condiment, Main dishes

Glazed Pork Roast with Chinese Plum Sauce

OLYMPUS DIGITAL CAMERA

I had the great good fortune to be allowed to pick some Santa Rosa plums from a mature tree this past summer.  I wrote about that experience in an early post:  Scavenger.  I made a lot of red plum jam, which just might be my favorite jam of all time, and I made some Chinese plum sauce.  The sauce turned into an experiment because I was disappointed in the original recipe, but after working with it, I came up with a sauce I love and have used it as a barbecue sauce for chicken with delicious results.  This week, I decided to try it with pork, and I might just have created my new favorite dish: Glazed Roast Pork with Chinese Plum Sauce.  Dennis really enjoyed this juicy, flavorful pork roast.  I asked him if the recipe should go on the blog, and he mumbled “yes” with his mouth full.

Now, I realize that now is not the time to be making plum sauce from scratch because plums are not in season.  But I am going to give you the recipe below so that you can make your own plum sauce when plums are in season.  In the meantime, if you want to make this dish, or if you are not a canner, you can buy Chinese plum sauce.  If there are no stores near you which carry it, you can actually order it online from Amazon.  And if you happen to have some homemade plum jam on hand, I’m sure you could concoct some Chinese plum sauce using your jam as the base and adding soy sauce, onions, garlic, ginger, red pepper flakes, and Chinese five spice powder.

But first, the recipe for the roast.  You might want to try it without the plum sauce, or you might want to try it with another sauce for glazing or dipping.  Sweet and sour sauce with pineapple would be good, or a sauce made with orange marmalade would be delicious too, with a little soy sauce, red pepper flake, ginger and five spice powder mixed in.  Any of these sauces would be excellent with the rub and braising liquid.  Think about the Chinese flavors you enjoy and get creative with your sauce.  But I do recommend the plum sauce.  It is sensational.

Glazed Roast Pork with Chinese Plum Sauce

1 jar Chinese plum sauce for glaze and dipping (see recipe below)

Pork Rub:

1 tablespoon brown sugar

1 tablespoon kosher salt

¼ teaspoon powdered ginger

¼ teaspoon cayenne pepper

¼ teaspoon dry mustard powder

½ teaspoon Chinese five spice powder

2-3 lbs. boneless pork tenderloin or sirloin tip roast

Olive, vegetable, peanut, or safflower oil

Braising liquid (see note):

12 oz. ginger ale or lemon-lime soda (or any slightly sweet liquid will do—see my notes on braising liquids in my pulled pork post)

¼ teaspoon of dried ginger or three thin slices of fresh ginger root

¼ teaspoon Chinese five spice powder

Mix rub ingredients thoroughly.  Pat meat dry with paper towel; oil meat.  Sprinkle all sides of meat with rub; pat into meat.  Wrap meat in plastic wrap, store in refrigerator to marinate 2-8 hours.  Bring meat out to warm up to room temperature about 20 minutes before searing.

OLYMPUS DIGITAL CAMERA

Heat oven to 325 degrees.

Heat 2 tablespoons of preferred oil in heavy Dutch oven.  On high heat, sear meat on all sides.  Reduce heat.  Add ginger ale (follow the link if you want to make your own homemade ginger ale, and if you use homemade ginger ale, you won’t need to add any ginger to the braising liquid), dried ginger or fresh ginger, and five spice powder slowly to the pan.  (Note:  Because pork tenderloins and sirloin roasts are typically very lean and have no fat on the outside to keep the meat moist, they can’t be roasted in an open oven without drying out, thus the braising liquid is needed to keep the meat moist and tender. This is not a recipe for a piece of meat that still has a thick rind of fat on it.  That piece of meat should be open-roasted on a rack.)  Bring braising liquid to boil, loosening all the brown bits on the bottom of the Dutch oven with a wooden spoon. Cover with lid and cook in oven for 30 min. per pound or until internal temperature registers 160-165 degrees.  (I recommend checking the temperature with a probe type meat thermometer after 45 min. with a two-pound roast.)

Remove lid from Dutch oven.  Spread ¼ cup Chinese plum sauce over top of meat.  Turn broiler to high, broil for about 5 minutes or until glaze is bubbly and caramelized.

OLYMPUS DIGITAL CAMERA

Remove meat from Dutch oven to carving board.  Let rest, loosely covered with foil, about 20 minutes. Carve in ½ inch slices, arrange on platter.  Drizzle with braising liquid from pan.  Serve with additional Chinese plum sauce for dipping.  Alternatively, you could slightly thicken the pan juices:  stir a teaspoon of cornstarch in a ¼ cup of water, add that to the au jus, and cook for a couple of minutes, stirring constantly, for a glaze and sauce.  The pan juices are wonderfully flavorful, so whatever you do, don’t waste them!

OLYMPUS DIGITAL CAMERA

I served this glazed pork roast with stir-fried vegetables (carrots, celery, red peppers, broccoli, mushrooms, onions, garlic), tossed at the end with a glaze made of ½ teaspoon cornstarch mixed into 1 tablespoon of water and ¼ cup of the au jus from the pork.  I put a dollop of Chinese plum sauce on the plate as well, for dipping.

OLYMPUS DIGITAL CAMERA

I also cooked some rice for Dennis, but the pork and vegetables were enough for me.  We had leftovers, so I put the sliced meat in a zipper-top bag and poured the leftover braising liquid over them.  The meat was even better the next day after soaking 24 hrs. in that braising liquid.  Never before have I had roast pork be better the next day!

Now, for the Chinese plum sauce.  There are lots of recipes for plum sauce out there, but this is the only one I have tried, and I love it so much I will never make another.  I have altered it to suit my tastes and make it my own.  This recipe calls for whole spices tied into a spice bag and cooked down with the plums.  It would be possible to substitute Chinese five spice powder for the whole spices.  I would start with a teaspoon of five spice powder and then taste, adding more until I liked what I had.  This is what I did with the sweetness and salt levels when I made my sauce.  I worked with it until I got that tart-sweet, slightly salty, spicy, plummy goodness that is great Chinese plum sauce.  Use your taste buds as you are cooking!  That’s what they’re for.

A word about the plums.  I think the type of plum you use is all-important.  Some recipes call for black plums, and others use Italian prune plums.  Both of these are sweet plums, and given my experience making jam with both of them, I don’t think they would make the best sauce.  I think red plums, like Santa Rosas, with their tart-sweet flavor profile, make the best sauce.  Santa Rosas have red skins and reddish-yellow flesh, and they make a bright red jam.  When you use red or Santa Rosa plums to make this sauce, you’ll get a deep burgundy color that is absolutely beautiful, not to mention delicious as well.

OLYMPUS DIGITAL CAMERA

Homemade Chinese Plum Sauce:

(Makes about 4 pints of sauce, enough to can or freeze for later!)

4 lbs. red plums, pitted and chopped

½ cup pitted prunes, chopped

1 onion, chopped

4 cloves of garlic, chopped

¼ cup peeled, chopped fresh ginger root

½ cup rice vinegar (must be at least 4% acidity)

3-6 tablespoons dark soy sauce (or more to taste) *see note

1 ½-2 cups packed brown sugar (or more to taste) *see note

½ teaspoon crushed red pepper flakes (or more to taste) *see note

1 cinnamon stick, broken in pieces

2 star anise

½ teaspoon black peppercorns

½ teaspoon fennel seeds

Pitting plums isn’t a lot of fun, but it must be done.  (If you are working with plums that aren’t freestones, you will have a lot of pits with flesh left on them.  Consider saving these for making plum vinegar.)  Once the plums are pitted, they can be chopped coarsely in a food processor.  The onion, garlic, ginger, and pitted prunes can also be chopped in the food processor.

Tie the spices into a spice bag or several layers of cheesecloth.  Place the spice bag, the chopped plums and other ingredients into a large, non-reactive pan (stainless steel or porcelain/enamel-coated or glass).  Note: Start with the lesser amounts of soy sauce, brown sugar, and crushed red pepper flakes.  Cook on medium heat until mixture comes to a boil, stirring to prevent sticking.  Reduce heat and simmer until onions and plums are soft, about 30 minutes.

Remove the spice bag.  Puree the sauce in a blender or food processor (watch out for spitting steam—use a towel over the vent) in as many batches as necessary.  Don’t overload your blender or food processor.  You will just make a mess, waste your sauce, and possibly burn yourself.  Pour the sauce back into the pan and simmer, stirring to prevent sticking.  Taste the sauce and add more brown sugar, more soy sauce, or more red pepper flake if desired.  More rice vinegar can also be added if desired, and at this point, if you want to taste the sweet spices more, you can put the spice bag back in or add some Chinese five spice powder if you wish (start with a ¼ teaspoon and work up until you like the flavor).  Your sauce should be tart-sweet, slightly salty with the soy, and spicy but not hot.  You should be able to taste the sweet spices and feel just a bit of heat on your tongue from the red pepper flakes as well.  I added enough soy sauce and brown sugar to equal the larger amounts given in the recipe, and an extra pinch of red pepper flake, and I added some Chinese five spice powder, about 1/4 teaspoon as well, until the sauce tasted right to me.

Cook the sauce until it thickens slightly.  It won’t be as thick as jam, but almost.  A good consistency is that of canned tomato sauce.

At this point the sauce is ready to use.  You should have about 4 pints of the stuff but you might have less, depending on how much you cooked it down.  The sauce can be frozen in plastic containers or zip top bags or freezer safe jars, but I like to can mine in half-pint jars in a water-bath canner.  I’ll use half of the jar, typically, for one dish, and the other half for another dish in a week or so.  (It’s excellent on grilled chicken as a glaze.)  The sauce keeps well in the fridge even after being opened.

To can the sauce, clean jars should be sterilized for 10 minutes in a boiling water bath first, then filled with boiling sauce to within a ¼ inch of the tops, capped with hot flats and rings, and processed in the boiling water bath for 5 minutes, or longer if you live at altitudes above 1000 ft.  Consult an altitude chart for correct processing times for your altitude.

As with most good things, Chinese plum sauce requires some time and effort, but the work involved is well worth it, in my opinion.  I’m looking forward to making more this summer.

Standard
Leftovers, Recipes

Roasted Vegetable Stock

I love finding ways to use scraps.  I’ve written about using apple scraps for vinegar making and pectin stock, and meat scraps and bones for meat broth or stock.  I’ve also explored ways to use dried tomato skins leftover from canning tomatoes and making salsa.  This week’s post is also about using scraps to make something delicious.  I referred to roasted vegetable stock with brief directions in last week’s post, so it occurred to me to devote a little more space to it.

For years, I threw my vegetable peelings and trimmings in the compost pile, or when we had chickens, into the chicken bucket.  And those are good ways to use vegetable waste.  But you can do something else with them before they go to the garden or the chickens.  You can make stock.

I remember reading, a long time ago, about pioneer women who kept stockpots simmering on their wood-heated cookstoves all the time.  The stockpot was never empty because any sort of meat or vegetable scrap went into the pot along with water to replace whatever might be used or might evaporate.  This was common practice when the woodstove was kept going nearly all the time for cooking and baking and heating purposes.

With the advent of electricity and gas for cooking, the simmering stockpot has fallen out of favor.  Most of us buy stock or broth in cans or cartons, rather than make it ourselves.  But it is so easy to make, takes very little time, and adds a flavor to soups, stews, beans, rice, etc. that you just won’t get out of a can or carton from the store.  And you don’t have to read a label on homemade stock to see if there’s anything in it you don’t to consume, like monosodium glutamate, a common additive in canned and boxed stocks.

You might not think a few carrot peelings, onion scraps, and celery bottoms and tops would amount to much, but if you follow this simple procedure, I guarantee you won’t believe the flavor of the stock you’ll get: fully vegetable with a rich roasted taste.  When you use it in a dish, this stock adds such deep flavor, it’s hard to believe it came from vegetable scraps.

When you are making salads or soups or stews, or whatever you’re cooking which requires you to prepare the holy trinity of vegetables, simply save your carrot ends and peelings (scrub the carrots first with a brush), clean celery trimmings, and onion tops (not bottoms because dirt can hide in the root ends) and any tough outer layers, and freeze them in a gallon-sized zip top bag.  When the bag is full, you have enough vegetable matter to make stock.  You can make stock out of other vegetables too.  You might want to have a bag of onion and pepper trimmings, or some other combination.  Think about the dishes in which you might want to use the stock, and bag up your vegetable scraps accordingly.

Then, when you have at least a full gallon-sized bag (it’s hardly worth it to do it sooner), thaw your vegetable scraps.  Drizzle a tablespoon of oil (I never use “vegetable” oil any more because it is mostly soybean oil, so I usually use olive oil) onto a large cookie sheet, and spread your thawed scraps out.  Drizzle a little more oil on top of the vegetables, not more than a tablespoon, and toss them to spread the oil around a little.  You may need a second sheet to get them spread thinly enough, depending on how big your baking sheets are.  Sprinkle the vegetables with about a ½ teaspoon of kosher salt and ¼ teaspoon of finely-ground pepper.

OLYMPUS DIGITAL CAMERA

Roast your scraps at 425 degrees until they are deeply browned but not charred.  (If a few pieces char, try to pick them out.  They do not add a nice flavor to the stock.)  Stir them and spread them out again after roasting for 10 minutes.  Stir again every five minutes until the vegetables are really nice and brown.  It might take up to 30 minutes or even longer, depending on how wet your scraps are.

OLYMPUS DIGITAL CAMERA

Scrape the browned scraps into a large stockpot and just cover them with water.  Adding seasoning at this point is a matter of personal preference.  I like my stock very lightly salted so that I can be sure it won’t add too much salt to whatever dish I’m using it in.  You can always add salt, but you can’t take it back once it’s in the pot.  To about two quarts of water, I add one teaspoon of salt and ¼ teaspoon of pepper.  The stock will taste under-salted at first but as the liquid reduces, the salt will remain and the salt flavor will intensify.  You can add more salt if you wish, but be careful, because whatever dish you are using the stock in will likely have its own seasoning requirements, so you can get too much salt in a dish if your stock is fully salted.

OLYMPUS DIGITAL CAMERA

Bring the stock to boiling and then reduce the heat, cover, and simmer for at least an hour.  The longer you cook the stock, the richer the flavor will become as it reduces, but of course, you don’t want it to boil down to nothing!  If you want a reduction, you can strain off the stock, pressing well on the scraps to get all the liquid out of them, then pour the stock back in a clean pan to boil down by half or more.  This will make a highly concentrated stock that you would use in a dish that doesn’t require much liquid but needs strong flavor.  If you want to make a reduction, you need to be very careful about how much salt you add to the stock at the beginning of the cooking process because none of it will go away, and your reduction will become saltier and saltier as the liquid evaporates.  I don’t typically make reductions because most of the dishes I use stock in require more liquid than a reduction provides.

OLYMPUS DIGITAL CAMERA

When you’re satisfied with the color and flavor of the stock—and remember, unless you are making a reduction, it won’t taste salty, so what you’re looking for is intense vegetable flavor—you can strain it through a wire mesh strainer or a cheesecloth-lined colander.  I strain mine into a 2-quart measuring cup to make it easy to pour into freezer bags after it has cooled.  You can use the stock right away, refrigerate it for a few days, or freeze it.  It can also be canned, but I don’t bother because I don’t make that much at a time, and I know I’ll use it up fairly quickly.  I freeze my stock in 2-cup measurements in quart zip-top bags, laid out flat on a cookie sheet, so they stack nicely in the freezer when frozen.  Sometimes, I gather four or five quart bags together into an old, washed, gallon-sized bag, to keep them together and make it easier to find them in my over-stuffed freezer.

OLYMPUS DIGITAL CAMERA

Most vegetable stocks are light in color and flavor.  Because the vegetables in this stock are roasted brown, this stock has more color and more flavor than what you’ll buy in the store.  This will affect the color of whatever dish you put it in, so if you’re going for a light-colored dish, you won’t want to use this stock.  If you’re going for richness and flavor, this stock is a winner.

I made two quarts of roasted vegetable stock two weeks ago, and I have already used three bags of it.  I used one bag in my Bear and Mushroom Fricassee with Creamy Polenta, one bag in another batch of my Spicy Sausage and Lentil Soup last week, and one bag in Bear Stroganoff with homemade sour cream, which will probably be the subject of next week’s blog.  I only have one bag of frozen stock left, and I’m itching to make more.

Of course, after the stock is strained, you can still feed the scraps to your chickens or pigs or add them to the compost pile.  I think that’s something to feel pretty good about.  Waste not, want not.

Standard