

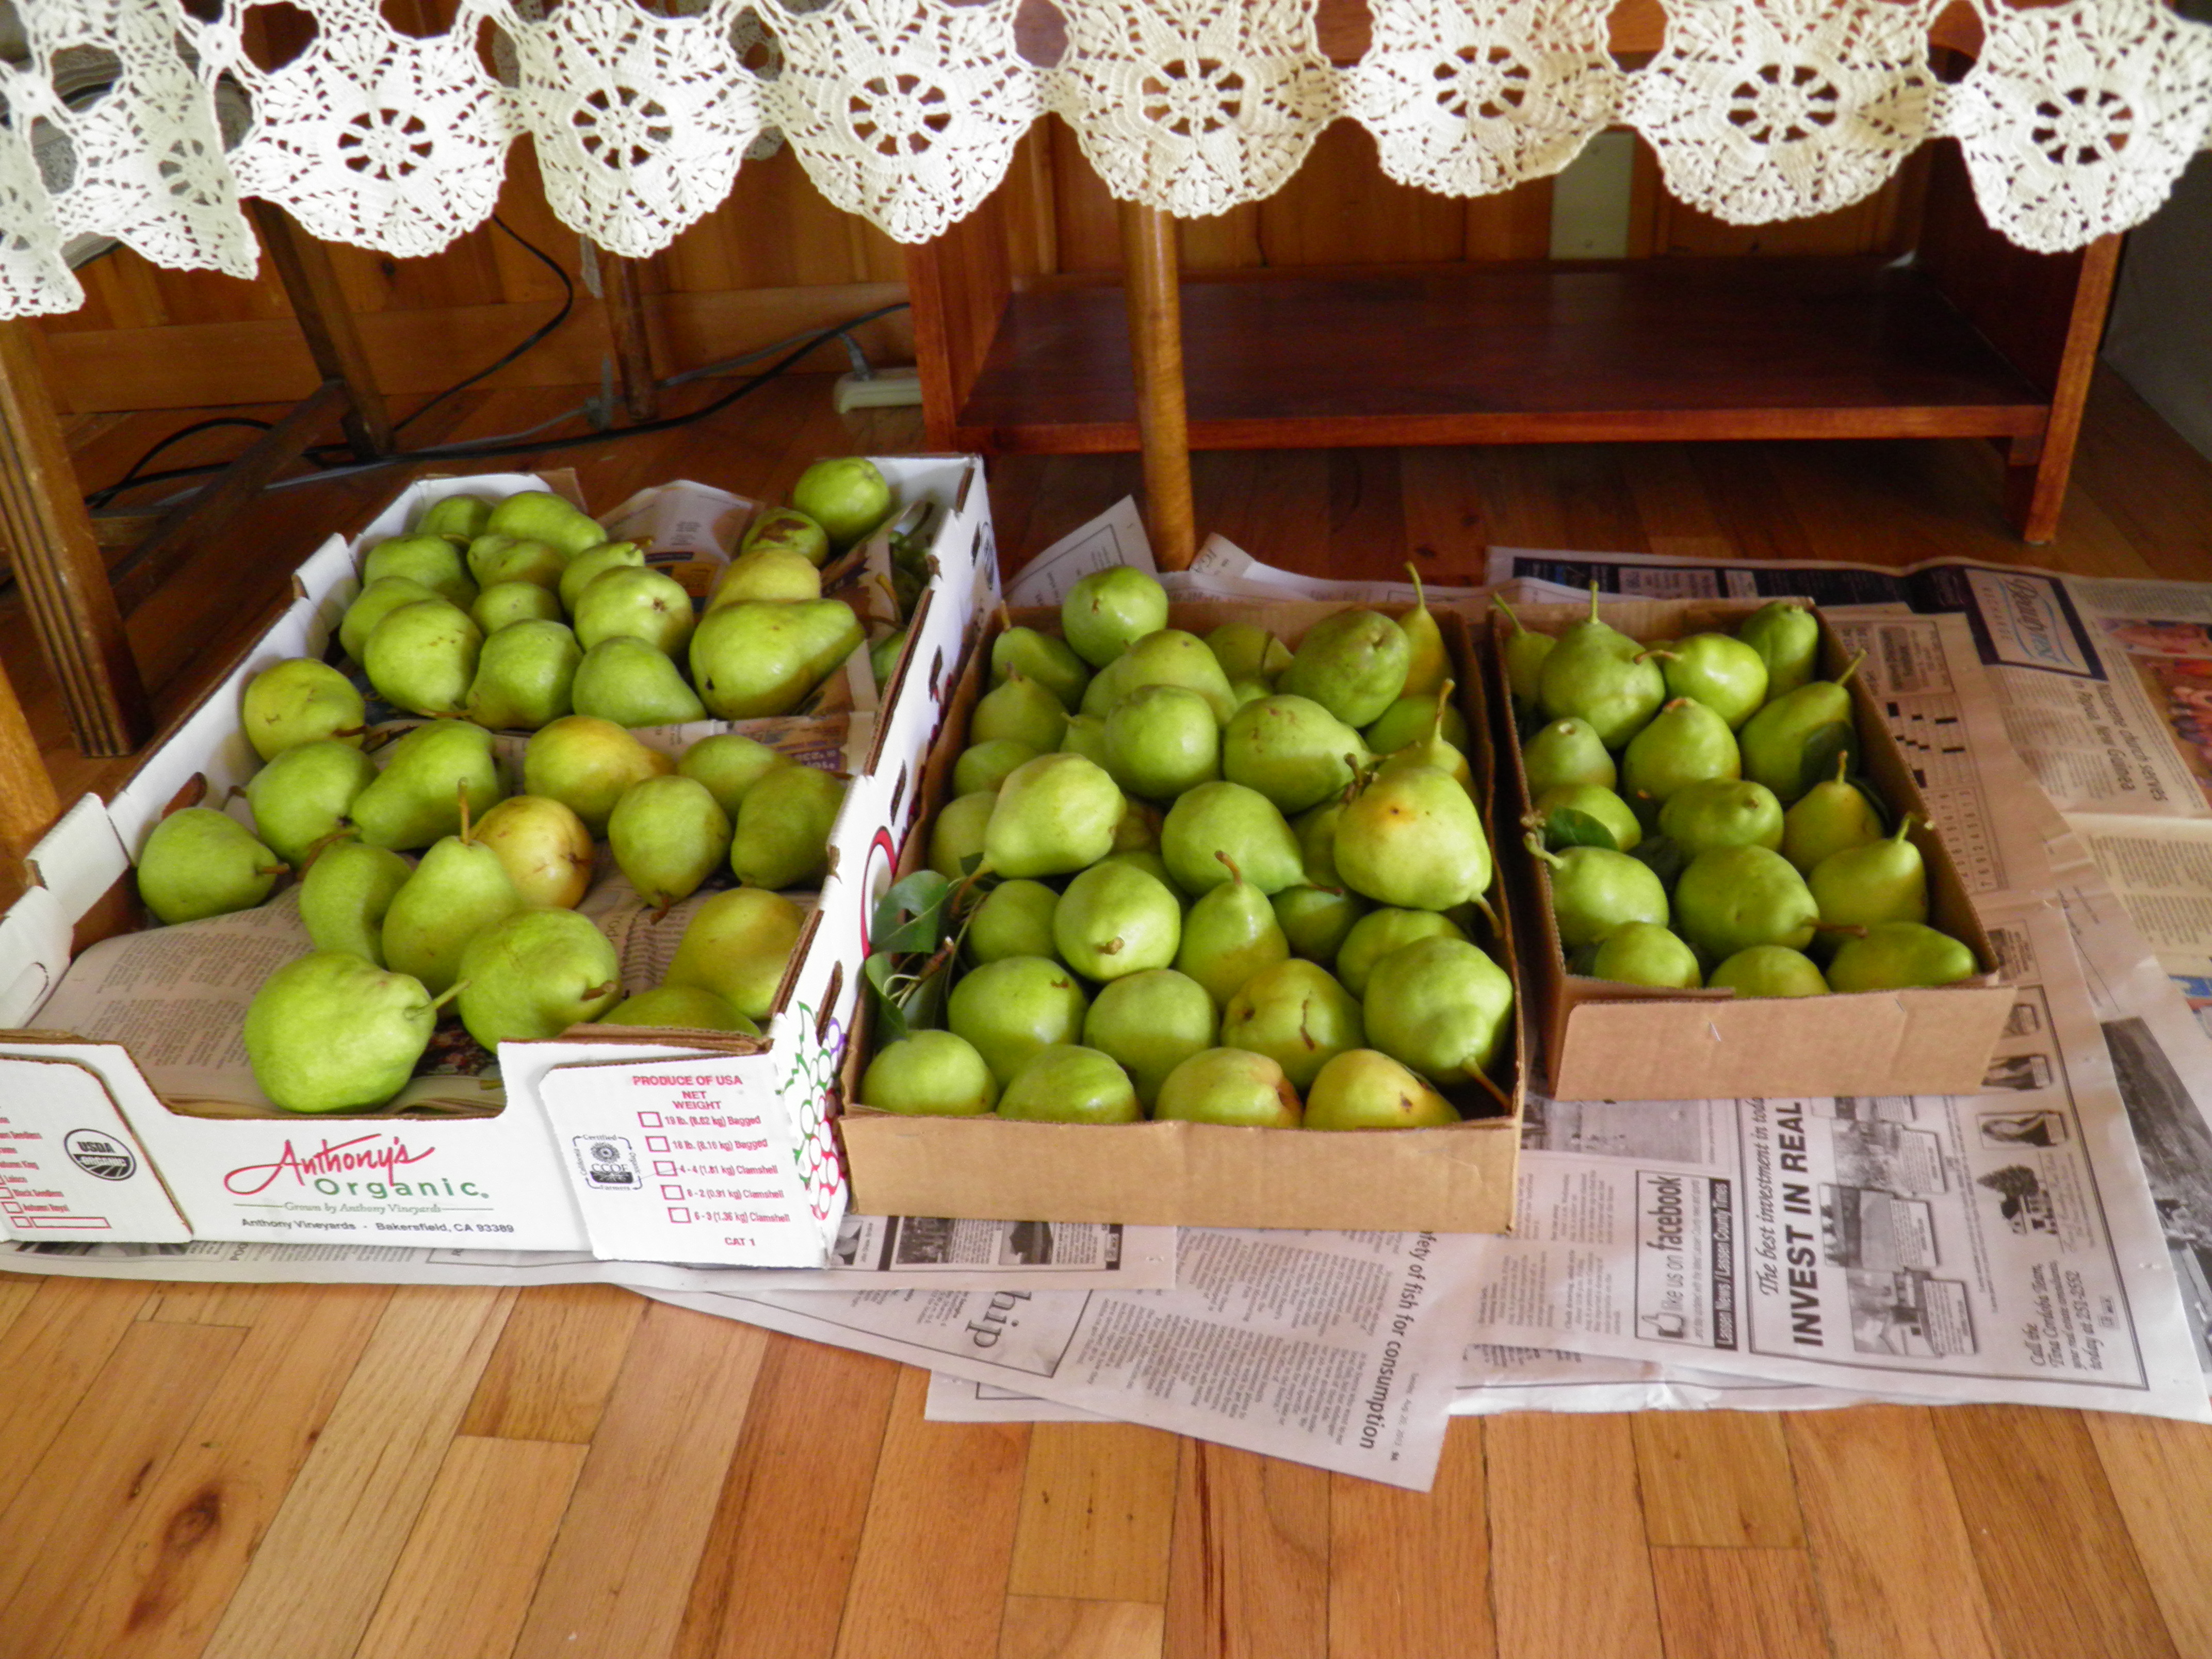
I’ve done it again. I’ve scavenged too much of a good thing. (For more on my scavenging habits, see the post “Scavenger.”) This time, it was pears. I haven’t canned pears in years; now I remember why! But I was inspired by some recipes I saw made up online, so I put the word out on my community Facebook page that I was looking for pears to can. And folks generously responded. Three people, and later a fourth, let me know I could pick their pears. As I always do, I’ll be bringing something back to them when the pear craze has left me. As of this writing, I have spent four days working with pears. The photo below shows some of the pears sitting underneath the dining room table (which is covered by my husband’s grandmother’s hand-crocheted tablecloth).
The first recipe, pear mincemeat, comes from Tina Harrington’s Facebook page, Cooking on the Sagebrush Sea. I don’t know where she found it. I found a similar recipe in my 1981 Ball Blue Book, which my mama gave me when I was married (along with a water bath canner and pressure canner). The Ball recipe, however, calls for vinegar, and Tina says she doesn’t like the vinegar-based mincemeat. I was so glad she talked me out of the vinegar, because after I made her recipe, I found it hard to imagine how adding vinegar could improve it. The beauty of pear mincemeat is that you don’t have to peel the pears. Simply core them and chop them in the food processor. This is the perfect recipe for very ripe pears that wouldn’t peel and can well in halves, or for too-green pears that wouldn’t have enough flavor to can. I made pear mincemeat out of the first box of ripe pears.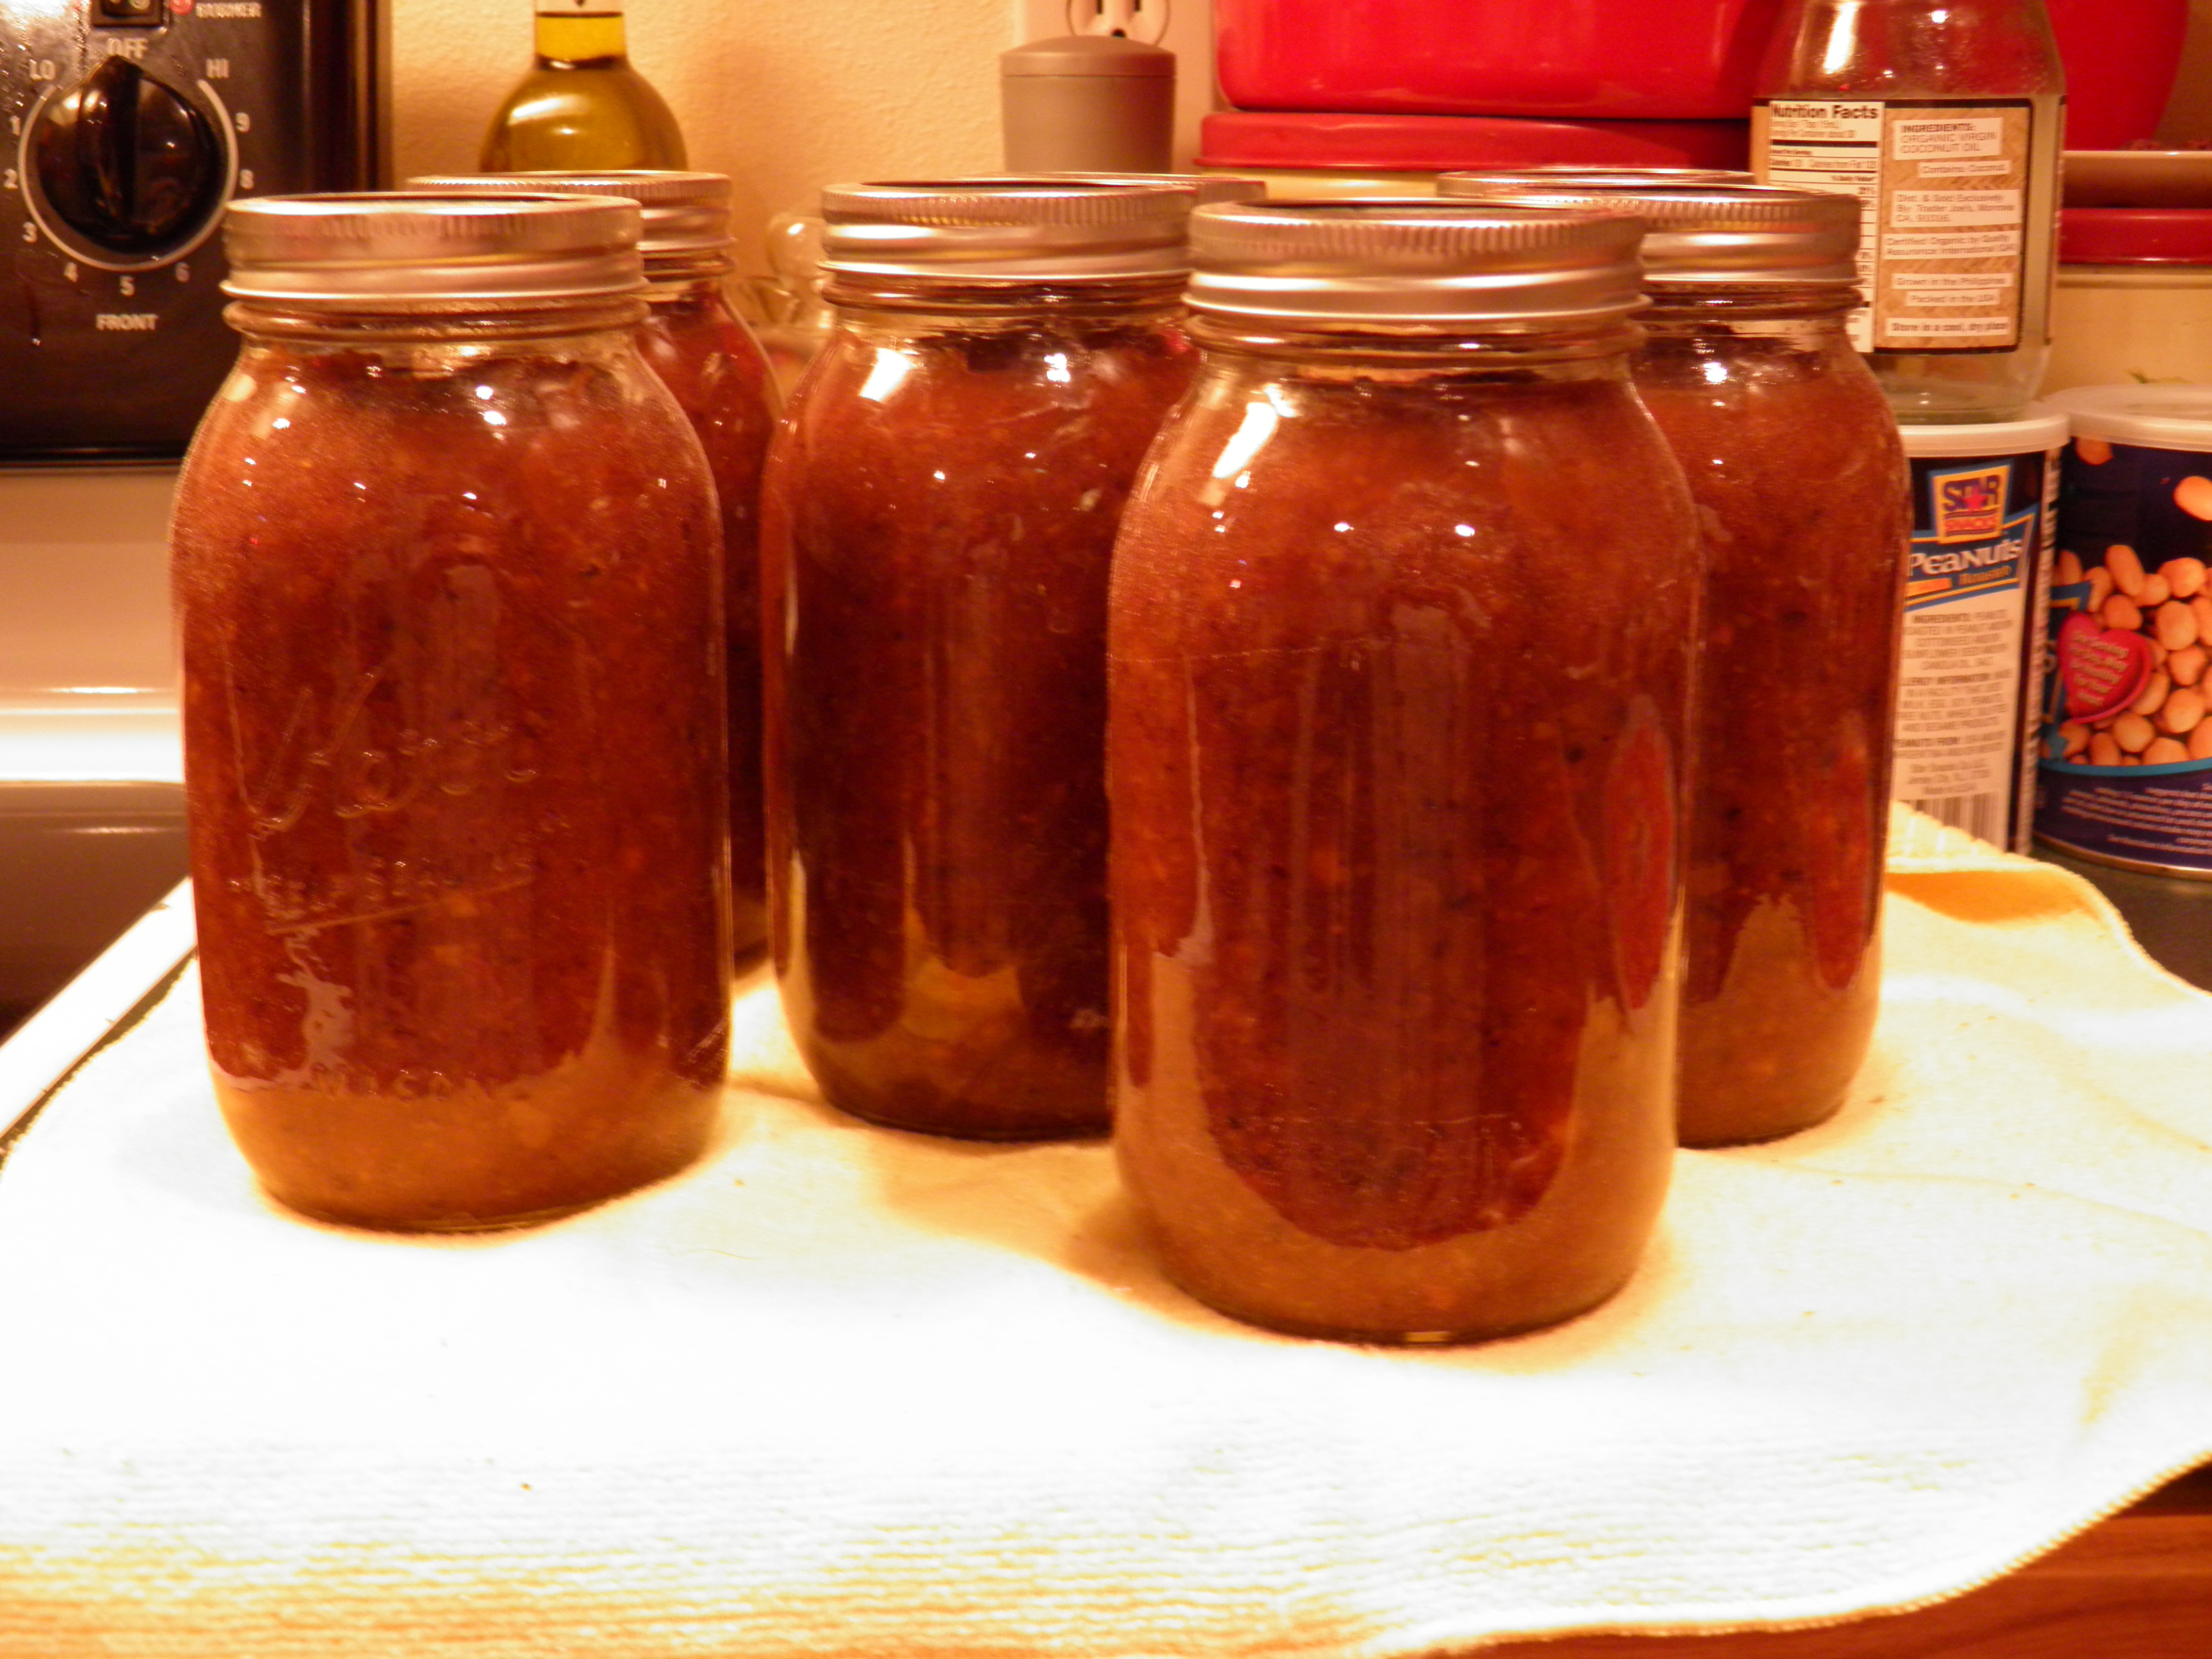
Day One
Pear Mincemeat
7 pounds pears
1 pound raisins
1 whole lemon
1 T each of cinnamon, nutmeg, clove, and allspice
1 tsp. fresh grated ginger
6 3/4 C sugar (or less, to taste: for a double batch, I used 9 ¾ cups)
In a food processor with a blade attachment, chop the cored and quartered pears, the raisins, and the whole lemon (ends and seeds removed). Add the spices and sugar and cook about forty five minutes until it’s thickened. Process in water bath canner for 25 minutes, leaving a half inch headspace. This can be done in pints or quarts. A quart is enough to make one nine-inch pie.
As usually happens when I decide to make a recipe I’ve never made before, I didn’t have enough of something I needed, in this case, raisins. I live 14 miles from town, and I didn’t have time for a raisin run, for crying out loud! So I taxed my brain and came up with a substitute. Last year, I dehydrated some prune plums I was given, and I left them in the dehydrator too long. They are so dry and hard, it would take teeth and jaws of steel to chew them, and even then, I’m not so sure. I stuck them in the freezer last fall while I tried to figure out what to do with them. Ta-da! I got those babies out, rehydrated them in some warm water while I cored pears (and yes, rehydration was necessary because even the food processor blade couldn’t chop them otherwise; I’d already tried that) and then drained the prunes and added them to the mix in the food processor. The flavor is excellent. If I make this recipe again, I might sub in prunes for half the raisins on purpose.
Day Two
Pears in Dark Ginger Syrup, and other good things
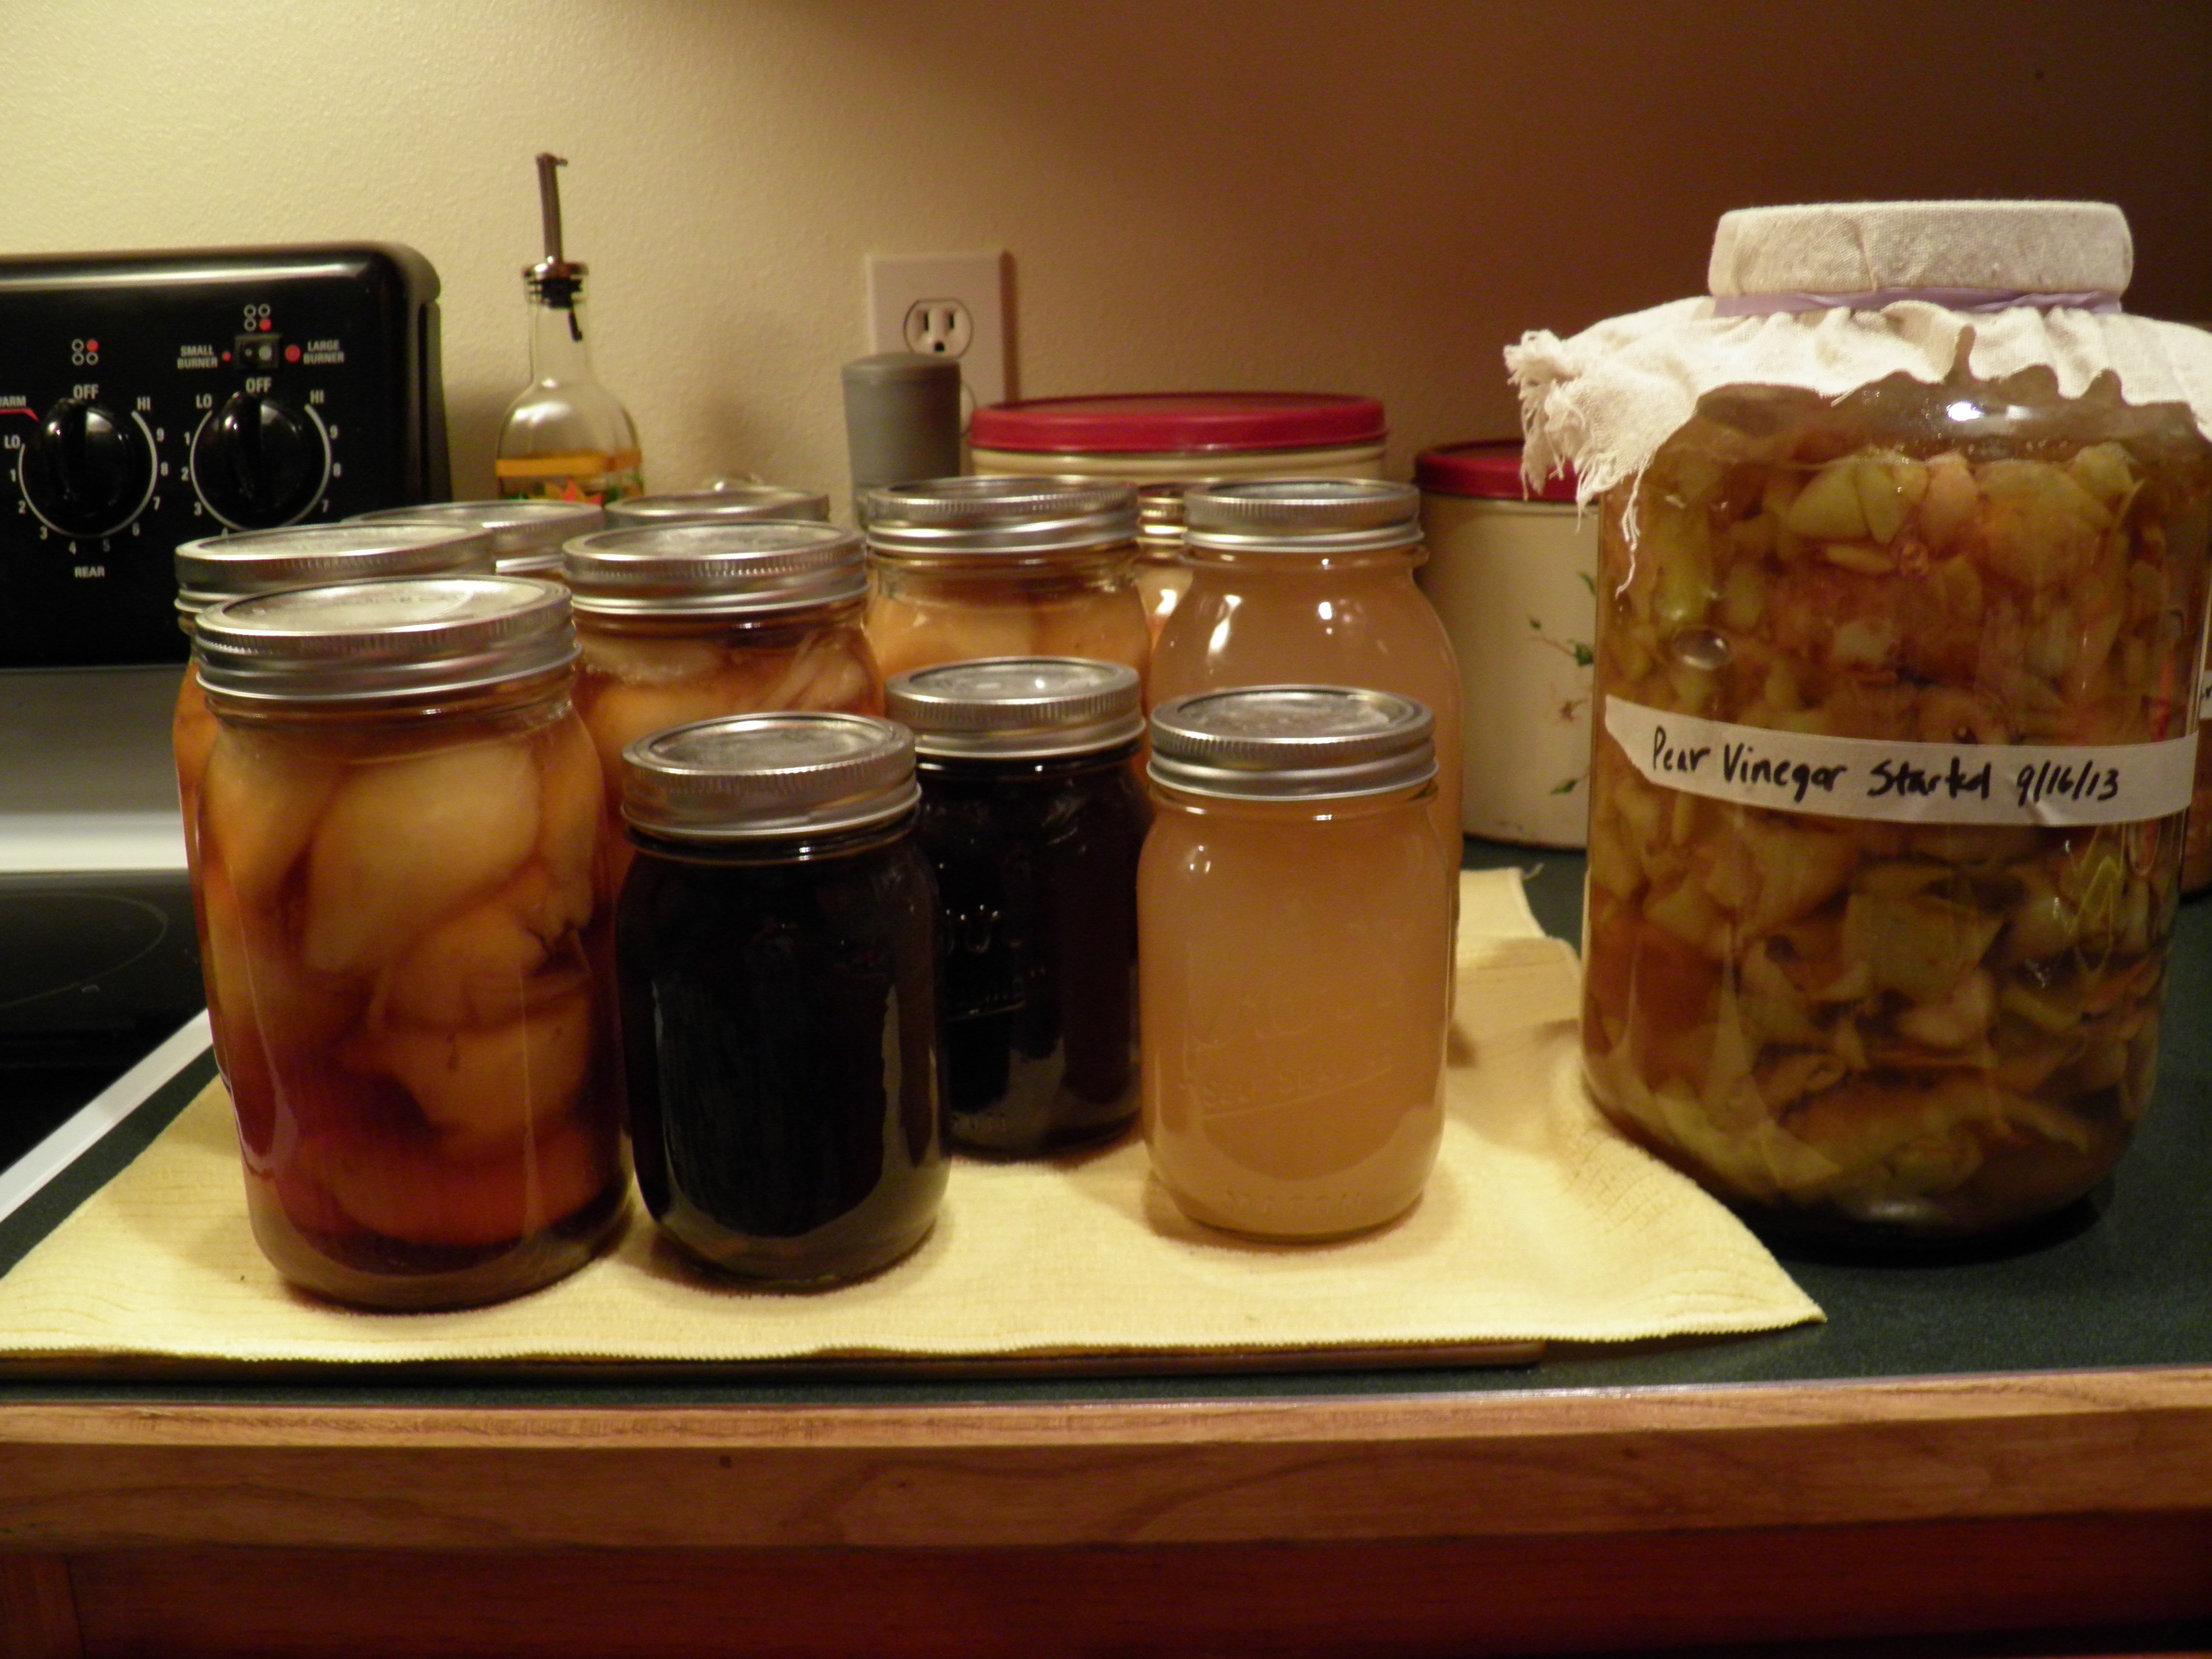
The next batch of recipes comes from Rebecca, the Foodie with Family. With twenty pounds of pears, I made her three-in-one pear recipes. It took me all day to peel that many pears, and I worked in batches because I didn’t want the pears I’d already peeled to darken.
Rebecca’s recipes are so smart for several reasons. First, they use up all the ingredients you use to prepare the pears. How many times have I looked at the water I’ve used to treat the fruit for darkening and thought, look at all that good juice going to waste! Well, with Rebecca’s recipes, it doesn’t. It’s turned into “juice” and canned, and it tastes really, really good! Her pear halves in dark ginger syrup recipe is smart because even though you dunk the pears in a lemon water bath (which becomes “juice” when you’re done), if you are slow, like me, your pears will still start to darken a little before you have enough ready to can several jars. The dark ginger syrup takes care of that. It’s made with raw sugar (or light brown sugar if you don’t have any raw or prefer not to buy it) so it’s dark, and it hides the little bit of browning that would otherwise show through a clear syrup made with white sugar. And the ginger is delicious.
That syrup is so good, you just have to can up what’s left over after you’ve canned your pears. I usually have syrup left over after canning fruit. I save it and use it again if I’m going to can more of that fruit, or sometimes I use it in a different fruit (like using the syrup left from canning Purple Prince plums to give a little color and more flavor to white peaches), but sometimes it sits in the fridge and spoils. Now I have two sealed jars of dark ginger syrup which I can open up and further reduce, if I so choose, for pancakes and waffles, or I can add it to any number of fizzy drinks or mulled wine, or I can drizzle it over ice cream or pie. So smart!
And finally, the “juice.” I made a double batch of pears in dark ginger syrup, so my acidulated water was extra juicy. I had a few pears that were really darkened, so those were the ones I left in the water to cook up the juice. I saved the pulp from the juice for pear butter, which I was making the next day with the pears that were too ripe or too compromised by bruising and bugs to can in halves. I got a quart and a pint of juice, beautiful stuff, and a cup left over to start off my pears for pear butter. For somebody like me who has a thing about cutting down on waste, Rebecca’s recipes are so welcome. I hope you’ll check out her Three-in One pear recipes.
I would add one thing to Rebecca’s three-in-one pear recipes to make them four-in-one. Pear vinegar! Yes, save those pear peelings. Let them age and brown in a bowl (covered if you have a fruit fly farm in your kitchen like I currently do) while you work with the pears. Then, when you’re done with everything else, put your pear peelings (and cores if they aren’t wormy) in a large, clean jar, and cover the peels with distilled water. Don’t overfill the jar! Pears ferment quickly, so leave several inches of head space. Put the jar on a plate in case of spillage while fermenting. Cover the mouth of the jar with some breathable fabric, secured with a rubber band or twine, to keep the fruit flies out, and stir every day. In 6-8 weeks, you’ll have pear vinegar. See my previous post, “Waste Not, Want Not,” for more instructions for making fruit scrap vinegars.
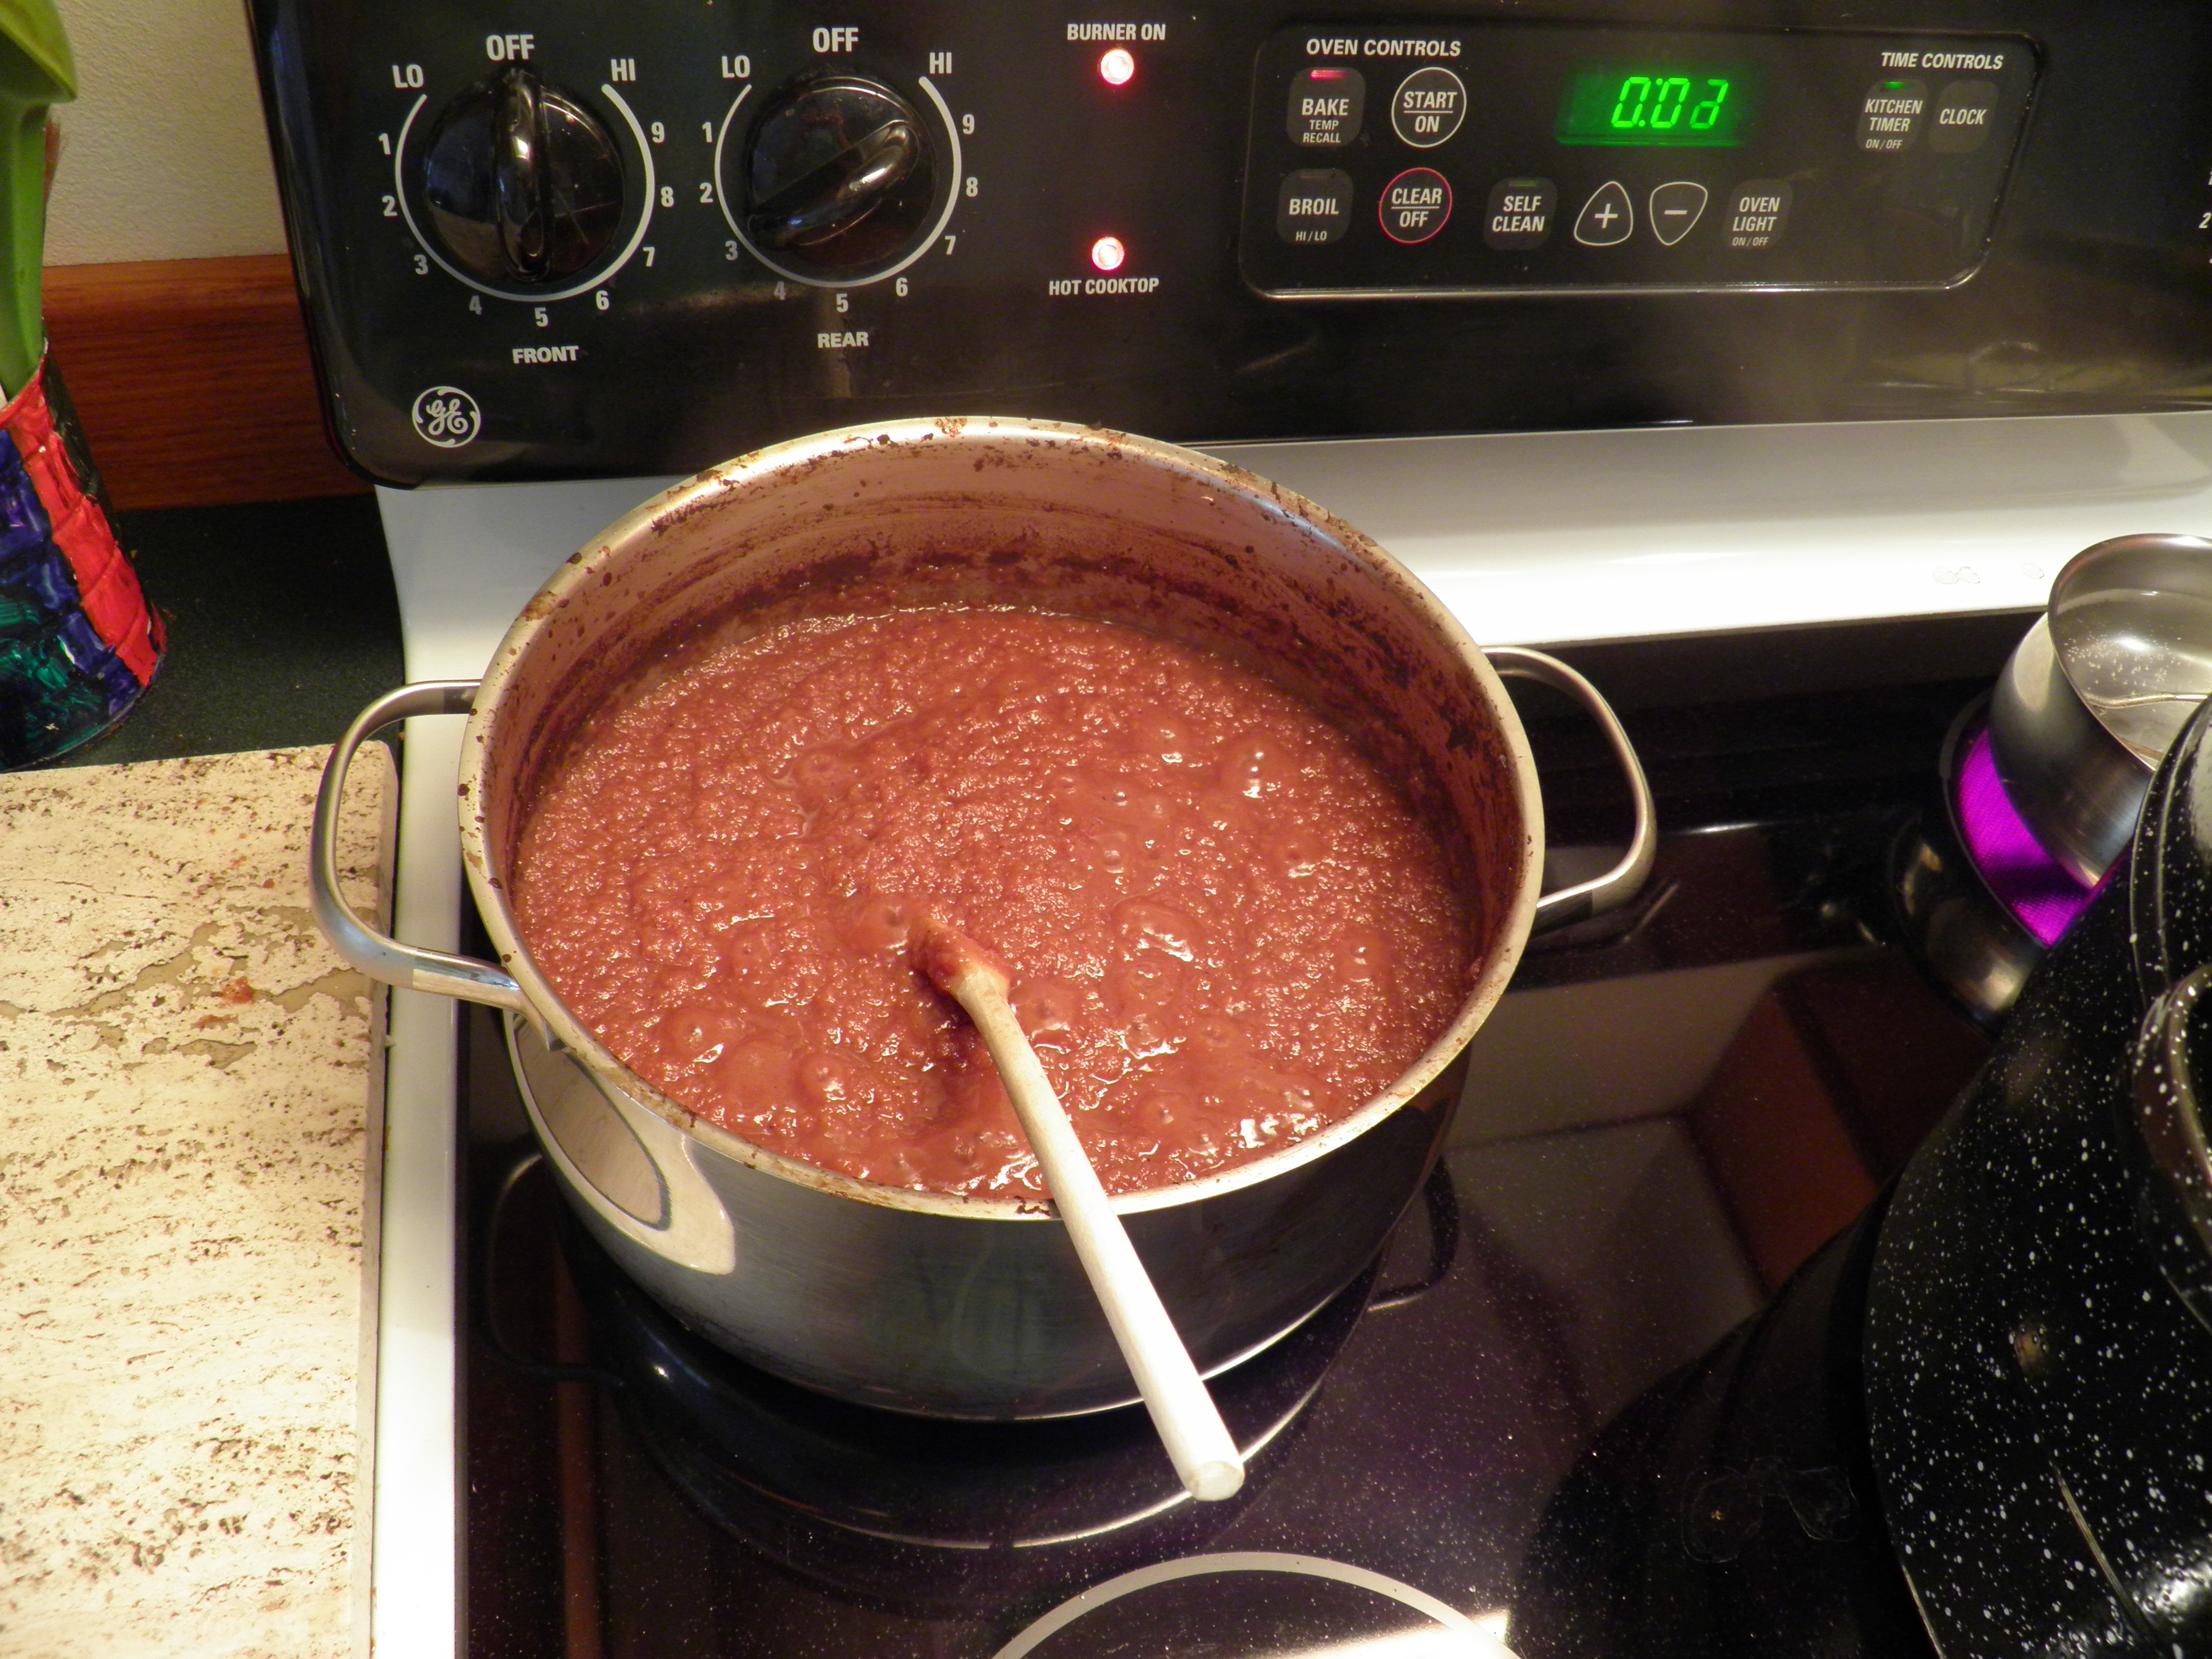
Finally, pear butter, which took two days. My hands were so tired, and the right one so swollen from canning three-in-one pears the day before, that the final box of very ripe, bruised, and worm-damaged pears had to be processed simply. Pear butter was the answer. It could have been pear sauce, but I knew that I would be so slow in getting the pears cut up that they would darken more than I’d want for sauce. So butter it was, since it cooks for a long time and darkens as it cooks.
I had to core most of these pears because they were wormy. I think the best way to do this is to quarter them; then, with a paring knife, it’s easy to cut out the core and any bad spots. For pear sauce or butter, there’s no need to peel if you’re going to run them through a strainer. If you have perfect pears, no worms, there’s no need to core, either. Just quarter them (or cut them in chunks if they’re very large pears) and get them into a large pot with either water, apple cider or juice, or pear cider or juice, about half an inch, in the bottom of the pot.
I had some of the pear “juice” left from processing pears in dark ginger syrup the day before, about a cup of it, and that went in the bottom of the pot to keep the pears from sticking until they started to render their own juice.
Don’t turn the heat under the pot on high. The pears will scorch to the bottom. Use a medium heat and stir frequently, as in about every five minutes. If your pears aren’t juicy, you may need to add more liquid, but don’t add any more than is absolutely necessary to keep your pears from sticking, because for pear butter, you’ll have to cook out all the liquid you add, and then some, to get the thick, rich consistency of a fruit butter.
I don’t recommend peeling your pears before you cook them because the pectin in the skin helps give the butter a glossy look and thicker consistency. It’s best to buy a strainer or simple colander and pestle (this one came from an antique store for $8!) and rub them through to remove skins and cores. It doesn’t take long, and it’s a good workout for your arms.

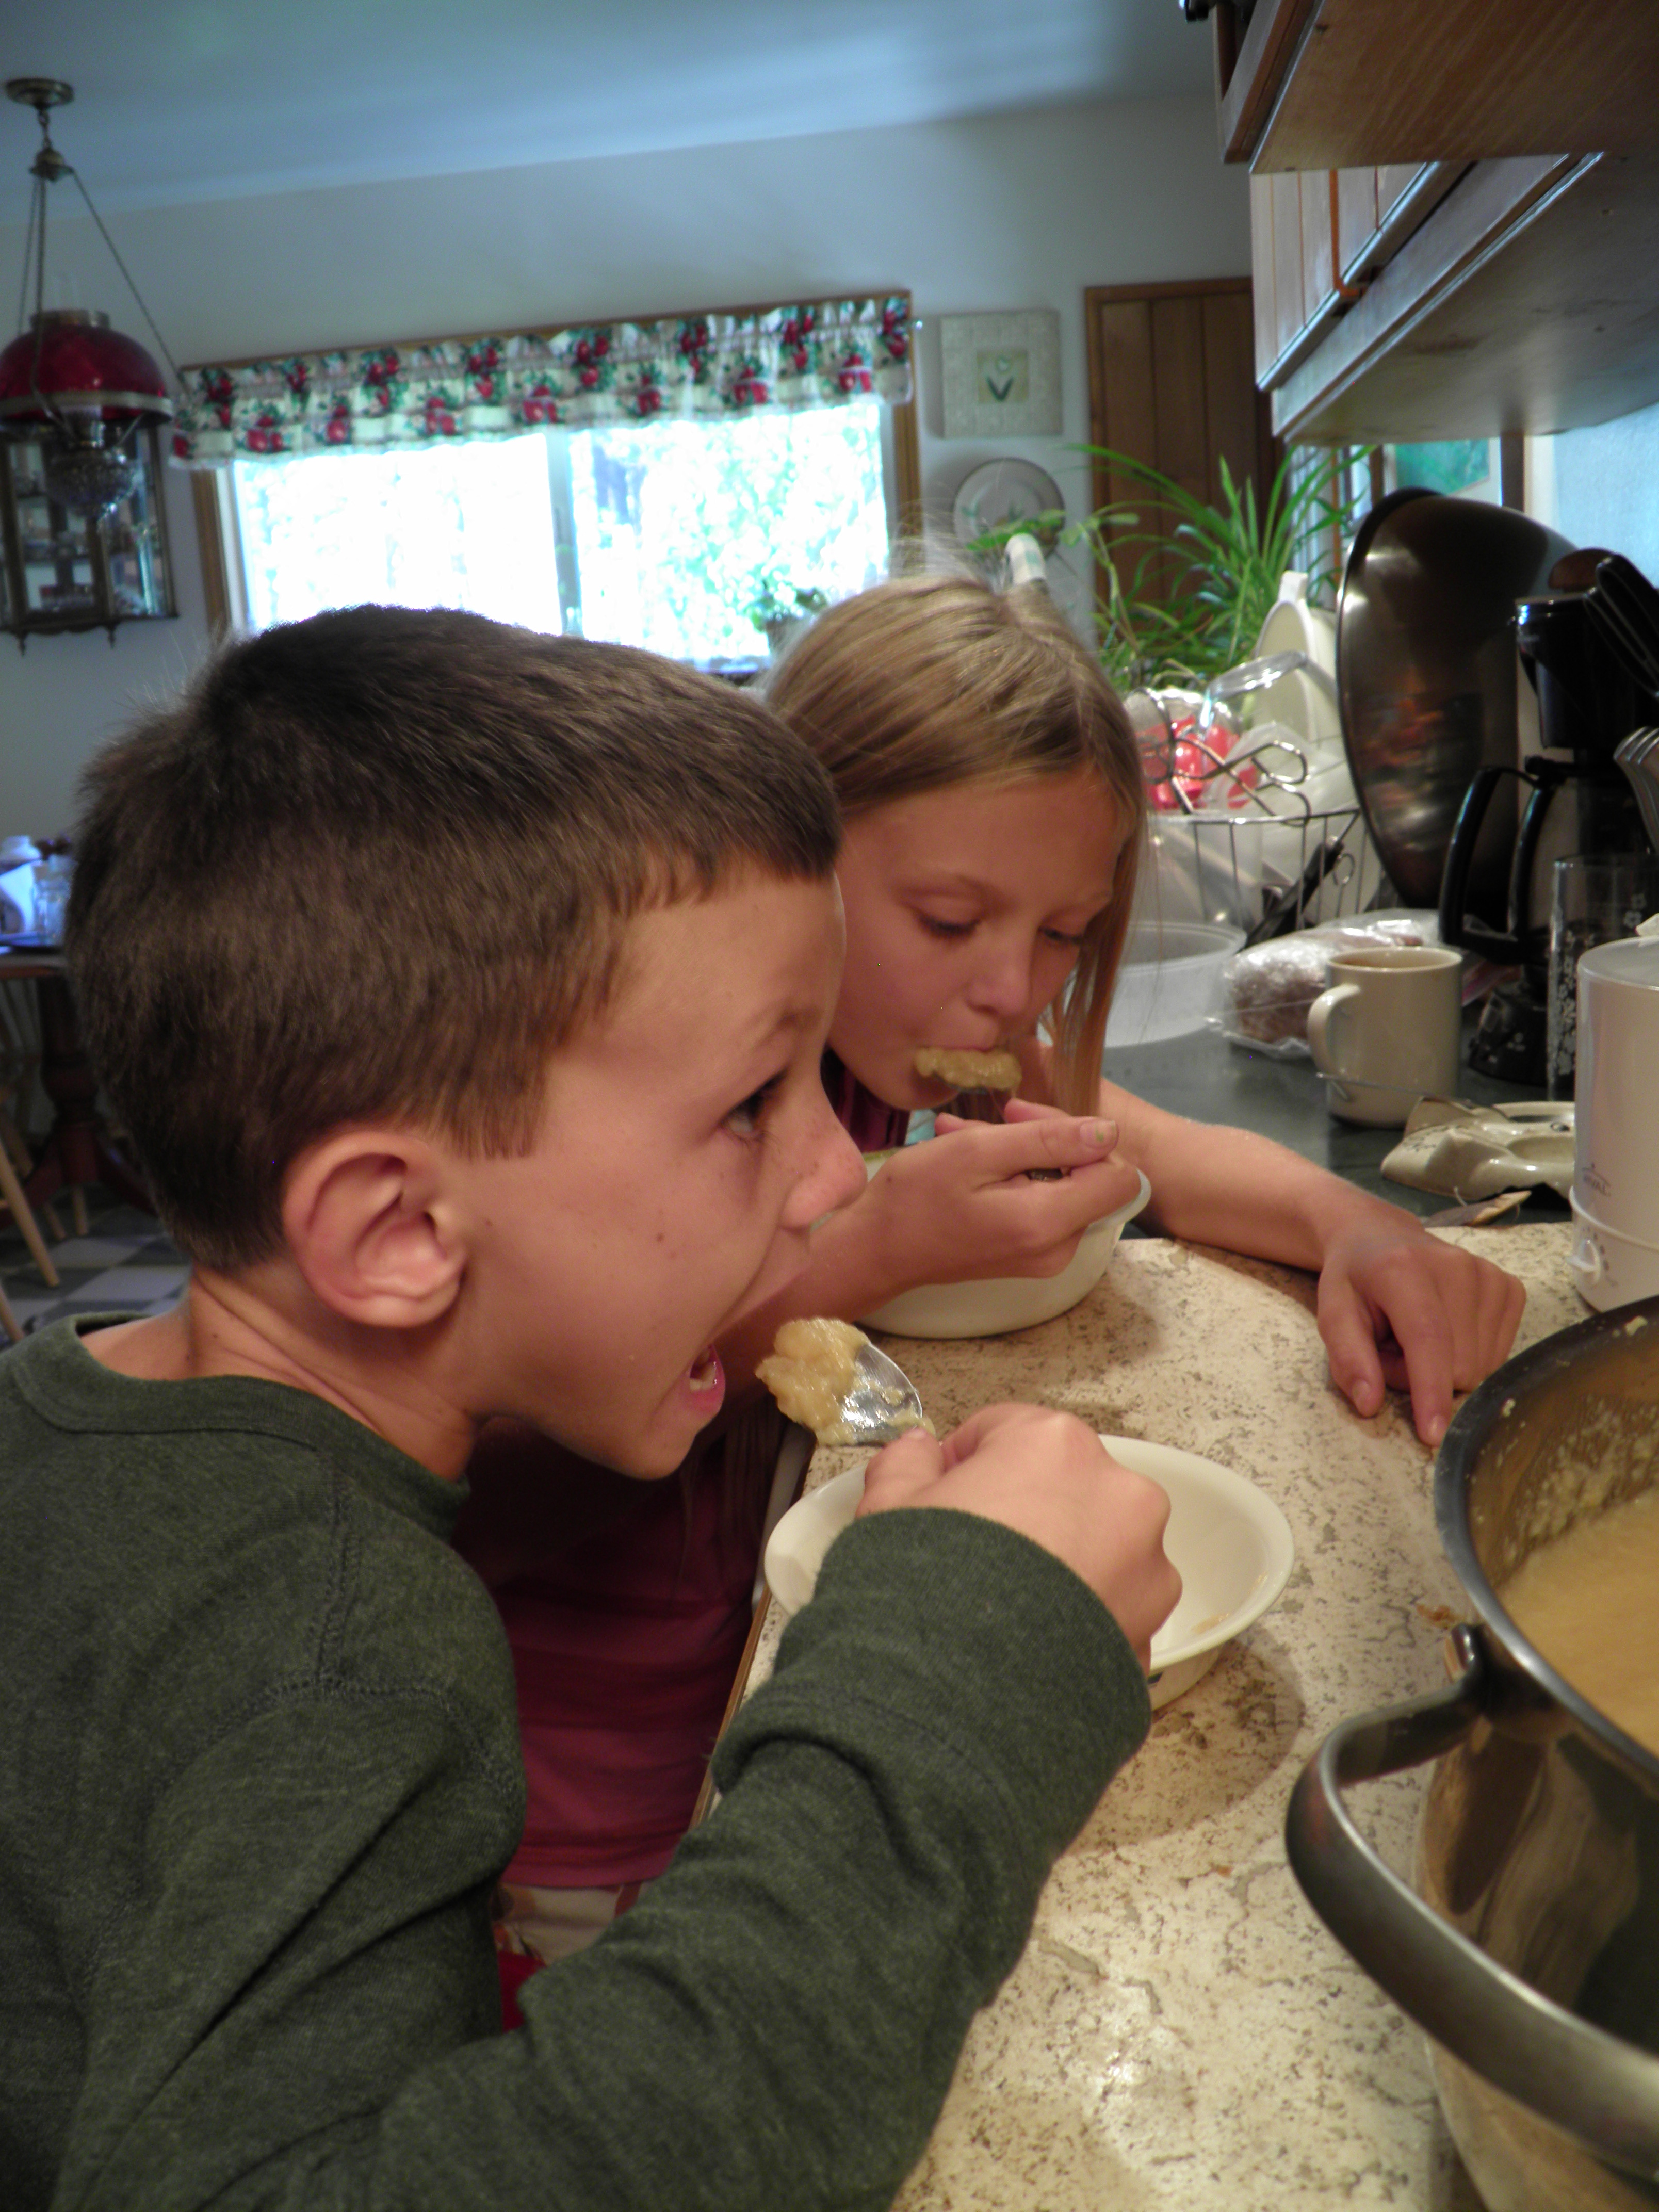
I had the best help with this one. My grandkids came over after school and helped run the cooked pears through the chinois (or cone colander, as I grew up calling it). They enjoyed a bowl of pear sauce as a reward while I added the sugar and spices and put the sauce on to cook down into butter. (Then we went out to the garden and picked apples, so you can guess what the subject of a future post will be.)

Day Three
Pear Butter
11 lbs. ripe pears, cored if necessary, quartered, cooked until soft, and strained to remove peels and cores. (I had about 6 qts. when cut up and cored, 4 qts. sauce after cooking and straining. If you want to stop at this point and can pear sauce, simply follow the directions in any canning book for canning applesauce. For pear butter, keep going!)
To strained pear sauce, add:
2 cups sugar
1 T. cinnamon
2 t. nutmeg
1 t. cloves
1 t. allspice
1 t. fresh grated ginger (or ½ t. dried, powdered ginger)
The amount of sugar and spice you add is really according to individual taste. I don’t like things very sweet, and I do like them spicy. Taste your sauce/butter after a few hours in the oven or crock pot. If it isn’t sweet enough, add more sugar. For this recipe, I started with one cup of sugar and added another cup about halfway through cooking. That was perfect for my taste. But you might like things sweeter or not as sweet as I do, so start with less and add more as you go. The same with spices. If you don’t like a lot of spice, reduce the amounts given here and taste, adding more if you want it spicier. Be careful with cloves. It’s a powerful flavor, and one that I love, but if you use too much, it will overpower the pears and the rest of the spices.
Bring all ingredients to a simmer over medium heat in a large, oven-safe pot. Bake in 300 degree oven until thick and reduced by one-third to one-half. You can do this in a crock pot; many people do, but I don’t think the crock pot gives the same flavor that roasting in an open pan in the oven does. But it’s up to you which way you want to cook your butter down. I don’t recommend boiling it down on the stove; both pear and apple butters are prone to scorching when cooked on the stove top, although it is faster. Typically, I cook my butters down for about 18 hrs, part of that time overnight, when I’ll lower the temp on the oven to 225 degrees. Then when I get up in the morning, if it’s not quite ready to can, I’ll raise the temp back up to 300 while I get the canner and jars ready. Usually, it’s ready by then. When the butter is thick and dark and tastes rich and spicy, and it will mound in a spoon, it’s ready to can.
Wash jars and start water bath canner heating. You will need about 5 pt. jars for this amount of pears, if you have reduced the butter down by one-third to one-half. I always prepare a few extra jars, just in case. Some fruits are larger, heavier, and juicier than others, and some people get impatient and don’t reduce as much as they should! Always sterilize your jars in your boiling water bath canner for 10 minutes before adding the butter to the jars. Bring the butter up to boiling on the stove top. This is a thick product, so leave ½ to ¼ inch headspace in the jar. I leave ½ inch. Seal with heated flats and rings and process in boiling water bath for 10 min. if below 2000 ft. elevation. Consult an altitude chart for adding time for higher elevations. This recipe makes about 5 pts.
The flavor profile of this pear butter is very similar to that of the pear mincemeat, but without the lemon of the mincemeat, and with a smooth, buttery texture. Spread this stuff on homemade bread or biscuits, and it’ll be heaven in your mouth, honey. I guarantee it.
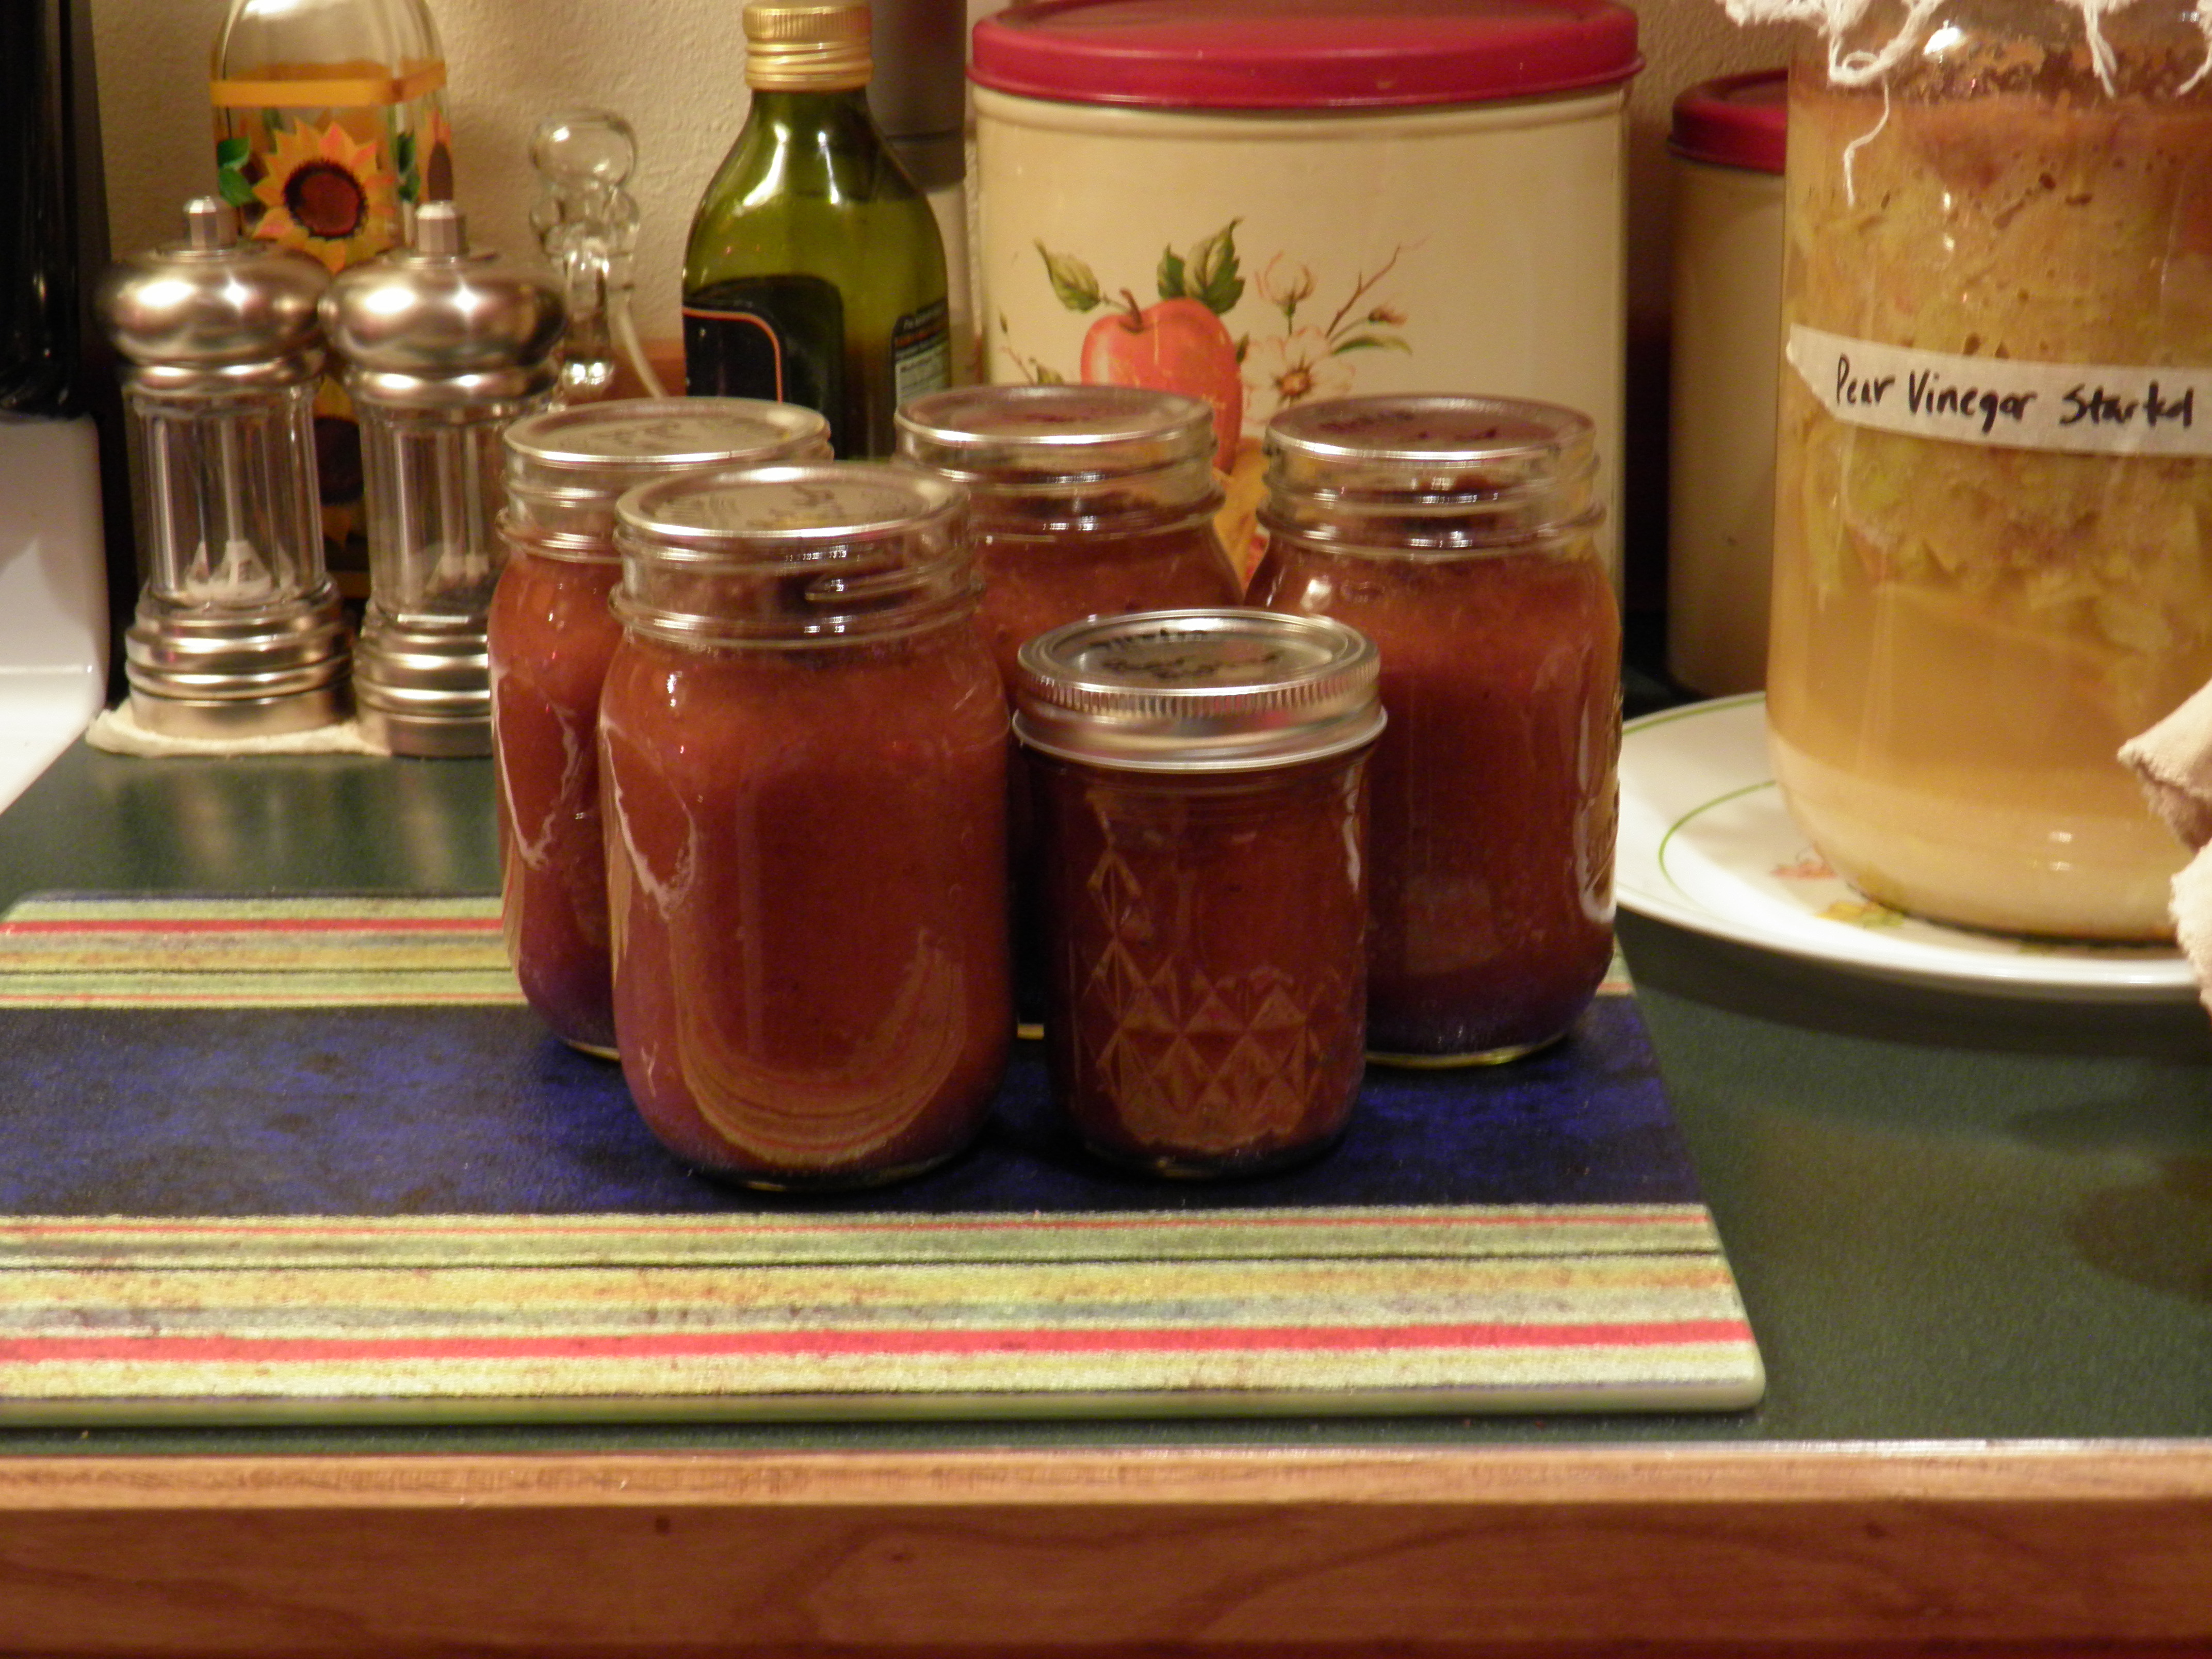
Altogether, I spent 4 days processing about 40 lbs. of pears. There are still a few green ones left that will slowly ripen in the box. I might make a pear crisp if we don’t eat them all out of hand. But not right away. For now, I’m just going to gaze at those jars of pear mincemeat, pears in dark ginger syrup, dark ginger/pear syrup, pear juice, and pear butter, and anticipate all the pear goodness we’ll get to eat this winter.
All original text, photos, and the pear butter recipe are the author’s own work and are copyright protected. You may not copy or reproduce in part or in whole without the author’s permission.

Pingback: Conversion: Gluten-free Pie Crust | Garden, Forest, Field
Pingback: Thanksgiving Dishes | Garden, Forest, Field
Pingback: Vanilla-infused Cranberry-Rhubarb Butter and Syrup: Update | Garden, Forest, Field
Pingback: All-Natural Cinnamon Pears in Brown Sugar Syrup | Garden, Forest, Field