
It’s nearly Halloween, and that means pumpkins are on the market and in the garden. It also means winter squashes are ripe and readily available. I grow my own. You would expect nothing less, would you? I always have a lot of them, so I’ve had to learn how to store them long-term. I’ve also learned how to use them in various ways, so we don’t get tired of them before winter is over. Read on for tips to make sure your squashes get through the winter without spoiling, and for some recipes using winter squash and pie pumpkins.
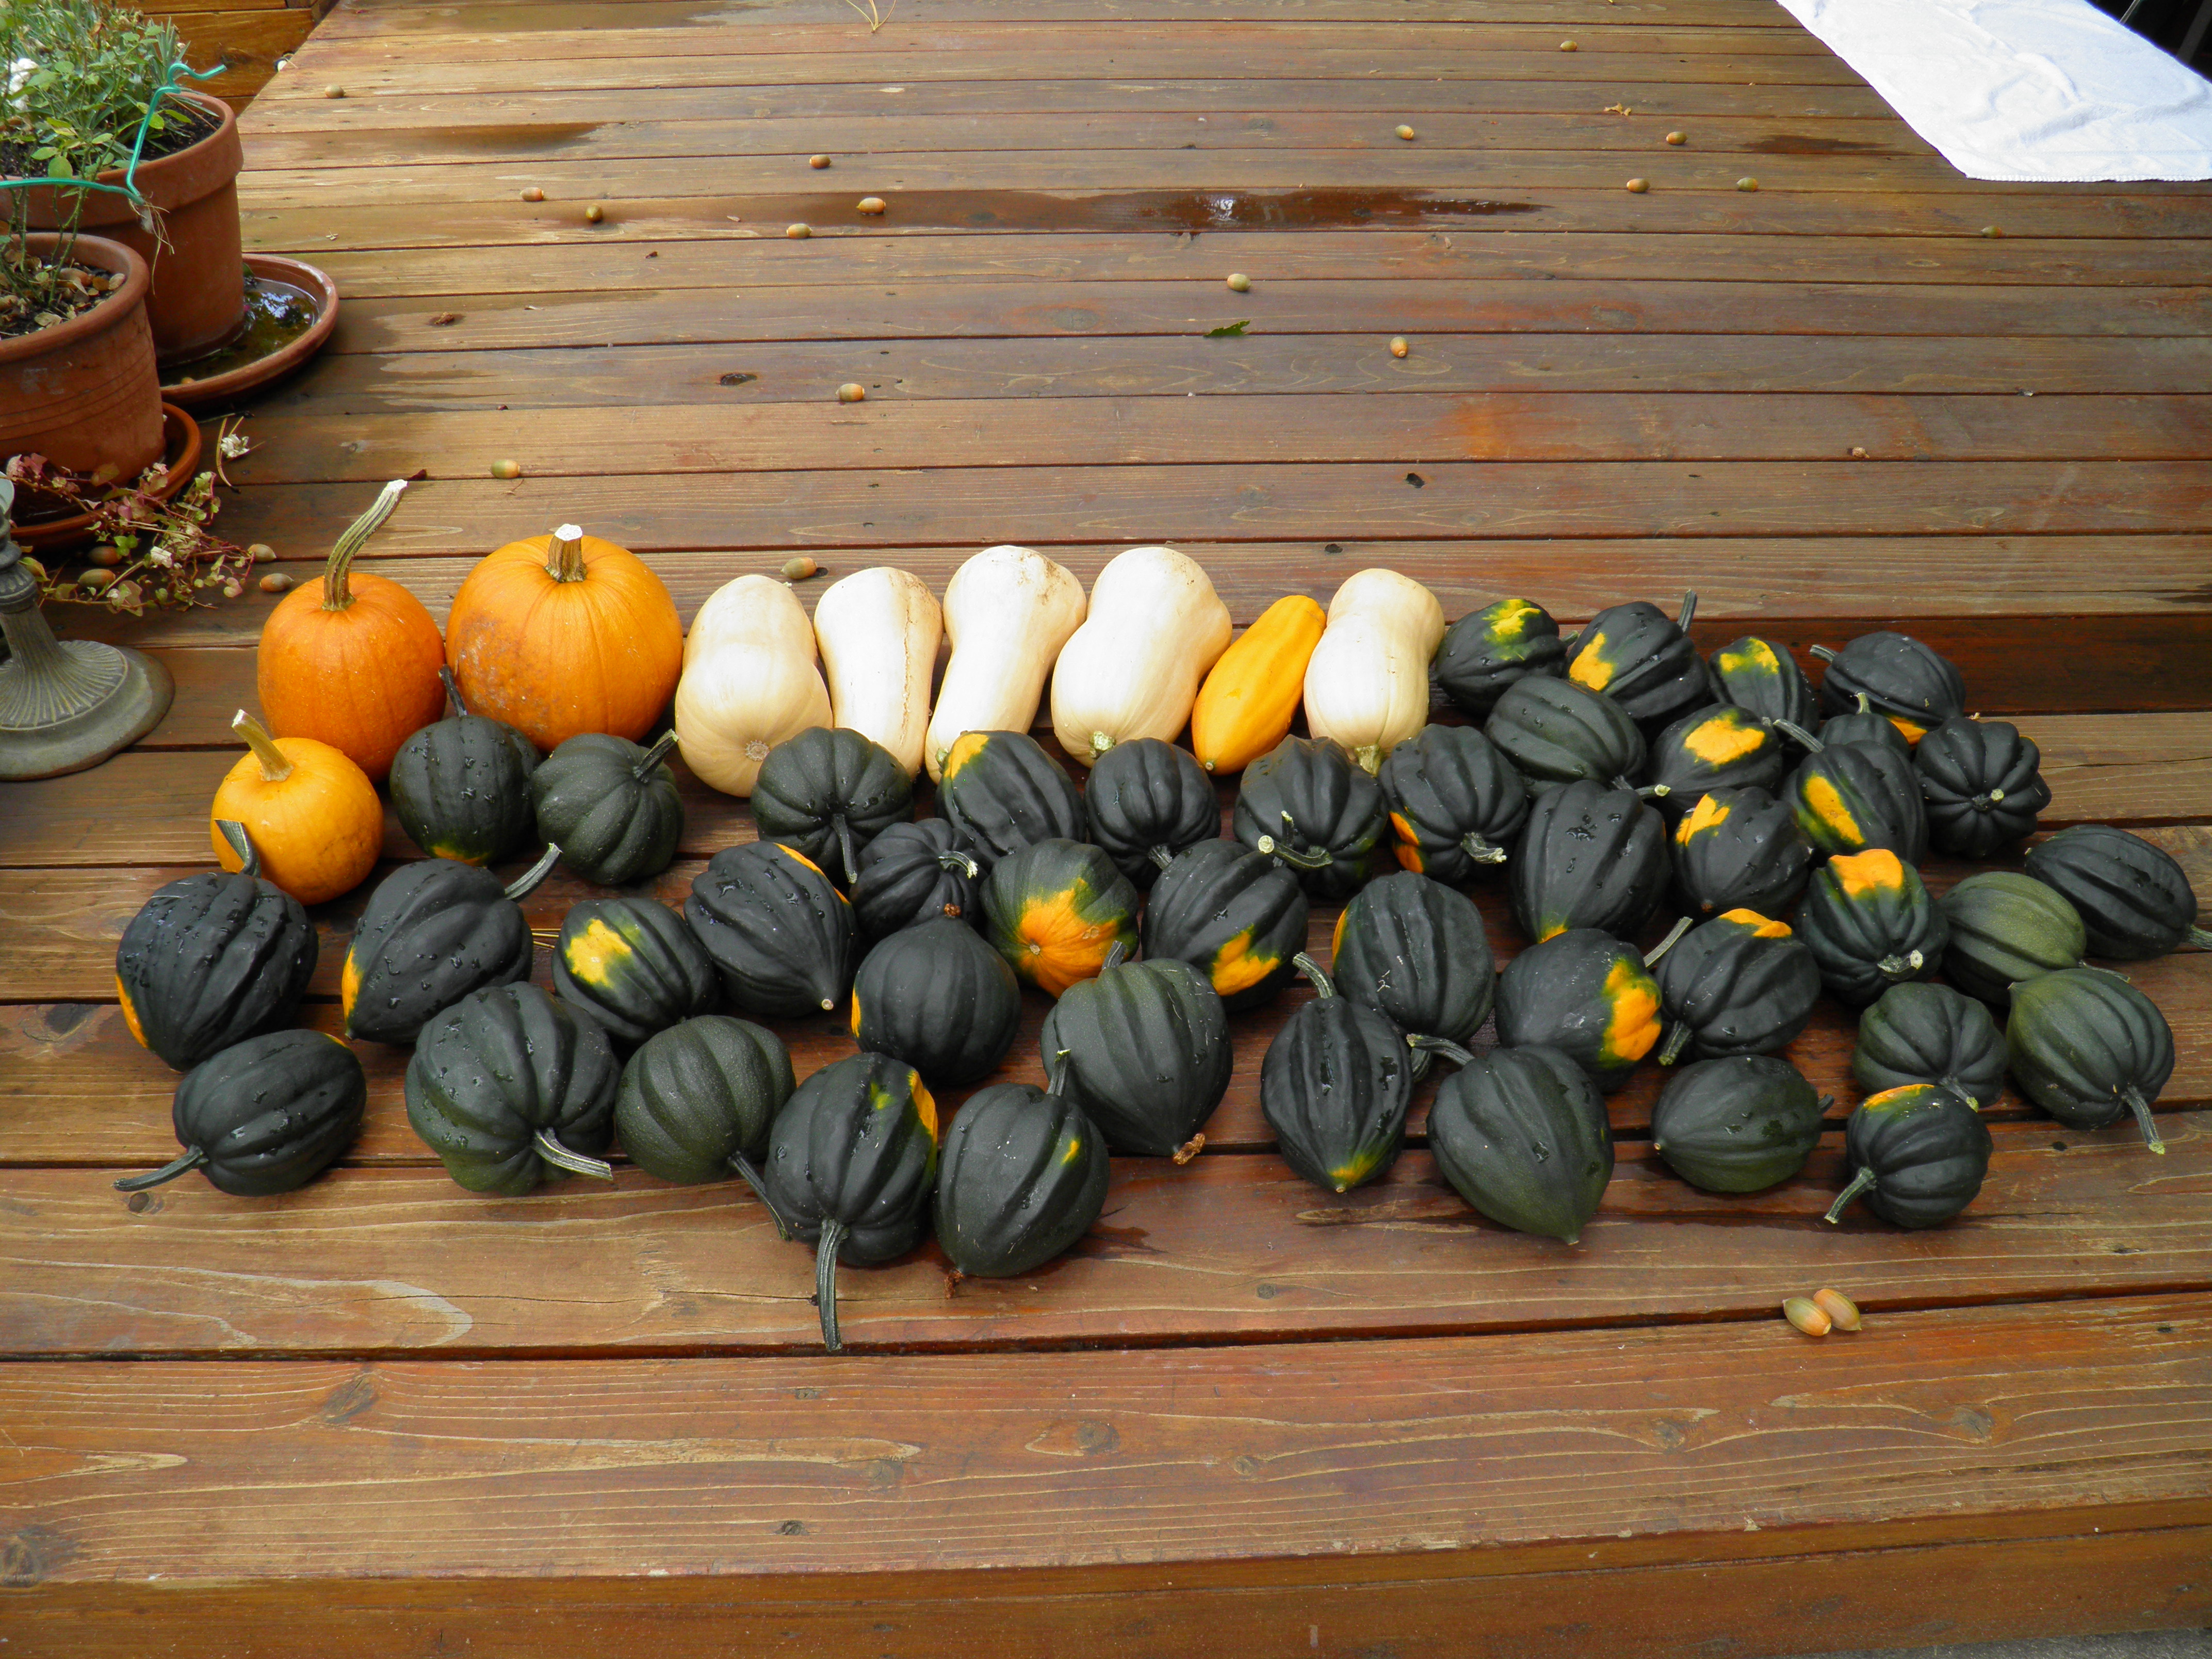
If you are growing your own, or even if you’re buying pumpkins and winter squashes cheap or on sale, and want to store them, there’s a very simple step you can take to keep them fresh for months. First, if you’re harvesting out of your own garden, it helps them last longer if you’ll let a light frost kiss them before you harvest. This hardens the skins, and a hard skin protects the golden goodness inside. Then lay the squashes out on a deck or patio and hose all the dirt off them. Let them dry. At this point, the method for ensuring long storage is the same for home-grown or store-bought.
To a gallon bucket or bowl of warm water, add a cup of white vinegar. Get a clean rag and an old towel, and line the boxes you’re going to store your squashes in with newspaper. Wash each squash or pumpkin with the vinegar water, dry thoroughly, and store in boxes, loosely stacked. You can also store squashes on open shelves if you have a place with the right temperature range where mice or rats or squirrels won’t get to them. Even though the skins are hard, in the winter, a hungry rodent can do a lot of damage. It’s a good idea to line your shelves with newspaper, to absorb any oozing from spoilage if it occurs. But the vinegar bath helps kill off bacteria and mold spores and minimizes spoiling.
The other crucial factor to prevent spoilage in long term storage is the right temperature range. Colder is not better when it comes to preserving winter squashes. I learned this the hard way when I tried to store them one year in our pump house, which is kept just above freezing all winter. The squash and pumpkins developed little black mold spots in January, and within a week or two, I was roasting and freezing like mad to keep from losing them all. I did a little research and learned that the optimal storage temperature is much warmer, from about 45-55 degrees. Keeping the squash dry is also important, so a damp, cold basement (or pump house) is not a good storage option.

Now, I store my pumpkins and winter squash in my laundry room, in wooden boxes, lined with newspaper, that slide under the shelves my husband put up for my canned goods. The laundry room is unheated except for the freezer that puts off heat when it runs, but the room is well-insulated, so it stays around 50-60 degrees all winter. That seems to be just about the perfect environment for squash storage. I harvest my squash after the first light frost burns the leaves of the plants, give them a vinegar water bath, store them in my boxes in the laundry room, and we’re still eating fresh roasted winter squash and pumpkins the following spring. Which is just fine by me, because I really love the stuff.
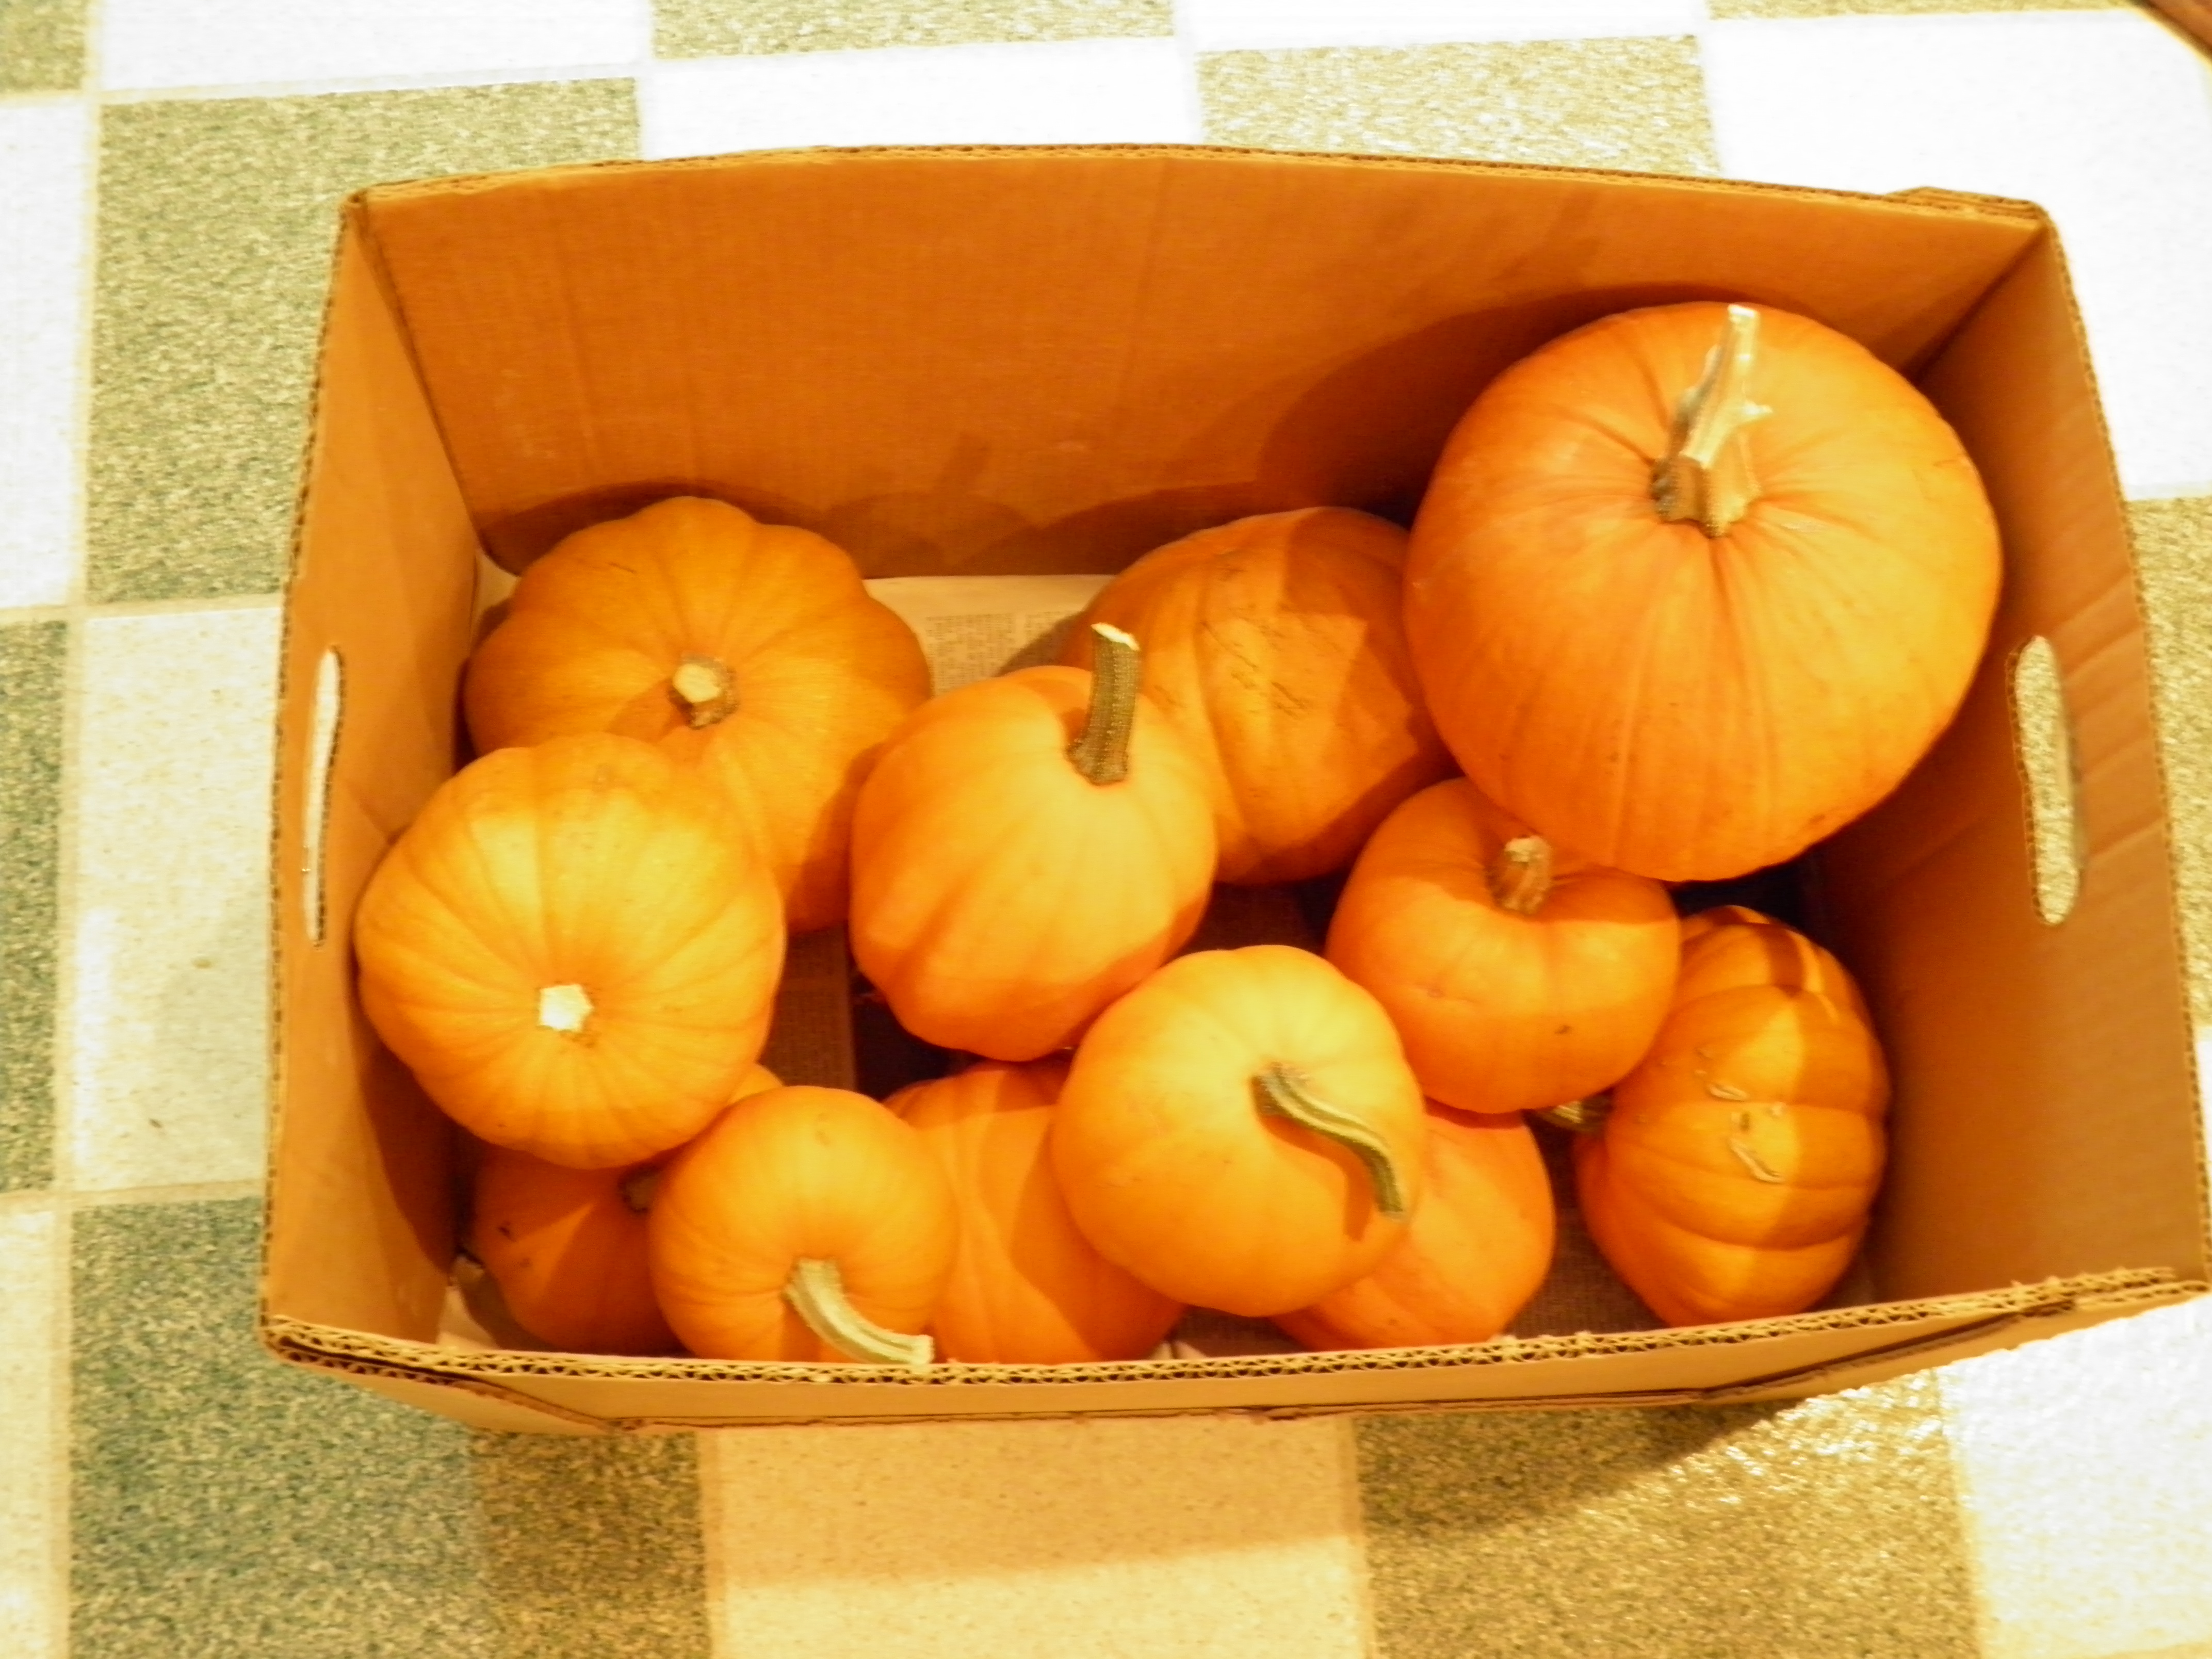
The photo below was taken on May 8, 2013 of the box of pumpkins I had left from the 2012 growing season. (I didn’t weigh them, but I must have grown about a hundred pounds of pumpkins and squash in 2012.) These were still sound! (Yes, I think that fact deserves an exclamation point, maybe two.) In March, I had taken out those that were left and had given them another wipe down with a vinegar wash–just being proactive with possible mold. In May, I decided it was time to roast and puree what was left and freeze my puree in bags, so now I have pumpkin puree all ready for this fall’s pies, which is fortunate because I didn’t get many pumpkins this year. Just another lesson from the garden: this year’s bounty may turn to next year’s dearth, so preserve while you can.
I like to grow acorn, butternut, and pie pumpkins. I have tried other squashes, but these are my favorites, and in a garden the size of mine, space is a factor. I try to use up my butternuts first because they have the thinnest skins and will usually spoil before pumpkins or acorn squash.
My favorite way to eat butternut squash is roasted, of course. I love roasting butternuts because you can eat the skins. Just cube up the gutted squash, sprinkle and toss with olive oil, salt, pepper, any crushed or ground herbs you like (I like sage and thyme, but rosemary is also delicious), add a few unpeeled garlic cloves if you like, a sprinkle of apple scrap vinegar or another fruit vinegar (the acid brightens up all the flavors), and roast on a cookie sheet at 400-425 degrees until tender and browned, usually 20-30 minutes. The roasting time depends on how large your squash cubes or chunks are. The skin of the squash gets tender and then goes slightly chewy, so you get great texture. This is a wonderful side dish to any roasted meat. I like to serve it with oven-fried chicken because both dishes cook at the same temperature.
Acorns squashes store very well because they have such hard skins. I like acorn squash because of its size and its seeds. Acorns are just the right size for a meal for two people. Each person gets a half. My husband likes them with butter and brown sugar, so I can dress his half with gooey sweetness, and my half gets a drizzle of olive oil and a sprinkle of sage and thyme, salt and pepper. We each get what we like with no fuss. Roast them at 400-425 degrees until the flesh is tender. And if you like roasted pumpkin seeds, you’ll like roasted acorn squash seeds. Actually, even if you don’t like pumpkin seeds, you should try roasted acorn seeds because they are even better than pumpkin seeds. They are smaller and roast to a crisper, crunchier texture.
The process is the same for pumpkin seeds and all squash seeds, so don’t throw any of them away. Simply spread the seeds (and a little bit of the flesh or juice will give the seeds more flavor, so don’t rinse them!) on a cookie sheet, drizzle a teaspoon or so of olive oil over them, stir to coat, sprinkle lightly with salt (I like freshly ground sea salt), and roast at 350 degrees for about 15 minutes, stirring after 10 minutes. Roast until golden brown. These are a nutritious and delicious snack that my grandchildren, daughter-in-law, and husband love. I keep a bowl of roasted squash and pumpkin seeds on the coffee table all winter long.
I love pie pumpkins, and they also store very well. I use them for pumpkin pie, pumpkin bread, pumpkin spice muffins, pumpkin pancakes, and pumpkin soup. There are many ways to handle a fresh pumpkin for cooking. Some people roast them whole and then peel and scoop out the seeds. Because I like to roast the seeds and get them crunchy, this is not the method I use. I used to cut them open, clean out the seeds, quarter and steam them, and then run through the chinois to remove the skins. This works if you’re processing a lot of pumpkin for freezing (pumpkin puree has been deemed unsafe for home canning), but you don’t get that wonderful roasted flavor. Roasting is what makes your homemade-from-scratch pumpkin pie or soup so superior to what you can make with what comes out of a steel can from the store. So, now I quarter my pumpkins, clean out and set aside the seeds for roasting later, and put the quarters on a cookie sheet and into a 425 degree oven until they are soft. I take them out, let them cool, then scoop the flesh away from the skins and put it in the food processor to puree. (The skins go into the compost bucket.) At this point, the puree can be used in a recipe in the same proportion as the canned pumpkin you buy. Or, you can make soup with it, which is a winter staple in our home.

Here’s my recipe for pumpkin soup, and keep in mind that you can substitute any orange-fleshed winter squash, such as acorn or butternut, for the pumpkin. You’ll get a slightly different flavor, but it will be delicious with whatever kind of squash you use. Don’t use huge, grocery store jack o’lantern pumpkins for this soup—they are too stringy. You can sometimes use smaller grocery store jack o’lantern pumpkins, but pie pumpkins, acorn squash, butternut, or any other yellow or orange-fleshed winter squash are better. You can mix varieties as you like.
After your pumpkin or squash is roasted and pureed as above, follow directions below for making the soup. (You can also use canned pumpkin, and the soup will taste good, but it won’t taste quite as fresh or rich as when you roast your own.)
Roasted Pumpkin/Winter Squash Soup

1 quart pureed pumpkin or squash
2 cups chicken stock/broth
1 tablespoon olive oil, or butter, or canola oil
¼ cup finely chopped onion
1 fresh jalapeno, finely chopped (deseeded, if you don’t like the heat)
1 stalk celery, finely chopped
1 clove garlic, minced
1 tablespoon fresh ginger root, grated (if not available, substitute 1 teaspoon powdered, dry ginger)
1 teaspoon salt
½ teaspoon black pepper
½ teaspoon ground coriander
¼ teaspoon ground allspice
1 tablespoon dried or fresh chopped parsley (fresh is always better)
1 teaspoon poultry seasoning
¼ teaspoon red pepper flake (optional for those who like more heat)
½ cup half & half
For serving: ½ cup plain low-fat yogurt or sour cream; ¼ cup roasted, salted sunflower seeds. Makes about 4 servings (cereal bowl size).
To the pureed pumpkin or squash, mix in chicken stock (I use homemade or low sodium canned) and start heating on low in a large pot with a tight lid. Stir frequently to keep the natural sugars in the pumpkin/squash from causing the soup to stick. As the soup heats, it starts to bubble like a volcanic mud pot, so keep it covered and be careful when you remove the lid to stir.
In a sauté pan, heat oil or butter. Add onion, jalapeno pepper, celery and minced garlic. Saute on medium heat until vegetables are soft. Add fresh grated ginger root, if available.
At this point, you’ll have to decide how smooth you want your soup to be. I like it silky smooth, so I put my sauteed vegetables into the pumpkin mixture and use my immersion blender on it until the vegetables are just tiny specks in the soup. If you don’t have an immersion blender, and you want your soup smooth rather than slightly chunky, put a small amount of the pumpkin mixture into a blender or food processor along with the sauteed vegetables and whiz until smooth, then add back into the soup. If you want more texture in your soup, add the vegetables without blending and proceed to seasoning.
If not using fresh ginger, you can add 1 tsp. dry ginger at this point. Add about ½ tsp. of salt (taste as you go so you can get the seasoning right for you), ½ tsp. black pepper, ½ tsp. ground coriander, ¼ tsp. ground allspice, 1 T. dried or fresh chopped parsley, and 1 tsp. rubbed poultry seasoning. (I grow and dry my own herbs, so instead of poultry seasoning, I use about a teaspoon of dried, crumbled sage, and a half-teaspoon of dried thyme. If there’s no snow in the garden, I substitute fresh herbs, but I’m careful with fresh sage. It’s a strong flavor.) Taste and add more salt and pepper or other seasonings as necessary. If you like more heat, you can add a little crushed red pepper flake. I like the different layers of heat in this soup from the fresh jalapeno, ginger, and black and red pepper.
As soon as soup is hot and bubbling like lava, add about ½ cup half & half. Reheat almost to boiling and serve. (Do not boil after adding the half & half because the cream will separate. It still tastes fine, but it doesn’t look as pretty.)
For serving: I like to add a dollop of plain, low-fat, homemade yogurt (sour cream is also good) to the middle of my bowl and sprinkle it with about a tablespoon of roasted, salted sunflower seeds. Then when I eat it, I get a little yogurt and sunflower seeds in my spoon along with the soup.
This is a very filling (and nutritious) soup, and you can make it relatively low-fat by using low-fat chicken stock, coconut, olive or canola oil instead of butter, fat-free half & half instead of regular, and low-fat or non-fat yogurt or sour cream in the topping.
Because I grow my own pie pumpkins and winter squash, and have learned how to store them all winter, I have a plentiful and tasty supply of Vitamin A through the winter and into spring. I hope I’ve inspired you to try it for yourself.
All original text, photographs, and the pumpkin/winter squash soup recipe are copyrighted and may not be copied or reproduced without the author’s permission.

Pingback: Thanksgiving Dishes | Garden, Forest, Field
Pingback: Save the Pumpkins | Garden, Forest, Field
Pingback: Saving Seeds | Garden, Forest, Field