Remodeling the Kitchen

Wrong Again

I’d hoped by this time to be able to report that the replacement granite countertops were in, and that we were moving on to tiling the backsplash.  We bought the backsplash tile several weeks ago, just after the first countertops that were cut wrong were installed.  We’ve just been waiting for the second, replacement installation to start tiling.

On Friday, just before I left for my big birthday weekend, the countertop installers from U.S. Granite in Reno arrived to put in the new counters.  And guess what?  They still didn’t fit!

The installers brought in the new countertops, put them down, and they didn’t fit right.  The measurements appear to be off.  Fortunately, the installers did not glue them in this time, except for the 6’ counter along the fridge wall that forms my baking station.  And then another problem was discovered.  The new granite is several shades darker than the slab off the first block, so the new counters didn’t match the two corner pieces that were being left in place.  The installers removed the sink base and dishwasher countertops before gluing or cutting and took them back to Reno.  Phone calls between the installers, the manager, and Dennis were flying back and forth when I left for my trip.  Truthfully, I was glad to escape.

So, here we are waiting for another measuring session and for new slabs to be brought in, which we will have to approve, and new counters to be cut and installed.  The previous mistakes had already added a 5 week work stoppage to our renovation, and it will probably be another 5 or 6 weeks before the third round of countertops are installed, and if they are right, we can finally go ahead with the backsplash.  Now, it is really crucial to choose slabs that will look okay with the backsplash tile, because we can’t take that back.

When we chose the slab for the second countertops, we were told by the stone supplier, Dal-Tile, that since it had been raining, the granite had absorbed water and darkened. “It’ll lighten up as it dries out,” they told us.  It was raining on Friday when the installers brought in the countertops cut from those slabs. Dennis was worried about how dark they were. “They’ll lighten up,” the installers also said.

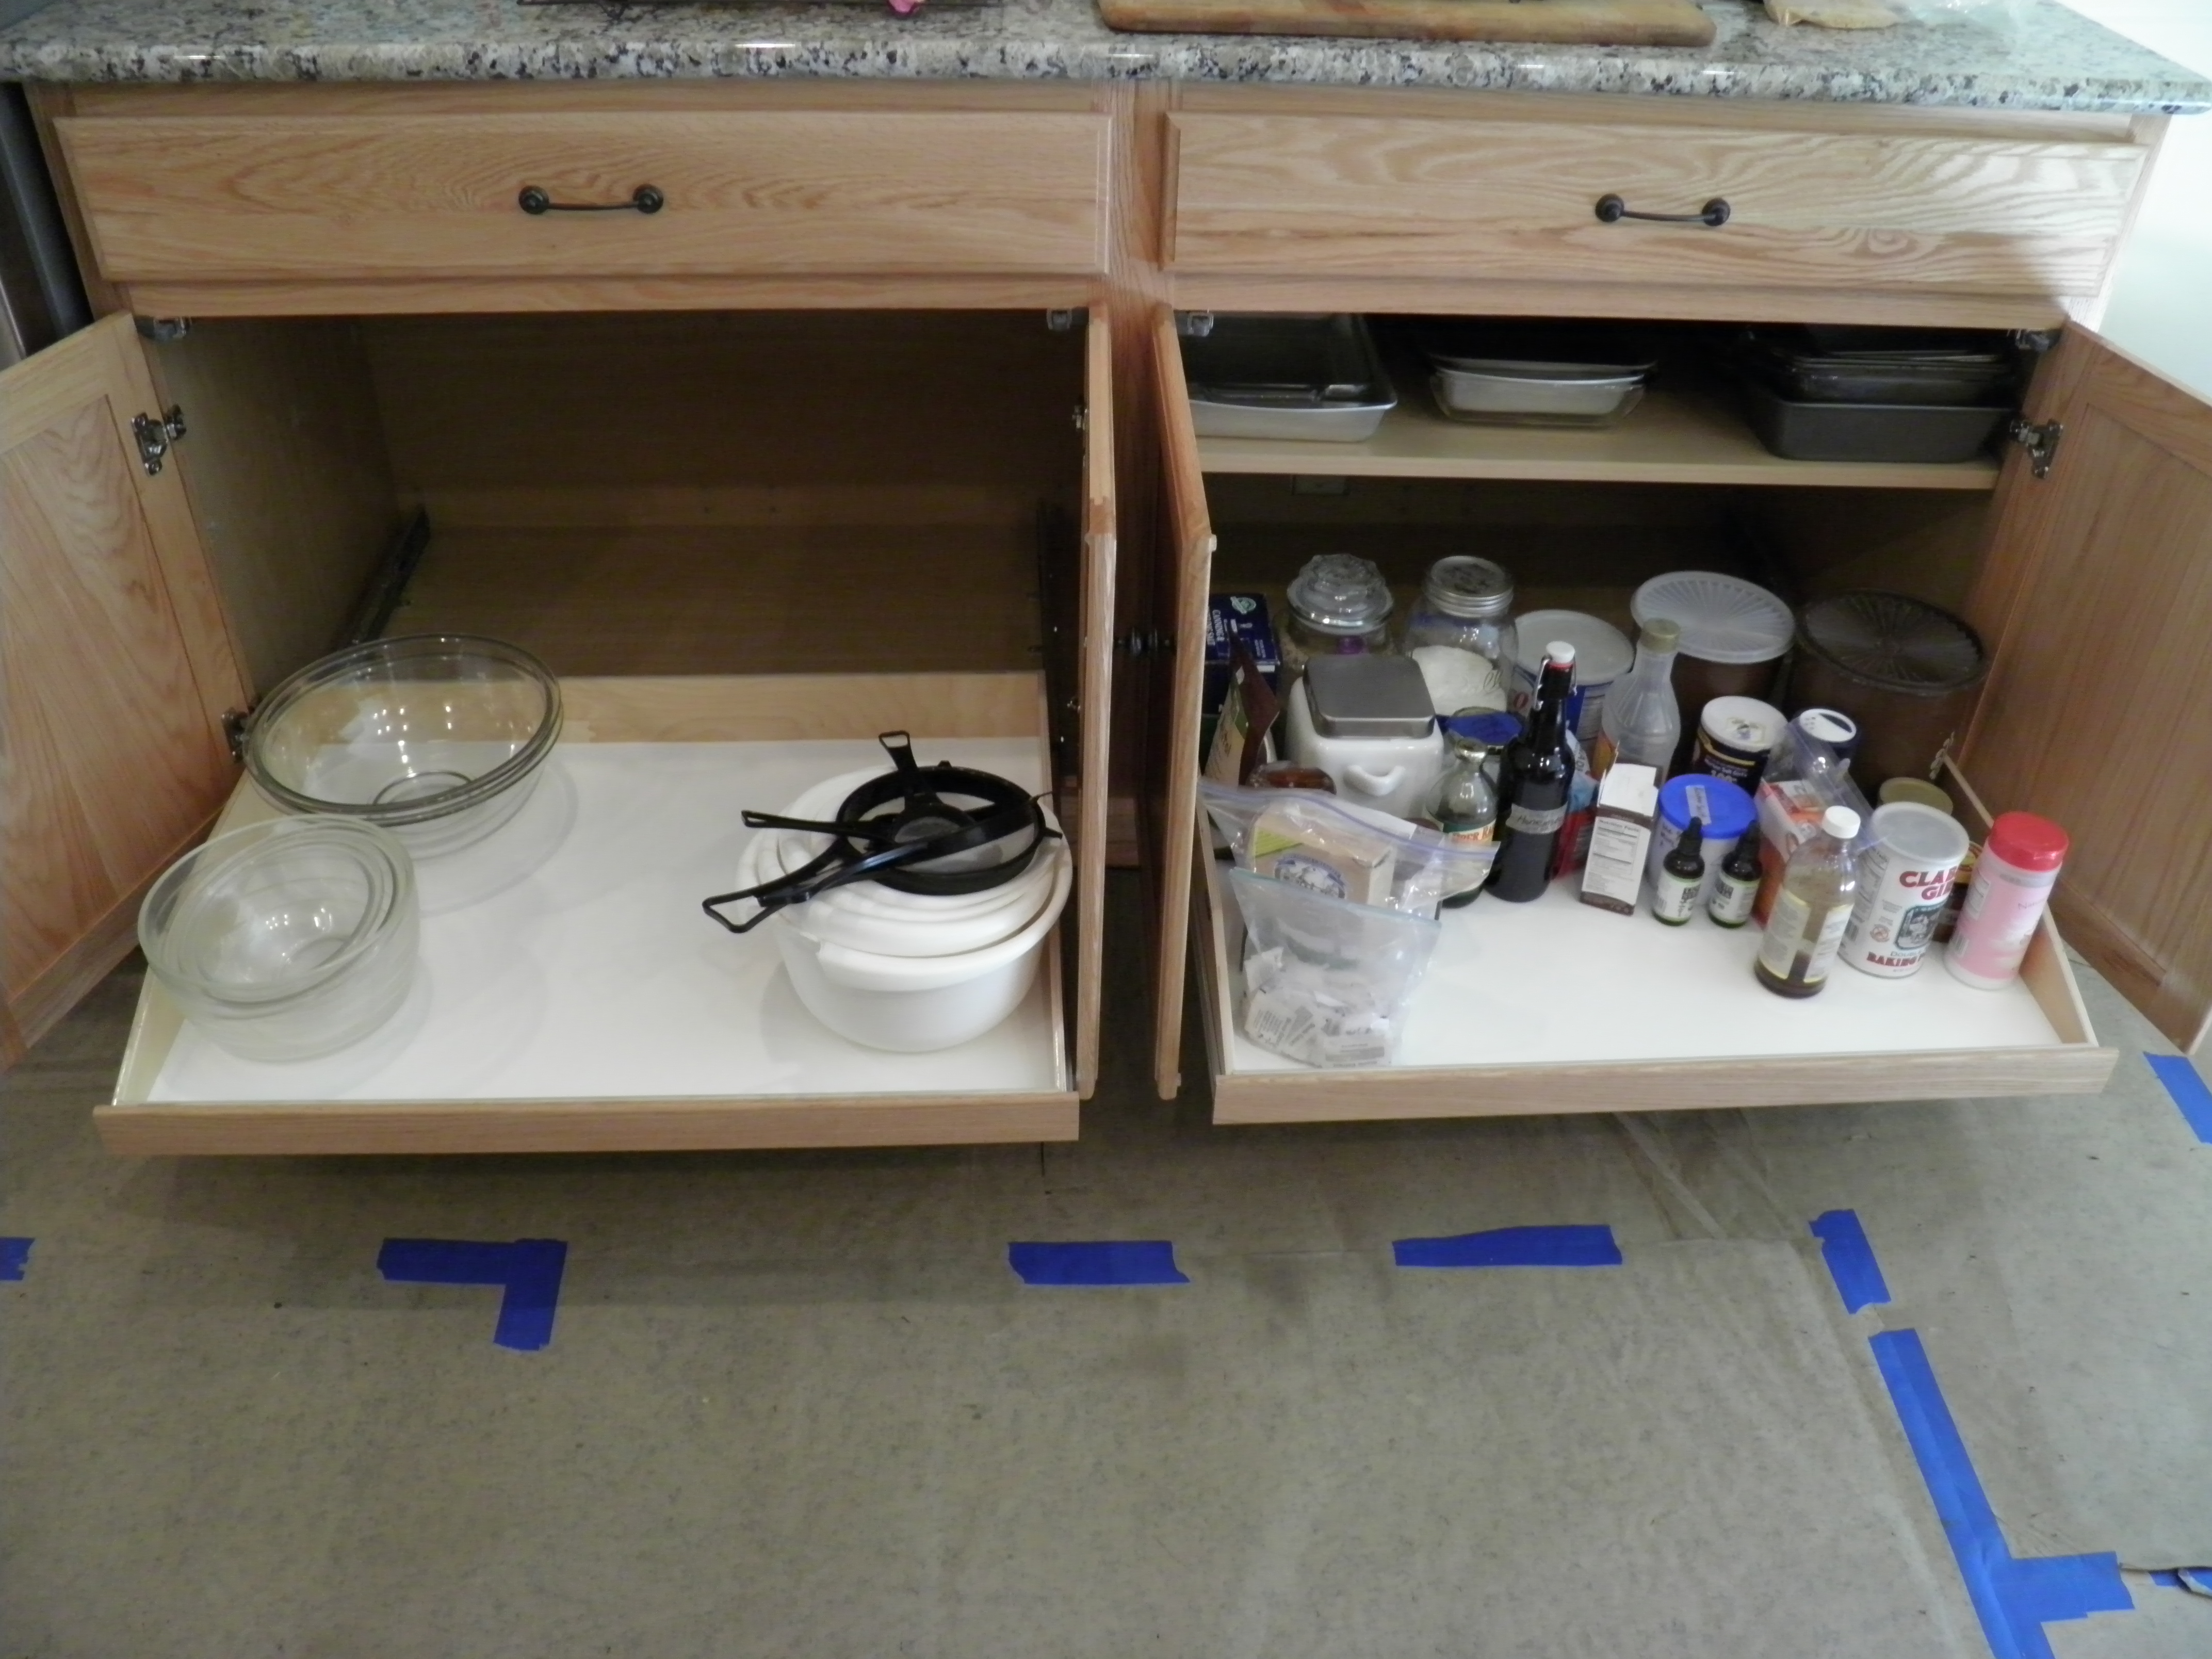
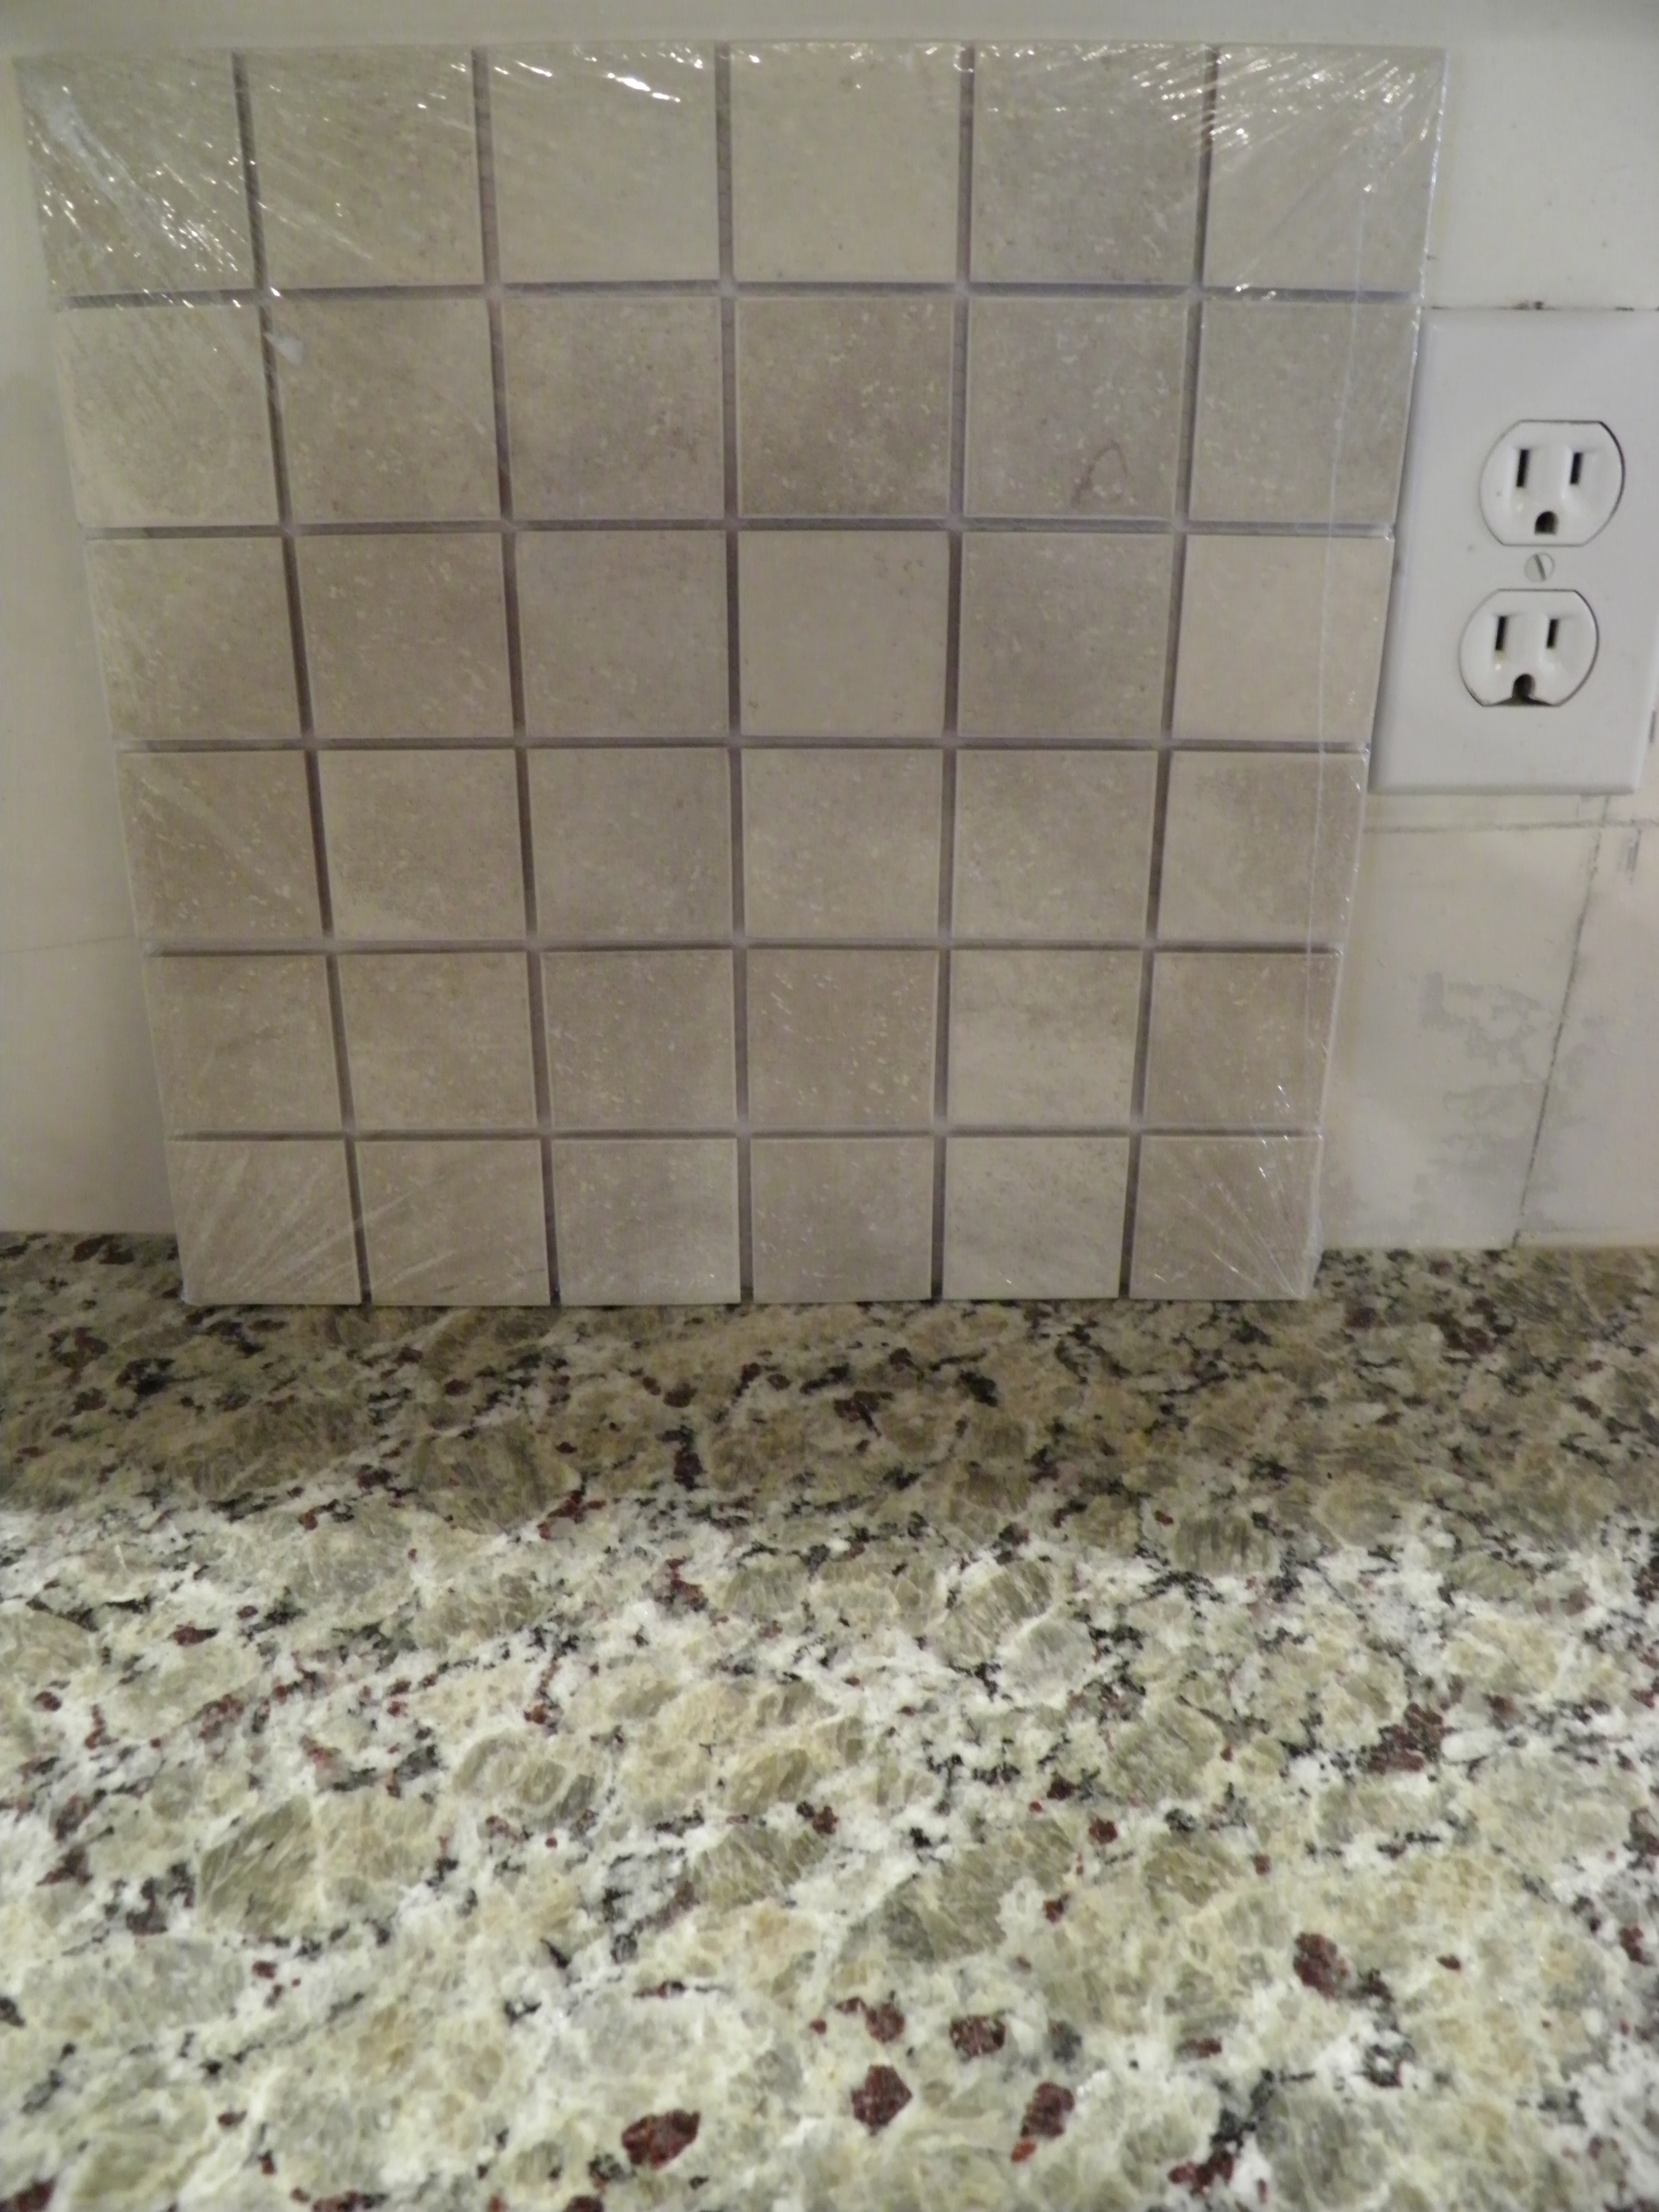
The replacement countertops haven’t lightened up and are significantly darker, more beigey-brown than the original slab we chose, and which we like the best.  The original slab had a lot more white in it, as you can see from the pics below.  This first one is of the original slab.

OLYMPUS DIGITAL CAMERA

OLYMPUS DIGITAL CAMERA

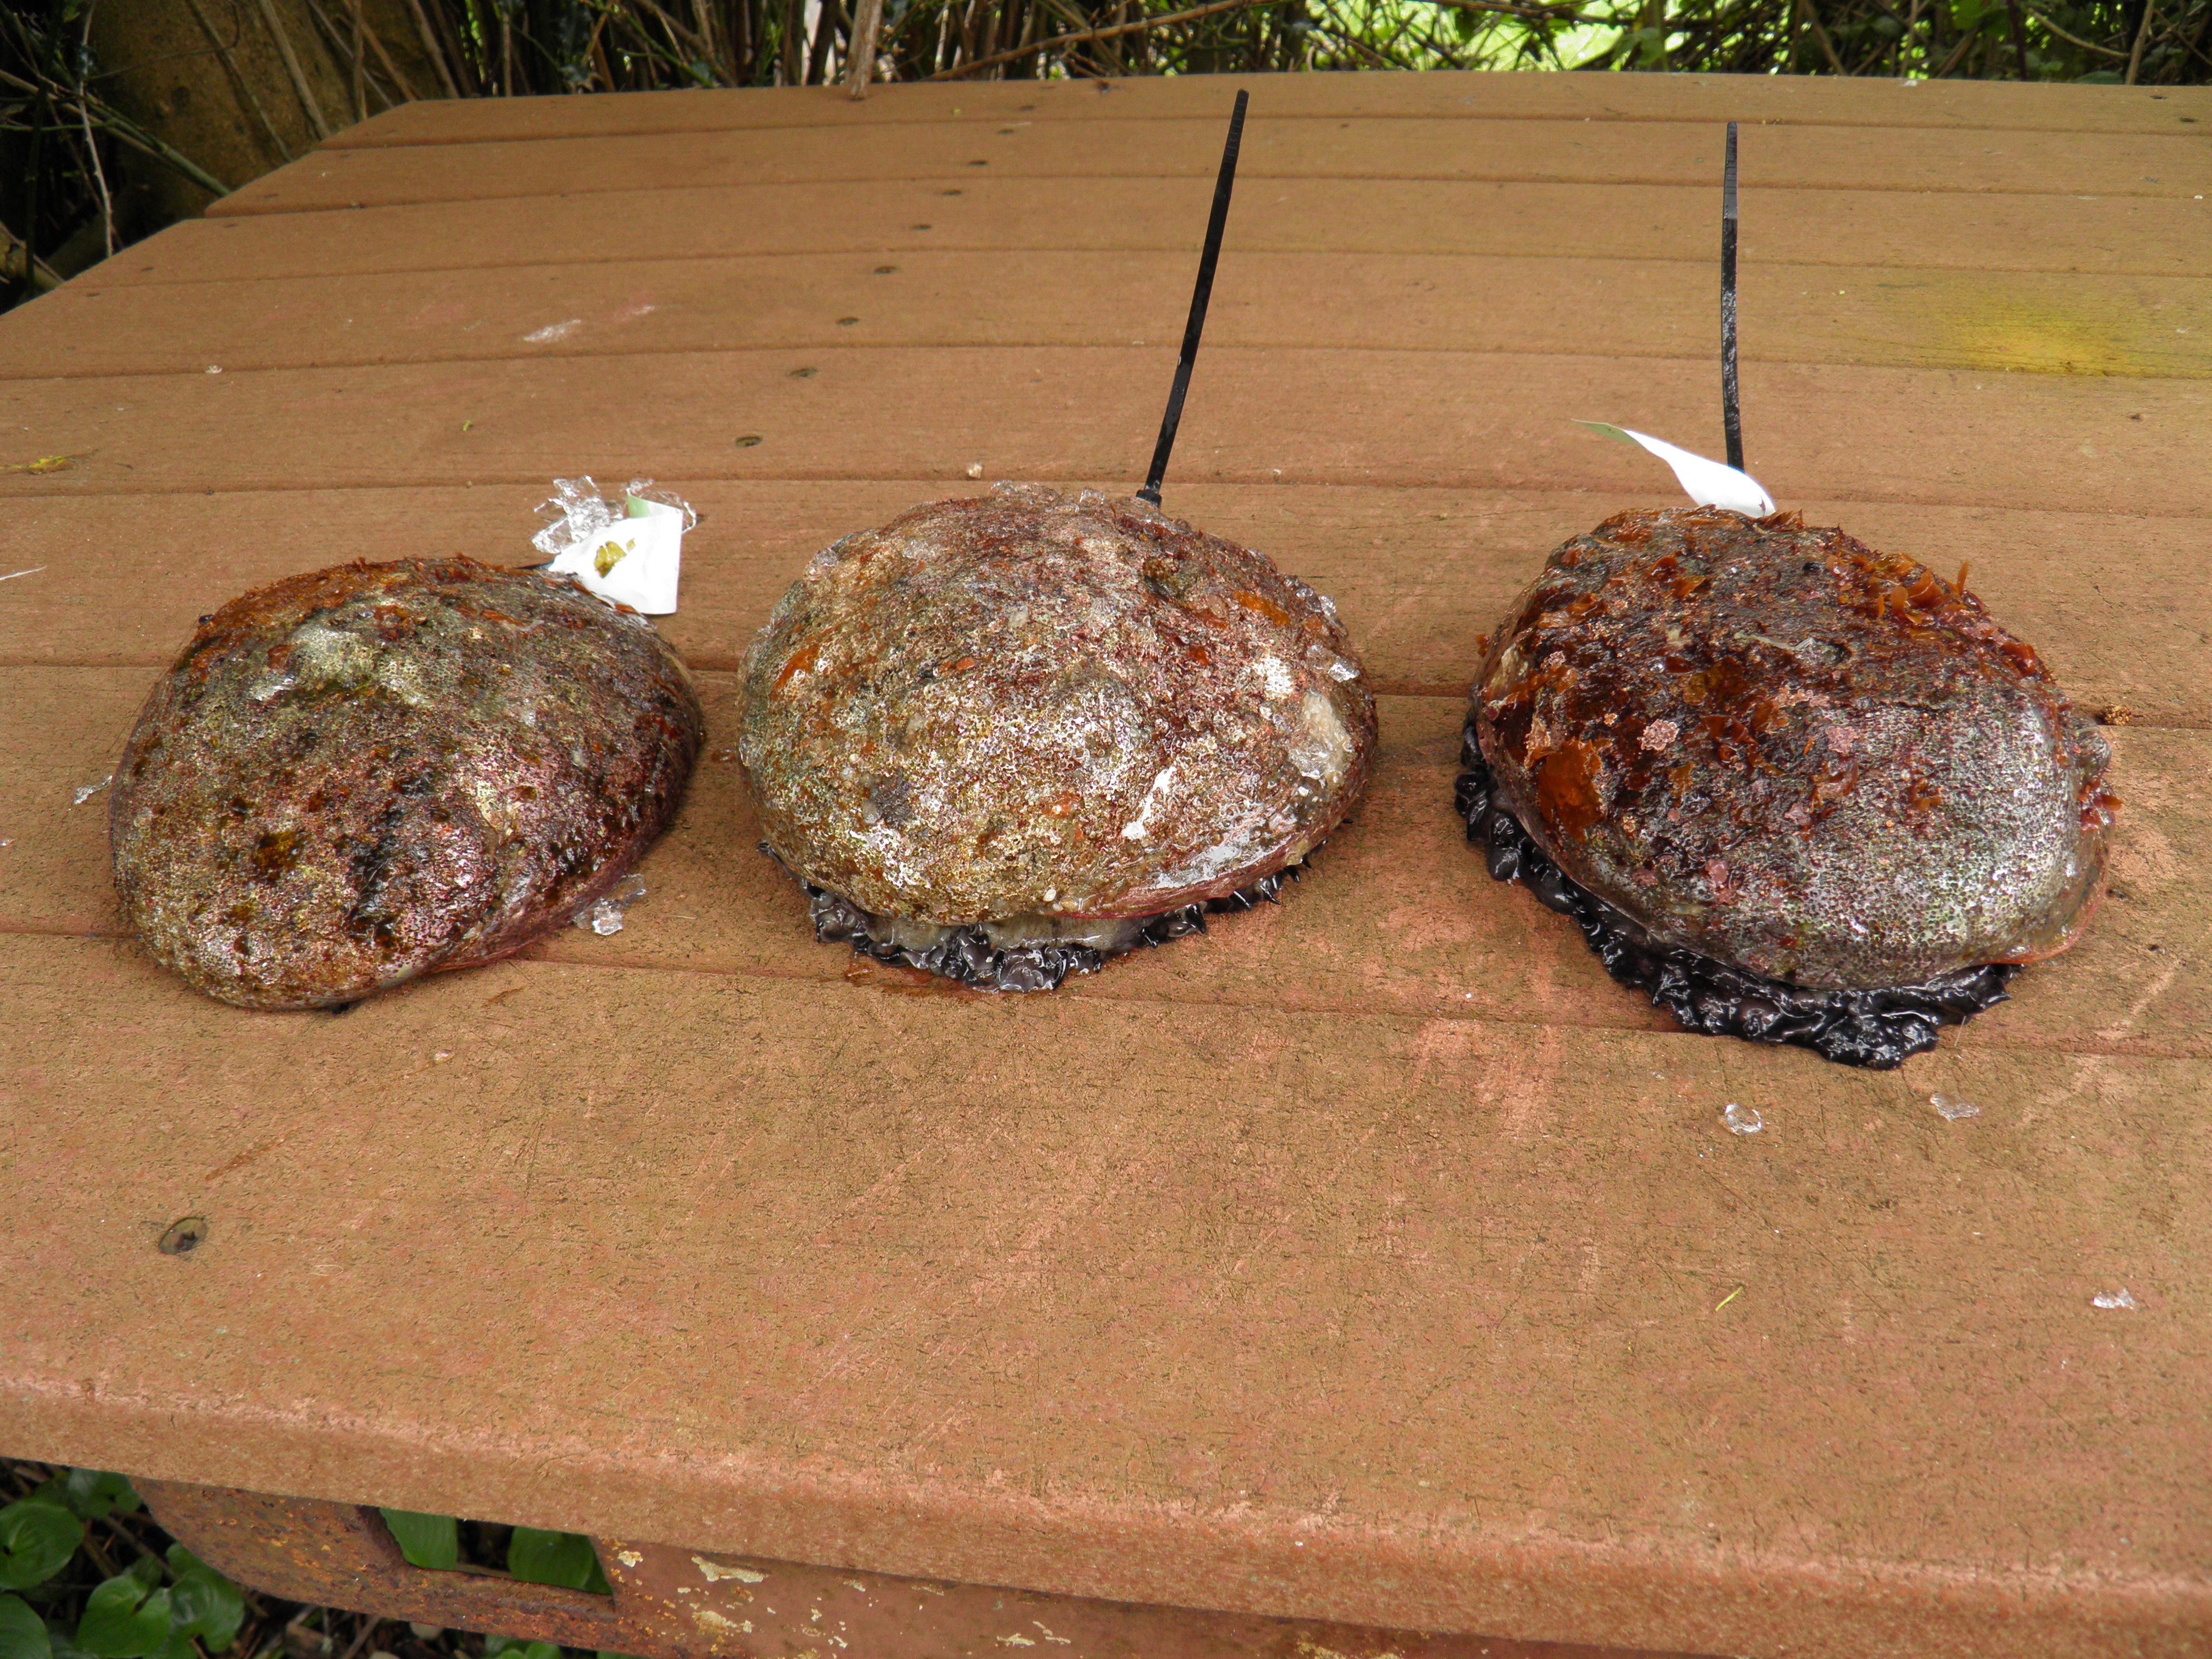
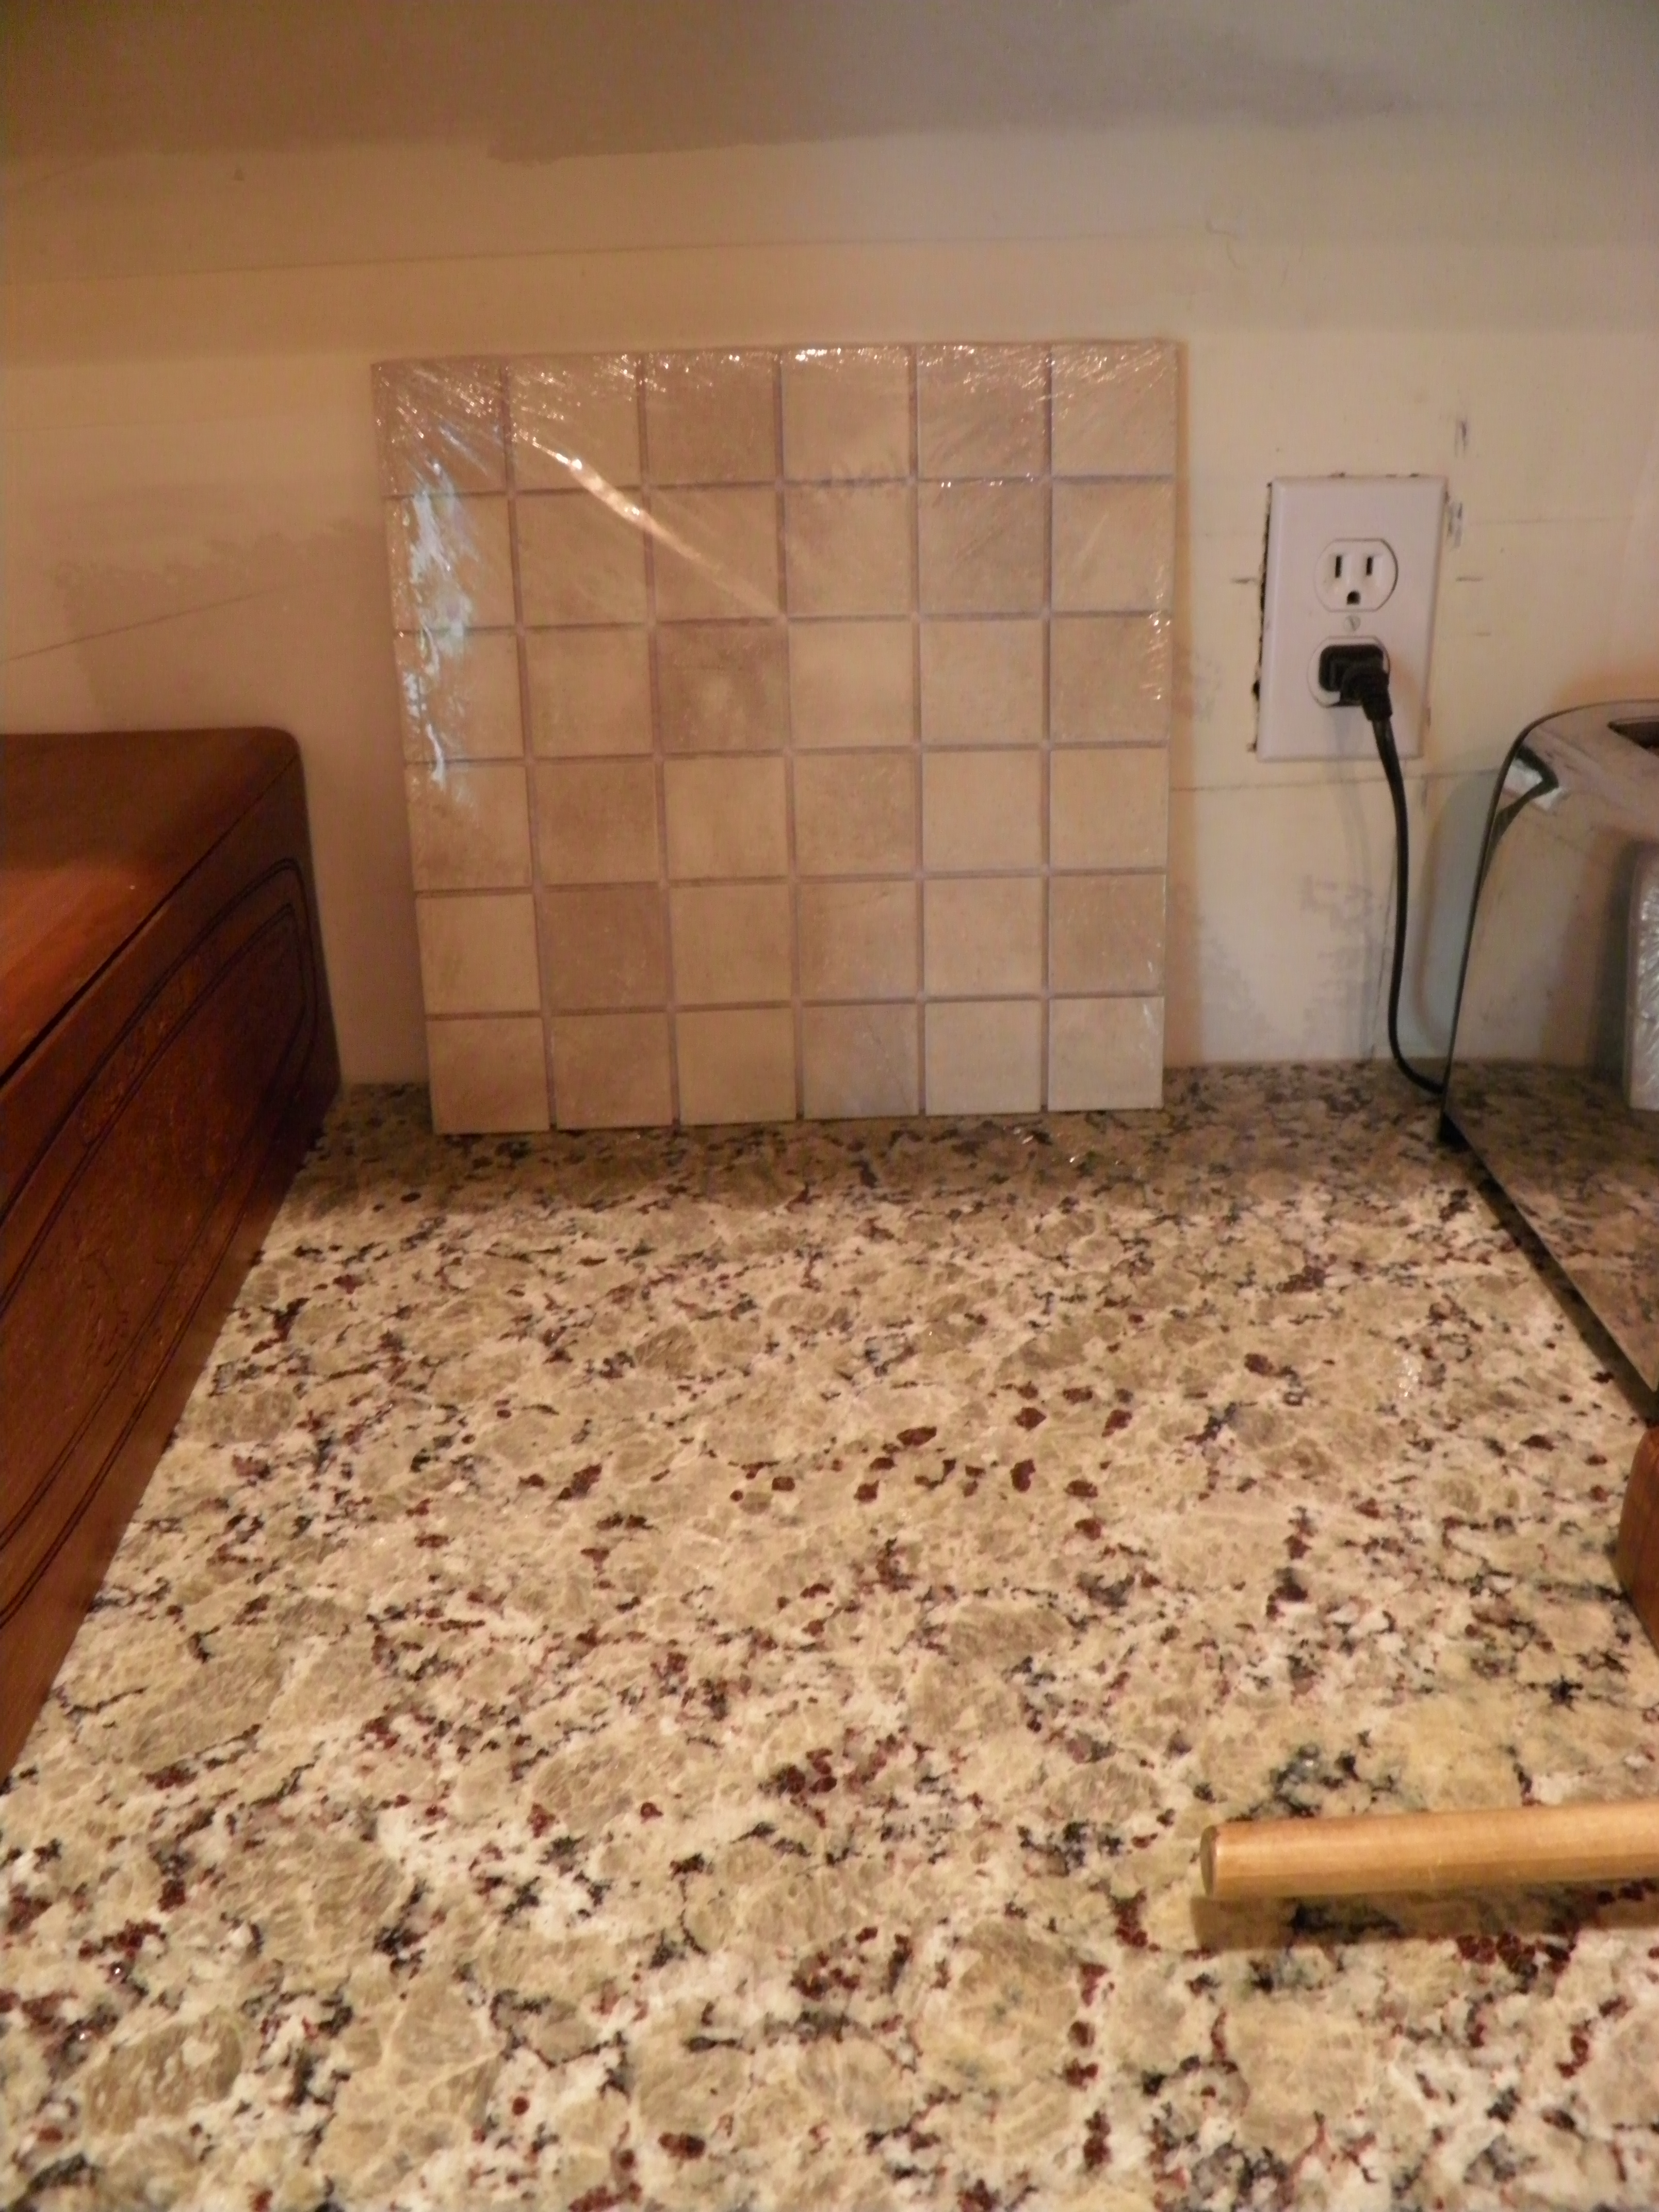
This is of the only replacement piece that was left in on Friday, and it is definitely darker than the original.

OLYMPUS DIGITAL CAMERA

OLYMPUS DIGITAL CAMERA

Fortunately, the backsplash tile I chose looks fine with both the lighter slab and the darker replacement, so hopefully, whatever we end up with in new slabs will also look okay. But it’s looking like they might have to replace the two corner pieces that we’d hoped to leave in, just to get a good match all around the kitchen.  The waste of it makes me sick.  However, we’ve talked them into leaving some of it behind (they’d better be doing everything they can to make us happy after all these screw-ups!), and I am hopeful that we can use some of it in the bathrooms and in my outdoor kitchen, if we ever get around to building it.

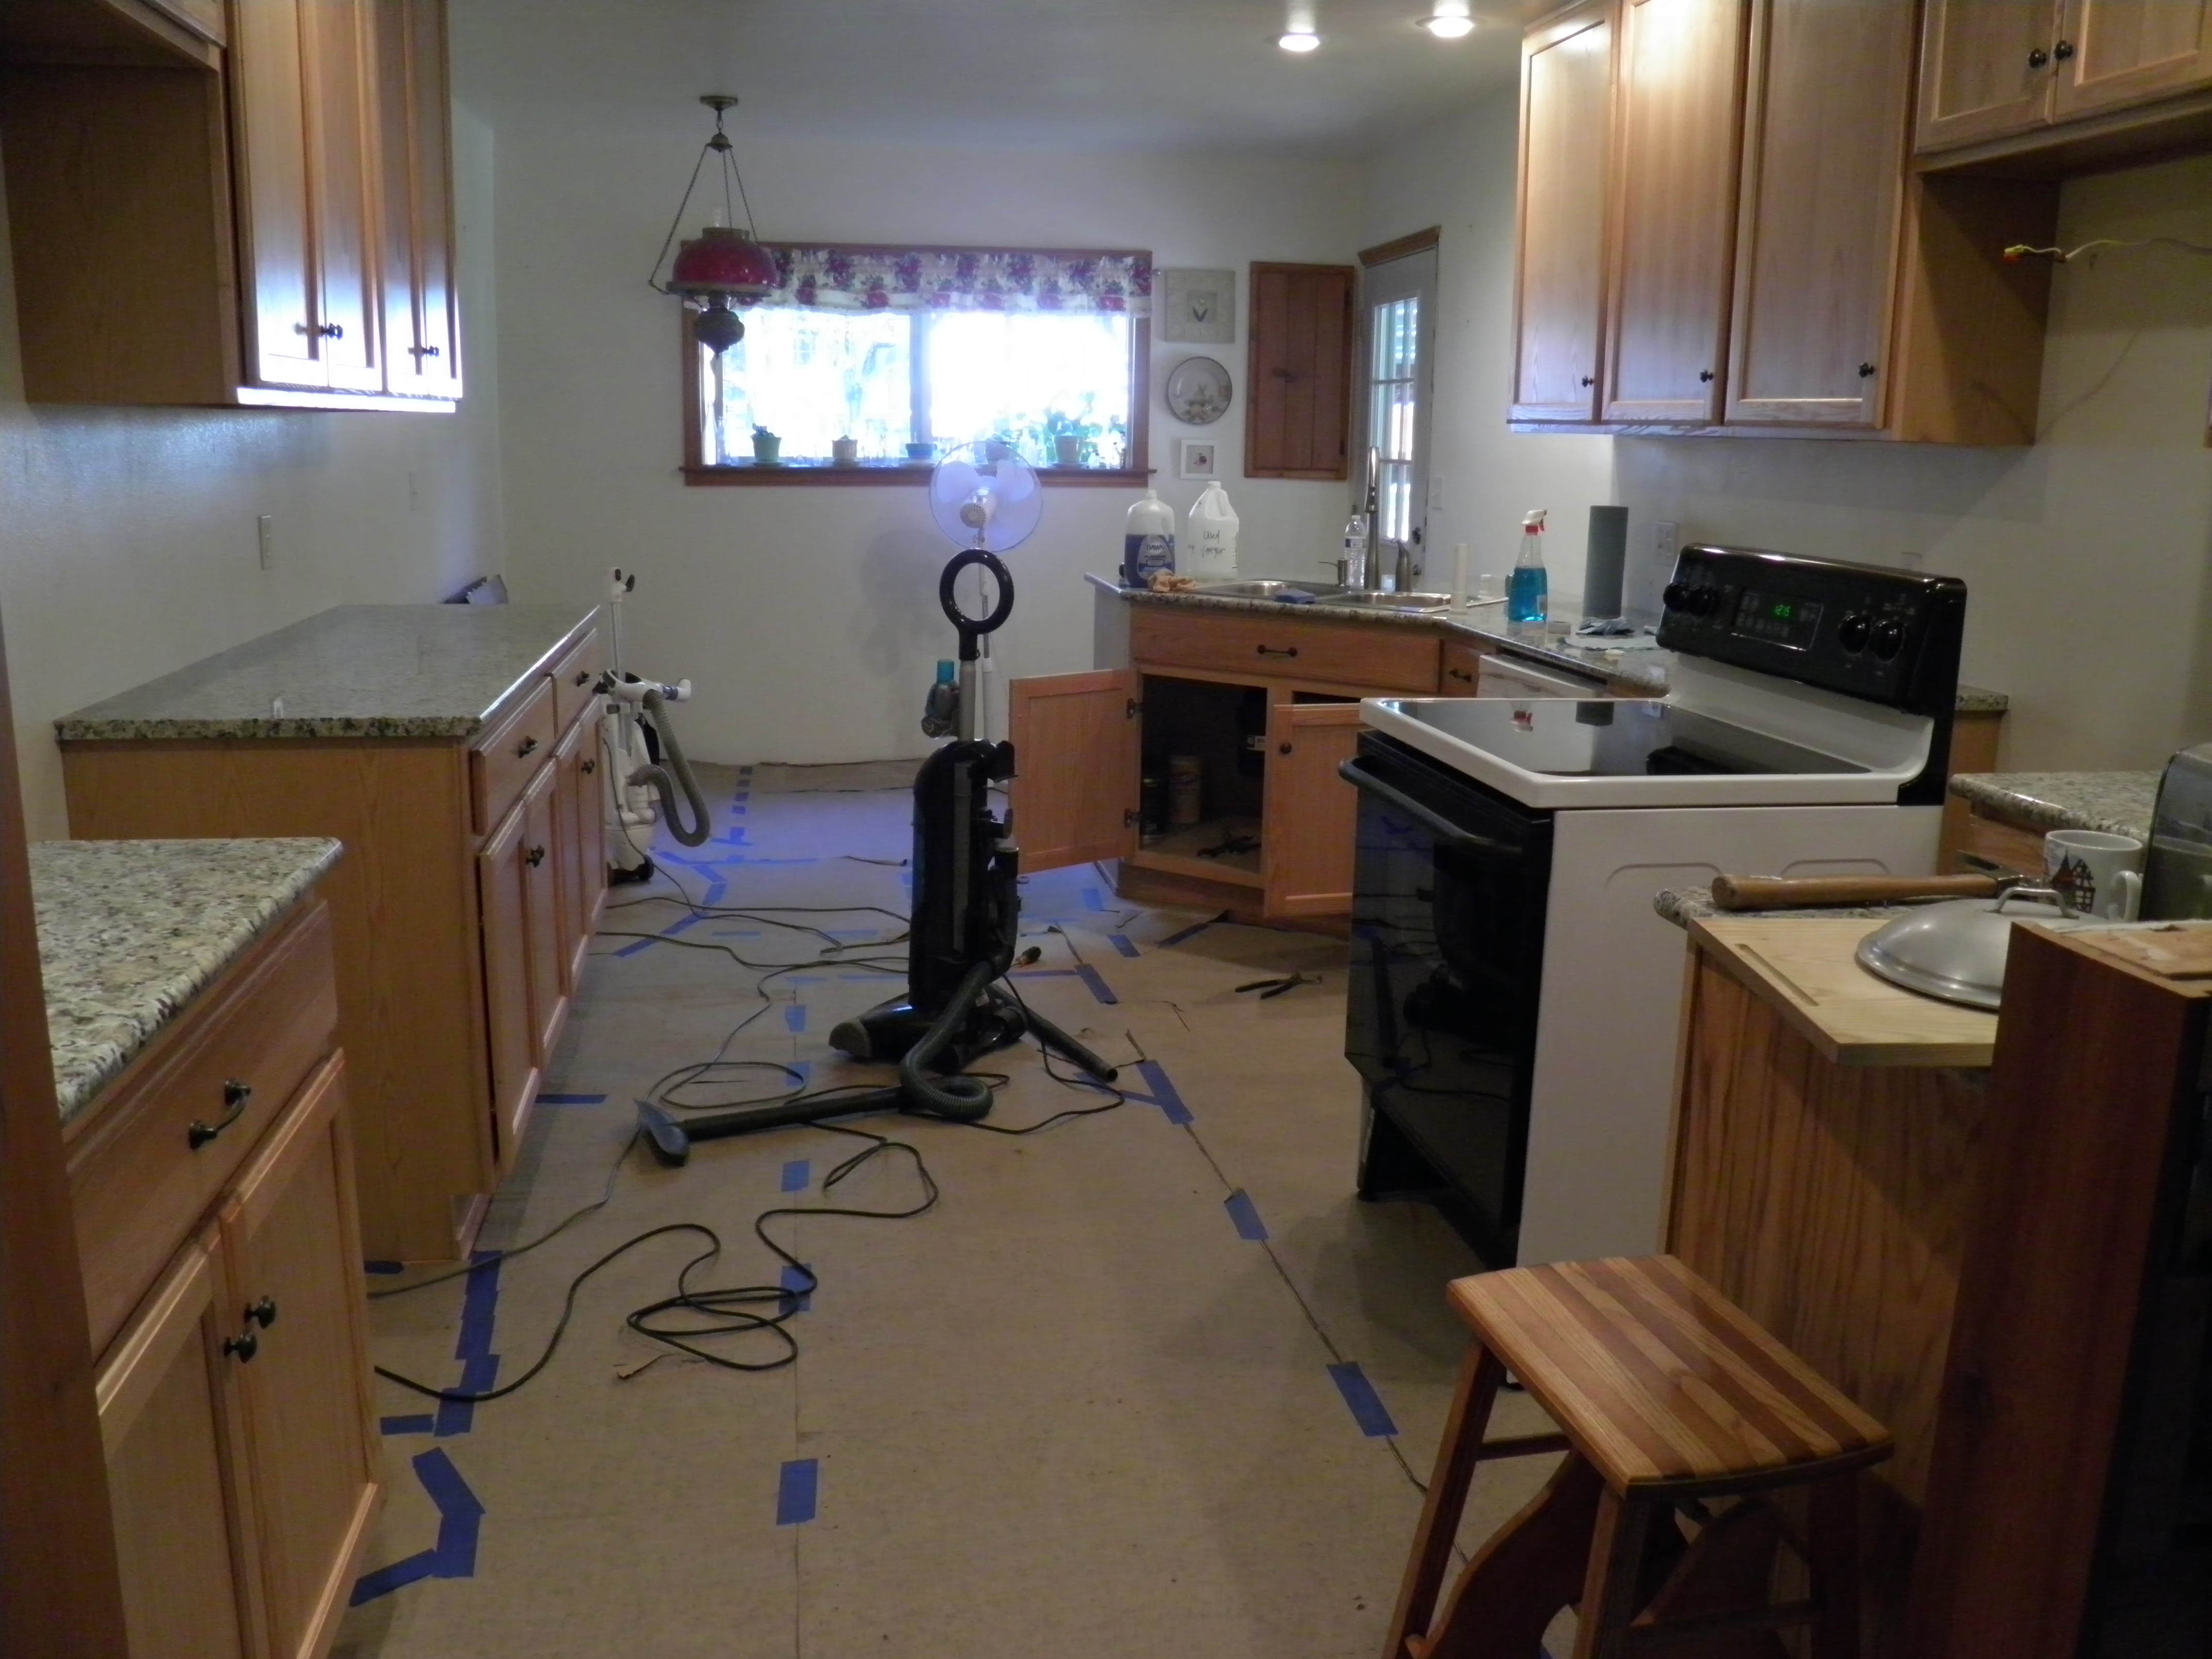
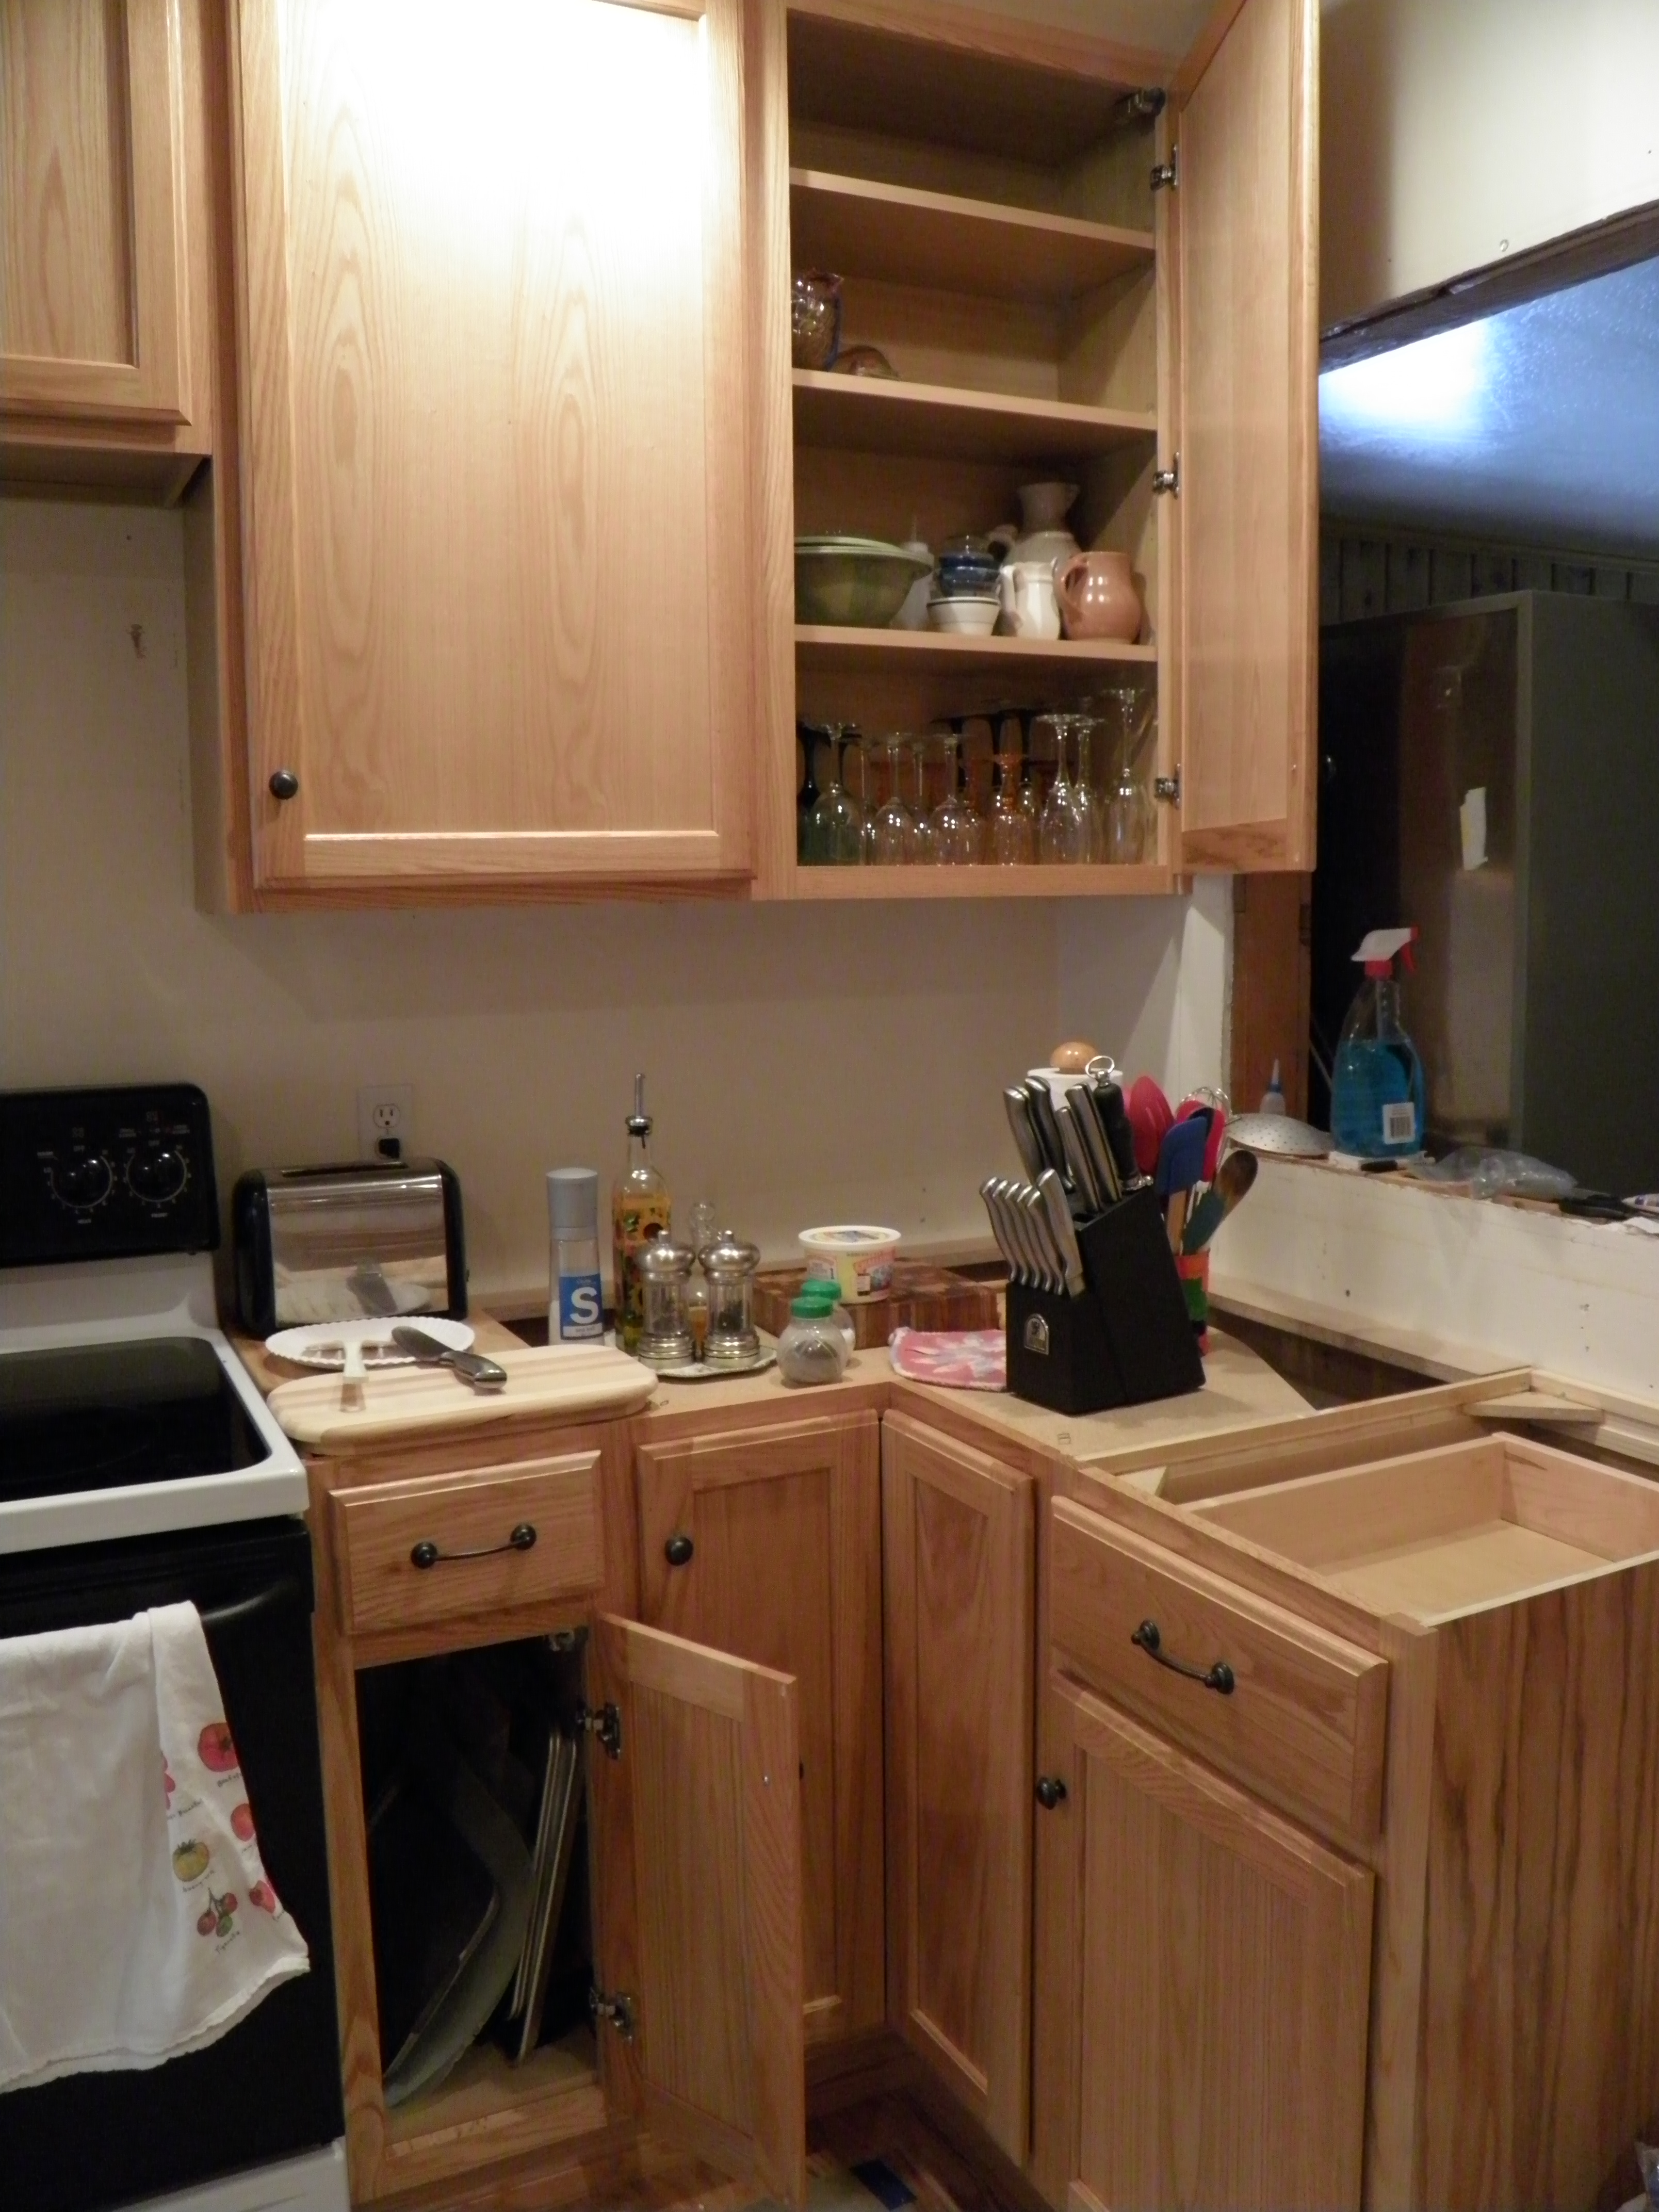
I am not a happy kitchen camper at this point, but it could be worse.  Dennis put the old laminate countertop back in so he could hook the sink up again (this makes three times now he’s taken the sink out and put it back in), so we have water.  We have a working stove.  I am grateful for that, at least.

OLYMPUS DIGITAL CAMERA

OLYMPUS DIGITAL CAMERA

If there is a tip in all this, it’s that you shouldn’t choose your granite slab after prolonged rain unless the slabs are stored in a dry warehouse.  Even when they are sealed, they will absorb water, and it does alter the color, making matching difficult. And that can make it difficult to choose backsplash material and other things as well.

I’d also say choose your contractors carefully, but you really can’t know what’s going to happen.  I chose to do this part of the project through Home Depot because I didn’t want to have to deal with contractors directly myself, and because we don’t know anything about any contractors in Reno, and there’s no one locally who installs granite.  We trusted Home Depot to work with contractors who can get the job done right.  Now we’re talking with Home Depot about how they’re going to make things right with us, because this foul-up has caused some significant inconvenience in our home and lives.

Standard
Remodeling the Kitchen

Of Countertops and Roll-Out Shelves

As some of you know, we discovered some major problems with our new granite countertops after they were installed.  Al, the templater that U. S. Granite uses, came out and checked all his measurements on Friday.  It turns out that his measurements were accurate, but the fabrication shop which cut the granite made mistakes.  The installer made mistakes.  As a result, at least three of our five pieces of granite (maybe four) have to be replaced.  The incorrectly cut and installed pieces were left in place, so that we do have a functional kitchen until the new pieces are installed.  Whenever that is.  We don’t know yet.  And until the granite is installed, we have to keep the floor covered.  Ugh.

In the meantime, over the weekend, Dennis installed the roll-out shelves I bought.  I had originally planned to buy cabinets with the roll-out shelves built in, but this would have added so much to the cost of the cabinets, I had to scrap that upgrade.  I already knew I could find after-market roll-out shelving much cheaper.  I planned to use chrome roll-outs on all the cabinets, but I failed to check and make sure that I could get them in all the sizes I needed for my various cabinets.  I could not get the chrome shelves in a 36” width to fit my big base cabinets on the fridge side of the kitchen.  What to do?

In a secondary search after the cabinets were installed, I found made-to-fit slide-out shelves from Slide-a-Shelf, sold on Costco Wholesale’s website.  Made to fit means that you measure your spaces and send the measurements off to the Slide-a-Shelf company, which then sends you your roll-out shelves made to your measurements.  And they are shipped within five days of ordering, so they must have some already made up in various sizes, right?

There are several choices of wood fronts ready to stain, so that you can match them to your cabinets, or you can choose a paint-grade wood front to match up to painted cabinets.  I chose oak fronts to go with my oak cabinets.  They came unfinished, of course, but all I had to do was slap on a coat of polyurethane (I have lots left over from the coffee table project) and presto!  I have roll-outs which look like they were made for those cabinets.  You can get these shelves in any size for one price through Costco, $79.99 for standard roll-outs, and $89.99 with the soft-close option.  That made these shelves for the big cabinets much more affordable than having them built in.  Shipping was free, another plus, because these things are heavy.  And if you’re a Costco member, there’s another $10 discount.

OLYMPUS DIGITAL CAMERA

OLYMPUS DIGITAL CAMERA

OLYMPUS DIGITAL CAMERA

OLYMPUS DIGITAL CAMERA

I could have gotten double rolling shelves, but I had already decided, based on my scribblings on my cabinet renderings, that I wouldn’t need the upper shelves to roll out.  I did decide to go with the soft close option, because Dennis likes soft close, but after they were installed, I realized that as big as these shelves are, and as heavily as they are going to be loaded, soft close doesn’t work all that well, and I could have saved that $10, which will amount to $30 for all three big shelves.  All the shelves are rated for 100 lb. carrying capacity.  As for installation, one went in really easily.  The other one, for some reason, was a bear, but Dennis finally got it.  There is some assembly required with these shelves before they can be installed, but it is nothing somebody handy with a screwdriver couldn’t handle.  Installation requires a drill and screwdriver.

On the other side of the kitchen, I only have three base cabinets that need roll-out shelving.  One is the sink base.  I wanted to have two roll-out shelves on either side, but because of the plumbing and the garbage disposal, only one would fit.  Dennis has drilled the holes for that one, which will hold the kitchen trash can and cleaning supplies, but he won’t install it until after the next round of countertop installation, because he has to crawl under that cabinet to hook up the plumbing to the sink, and the roll-out would be in the way.

OLYMPUS DIGITAL CAMERA

OLYMPUS DIGITAL CAMERA

The other two roll-outs hold pots and pans and plastic storage stuff.  On the stove side of the kitchen, I have tried to keep things in relatively the same space as they were before.  It drives us both crazy to reach for something and not find it in the place we’re accustomed to.  The older you get, the harder change is!  These roll-outs are from Lynk Professional, and I bought them on Amazon.  They are very affordable, very sturdy, and I think, quite nice-looking.  Dennis said these were a breeze to install.

OLYMPUS DIGITAL CAMERA

OLYMPUS DIGITAL CAMERA

OLYMPUS DIGITAL CAMERA

OLYMPUS DIGITAL CAMERA

I could have bought made-to-fit shelves through Costco Wholesale for all my cabinets.  But with the one-price-fits-all-sizes pricing, I’d have spent much more on the smaller roll-outs than I did going with the Lynk Professional chrome roll-outs.  I spent about $140 on the three chrome roll-outs.  If I’d gone with the Slide-a-Shelf ones, I’d have spent at least a hundred dollars more.  I did get the shipping free on these from Amazon, too.

My roll-outs don’t match, but I’m okay with that.  They are functional and affordable, and I’ll take that over “a foolish consistency” any time!


Standard
Main dishes, Recipes, Travel

Fresh Abalone

I usually like to write up my wild culinary adventures right away, but when you’re camping, you’re not likely to have an internet connection capable of handling a big upload (or is download?).  That was the case with our five days in Cleone, California, a tiny hamlet just a couple of miles north of Fort Bragg in Mendocino County.

We go to Mendocino County (and camp in Cleone) at least once a year, twice if we can manage it, so Dennis can dive for abalone.  For those who don’t know, abalone is a shell fish, but not a fish.  It’s basically a big sea snail.  They look disgusting and taste divine when prepared properly.  So today’s post is about preparing abalone the way we like it best, and we’ve tried many different methods.

OLYMPUS DIGITAL CAMERA

OLYMPUS DIGITAL CAMERA

OLYMPUS DIGITAL CAMERA

OLYMPUS DIGITAL CAMERA

For the past couple of years, we’ve been camping in April with our dear friends, Karen and Louie Fortino, as a birthday celebration for Dennis and Karen, whose birthdays are only days apart.  It’s a good excuse to get together with friends we don’t get to see that often.  They live within two hours of the coast.  For us, it’s an eight-hour drive, but the haul is worth it.

Many years ago, Louie taught us a method for breading and cooking abalone.  It’s the best.  Louie’s a fabulous Italian cook, and this is the way he prepares squid for calamari.  It works equally well with abalone.  But before you get to the breading, there are some essential steps to take to make sure the abalone is tender enough to chew.

First, Dennis pries the abalone out of the shell, cleans away the gut (full of ground kelp), and trims off the black “lips” around the edge of the creature.  These lips are actually the abalone’s feet.  They help it move around on the rocks on which it lives under the surface of the sea.  The meat is pounded a few times with an ab iron (the tool used to pry the abalone off the rock) or a mallet, or even a two by four, if that’s all that’s handy.  This helps that incredibly strong muscle to relax.  Then the meat is rinsed clean, sliced thin into steaks, and pounded again, this time with a meat mallet, bumpy side down.  It’s necessary for the abalone steaks to be tenderized this way, and Dennis usually pounds them until he can see the muscle fibers breaking down.

OLYMPUS DIGITAL CAMERA

OLYMPUS DIGITAL CAMERA

OLYMPUS DIGITAL CAMERA

OLYMPUS DIGITAL CAMERA

Then it’s time for breading.  When we’re camping, we set up the breading station as follows:

*Put a cup of white flour in a paper plate and spread it out (for gluten-free abalone, I use brown rice flour here and homemade gluten-free breadcrumbs, seasoned the same way I season wheat flour breadcrumbs).

*Beat 3 eggs with a 3 tablespoons of water in a shallow bowl (or large paper plate) Mix with a half cup of chopped, fresh parsley if you have it.

*Pour a cup of Italian-seasoned breadcrumbs into another paper plate and spread them out (my recipe below).  If breadcrumbs are store-bought, add ¼ cup of grated Parmesean cheese and mix well.

This is enough breading for two medium abalone, which is enough abalone, with sides, for four hungry adults. The abalone steaks are dipped first in flour, then in the egg-parsley mixture, then in the seasoned bread crumbs.  After breading, they should be laid out in single layers on paper plates, waxed paper, plastic wrap, what-have-you, so that the breading doesn’t get soggy.

We usually have two people working the cooking process, one to bread and one to fry.  (Louie did the breading this time, and Dennis did the cooking, while I sat by the fire and drank wine with Karen!) As soon as breading starts, the cook should start heating some olive oil in a large skillet.  (Regular olive oil, not extra-virgin, is best for frying because it has a higher smoke point, but all I had this time was EV, and you just have to watch the temperature of the oil and clean the pan between batches.)  When the oil is hot but not smoking, it’s time to fry.

It only takes a few minutes to fry breaded abalone steaks.  By the time the breading is browned, the meat is tender and done.  It’s ideal to put the cooked abalone on a cooling rack and cover with paper towels to keep it warm, but when we’re camping, we just put it on paper towels in a paper plate and cover it loosely with foil to keep it warm.  If done right, the breading won’t become soggy while the rest is cooking.

Abalone is best fresh out of the ocean, but it can be removed from the shell, cleaned, and frozen in water (or a mixture of water and milk, Louie says) in freezer bags and eaten later.  We don’t bring it home any more.  It’s eaten on the spot!

We’ve tried other ways of preparing abalone.  It doesn’t have much flavor on its own, so it needs the seasoning in the breading, in my opinion, for best taste.  Dennis used to bread it in cracker crumbs, but the Italian bread crumbs are much better.  We’ve tried it sautéed in garlic and butter.  Blah.  We’ve tried it rolled in a flour and cornmeal mixture like fish.  Blah.  We’ve tried it in panko.  Blah.  We’ve tried it grilled.  Blah and yuck.  Basically, we’ve tried every way anybody who dives for abalone has said it’s good, and we’ve always come back to Louie’s calamari method.  It’s simply the best.

My apologies for the lack of photos with this post, but when you’re about to eat a once-or-twice-a-year delicacy, photos are the last thing on your mind!  I had to jump up and grab my camera just as we were ready to dive in, and I didn’t get pictures of the breading and cooking process because I was drinking wine with Karen.  🙂

OLYMPUS DIGITAL CAMERA

OLYMPUS DIGITAL CAMERA

Homemade Italian Seasoned Bread Crumbs for Abalone Breading

*4 cups dry breadcrumbs

*1 cup grated Parmesan cheese (I do use the fine stuff in the green container for this)

*1/4 cup crushed, dried oregano

2 tablespoons crushed, dried basil

2 tablespoons crushed, dried parsley

1 teaspoon salt

1 teaspoon pepper

1 teaspoon paprika (optional)

Mix all ingredients thoroughly.  Store in cool, dry place in airtight container.  Can be stored in fridge or freezer if tightly sealed.

I save heels, stale bread, hot dog and hamburger buns, dry ends of French bread—whatever I have—in the freezer until I have a gallon bag of it.  Then I dry it in the oven at 170-200 degrees.  I cool it, then run the pieces through the food processor with the blade in place.  I store this in ziplocs in the freezer and make up a batch of seasoned bread crumbs before we go to the coast.

For gluten free breadcrumbs, save the heels and stale pieces of bread and dry and grind them as above.  Then season away!

Earlier in the day, we stopped at Cowlick’s Ice Cream Parlor in Fort Bragg, and I had a scoop of Candy Cap Mushroom ice cream.  It sounds weird, but oh my, was it good!  It tasted like Butter Pecan or Butter Brickle ice cream.  I could have used another bowl of it for dessert!  (Not that we were lacking desserts, with homemade blueberry-topped cheesecake and homemade pineapple upside-down cake, neither of which were photographed!  We ate the evidence!)

OLYMPUS DIGITAL CAMERA

OLYMPUS DIGITAL CAMERA


Standard
Remodeling the Kitchen

Rule

First rule of construction:  What can go wrong, will.  And it did.

The countertops were supposed to be installed on Friday.  Nope.  The installer ran into a problem at his morning job, and he never showed up on Friday, after calling to say he would come, even if it was late.  Neither Dennis nor I were happy about that, because we’d gone to the effort of moving the stove, the cutting boards that were my makeshift counters, the essentials like salt and pepper and olive oil that I need for cooking, and the utensil containers, and we’d covered the floor with paper again to protect it from the workboots that tend to pick up gravel and mud outside and bring it in.  But these things happen, right? We called and rescheduled for first thing Monday morning (today).

A new set of installers showed up a little earlier this morning than we expected them, and they got right to work.  The lead installer seemed to know what he was doing.  He was training a new helper, a gofer, who has aspirations of becoming a lead installer himself.  But it didn’t take long for the first problem to manifest itself.

The lead installer had not brought the bracket they use to secure the dishwasher under the granite countertop.  He said he’d let his boss know, and he’d come back to put the dishwasher in.  In the meantime, they’d go ahead with the installation.  I got so excited when I saw the first top in place, and that was before the dust was cleaned off.  I love the granite I chose with its beige and gray background, black veining, and dark red flecks.

OLYMPUS DIGITAL CAMERA

OLYMPUS DIGITAL CAMERA

And then the next problem surfaced.  The hole for a top mount sink is usually cut on site and outside because it creates a lot of stone dust.  But because our sink base cabinet is HUGE (bigger than a lot of kitchen islands), the installer decided he would have to cut the top for that area in situ to minimize the chance of it cracking.  Okay, that’s reasonable.  However, we didn’t know this was going to be the procedure because we’d been told otherwise, so we didn’t have a chance to curtain off the kitchen with plastic to keep the rock dust out of the rest of the house.  And as soon as the saw started up, the dust billowed out into the living room and down the hall.  Fortunately the doors to the bedrooms were shut, but the office door was open.  Rock dust all over the computer and printer, as well as the leather sofa and recliner, the coffee table and TV cabinet, etc., in the living room, along with the open boxes of kitchen accoutrements that I’d been using and couldn’t put away in the cabinets yet.  Not that that would have made any difference, because everything I did put away in the cabinets is also covered with rock dust.  It’s going to take some serious cleaning to get rid of it all.

All the countertops were installed, the only seam filled with epoxy, and off the guys went to their next job, while Dennis and I started our tasks.  Dennis worked on putting in the sink, and I started cleaning the rock dust off the outside of the cabinets.  (I couldn’t clean the insides because I didn’t have any water yet to wash the dishes before I put them back on the clean shelves.)

Dennis discovered that the sink wasn’t in exactly the same position it had been, so he needed to get a longer length of drain pipe.  I asked him to put the stove back in before he left to get his plumbing supplies, so I could start on dinner while he was gone.  And that’s when the next problem surfaced, and this one is a doozy.

The stove doesn’t fit in the space left for it between the countertops.  In looking at that run of granite, we discovered that the slab is about 3/8ths of an inch out of position.  The seam isn’t in the right place, the sink base countertop isn’t in the right place, and the piece that abuts it and the stove is therefore too long.

We didn’t discover this problem until after 5 o’clock, so we can’t call U.S. Granite until tomorrow morning.  After hearing about how strong the industrial grade silicone is they stick the countertops down with, we’re worried about our new cabinets.  We don’t know yet how they are going to fix this problem, but in the meantime, I’ll be cooking on the stove that’s sitting out in the middle of the kitchen.  At least I can cook in the kitchen, and the sink is now plumbed (my hero is multi-talented), so I have water again in the kitchen after how many weeks?  I’ve lost track.

OLYMPUS DIGITAL CAMERA

OLYMPUS DIGITAL CAMERA

The first rule of construction applied today. What could go wrong did.  But Dennis is mad enough that he’s going to make sure it’s fixed right.  And in the meantime, we’ve chosen the backsplash tile.  It’s going to look great with the new countertops and cabinets.

OLYMPUS DIGITAL CAMERA

OLYMPUS DIGITAL CAMERA

Standard
Dairy, Gluten-free, Main dishes, Recipes

Buttermilk Pancakes

Until I started making buttermilk pancakes and sourdough pancakes from scratch, I really wasn’t all that fond of pancakes.  I’m sure I enjoyed them as a kid, because what kid doesn’t like pancakes?  But when my husband would make them for our kids, from pancake mix, they were always just so heavy and doughy, I didn’t really enjoy them.  I had to start making them from scratch to fall in love with pancakes again.

I love sourdough pancakes.  I like to make them on holidays when I’ve activated my sourdough starter to make sourdough rolls. But I don’t always have my sourdough batter activated and ready to go every time I want to make pancakes.  You either have to keep your sourdough always growing on the countertop (which I don’t), or you have to plan ahead and activate your refrigerated starter the night before so you can make pancakes the next morning (which I don’t).  And that’s why I love buttermilk pancakes, made with real buttermilk.  They are light and airy and tender, like sourdough pancakes, and they have a similar flavor.  And believe me, the flavor and texture of real buttermilk pancakes is nothing like the flavor and texture of a buttermilk pancake mix.

I make my own buttermilk now, so I always have it in the fridge. I usually only make 2 cups at a time, so I can use it up and keep making it fresh.  (Click the link to see how easy it is to make your own buttermilk.)  Also, my fridge is kind of small, so it helps with the space issue to keep just a pint jar going, and that’s enough for a big batch of pancakes, or a small batch of pancakes and a batch of biscuits.  (Yeah, real buttermilk biscuits are the bomb, too.) Because I always have buttermilk on hand, I don’t have to plan ahead to make delicious pancakes.

I have also used milk kefir in place of buttermilk with the same results.  I tried this because I had some kefir go a little alcoholic in the fridge when I was ill with the flu and unable to eat dairy.  I didn’t care to drink it when I got better, but I didn’t want to waste it.  The kefir made wonderful, light, fluffy pancakes, just like buttermilk, with no adjustments to the recipe.

I often make pancakes on the weekends.  I use a gluten-free, bean-based flour, and Dennis loves them.  He usually pours maple syrup on his.

OLYMPUS DIGITAL CAMERA

OLYMPUS DIGITAL CAMERA

I like to change it up.  Sometimes I like maple syrup, but I often will open a jar of my blackberry syrup or another fruit syrup I’ve made, or I’ll spread my pancakes with my old-fashioned, low-sugar, strawberry jam made with whole berries. (You can tell this picture was taken recently during the kitchen renovation, because of the paper plate and plastic fork!)

OLYMPUS DIGITAL CAMERA

OLYMPUS DIGITAL CAMERA

Or maybe I’ll pile them with apple butter or pumpkin butter and then drizzle them with maple syrup. Here’s a pic of one spread with apple butter and then rolled up like a blintz.  Then I coated it with maple syrup.

OLYMPUS DIGITAL CAMERA

OLYMPUS DIGITAL CAMERA

OLYMPUS DIGITAL CAMERA

OLYMPUS DIGITAL CAMERA

I like them in the summer with sliced fresh strawberries, or fresh raspberries or blueberries, or fresh peaches or nectarines, and whipped cream.  And if you add an extra egg and thin the batter out a bit with more buttermilk, you can use this batter for crepes as well.  Then you can fill them with sweetened cream cheese and fruit for blintzes.  Oh, my.  If you omit the sugar, you can use the crepes for a savory dish.  I’ll have to dig out my old recipe for chicken or turkey main dish crepes!

Here’s my gluten-free buttermilk pancake recipe for two (double the recipe for a family), and after that, I’ll share an old buttermilk pancake recipe that uses wheat flour.

Gluten-free Buttermilk Pancakes

Wet ingredients:

1 large egg

2 tablespoons melted butter or vegetable oil (I use grapeseed, olive, or avocado oil)

1 cup buttermilk or milk kefir (Regular milk can be used, but the flavor will be different. Omit baking soda if using milk, and increase baking powder to ¾ teaspoon.)

½ tsp. vanilla extract

Dry ingredients:

1 cup gluten-free baking flour (I use Bob’s Red Mill from bulk bins at Winco.)

1 Tbs. sugar (any kind, or can be omitted; I use coconut palm sugar)

½ tsp. baking powder

¼ tsp. baking soda

¼ + pinch of salt

1/2 teaspoon xanthan gum (can be omitted; I’ve forgotten it, and the pancakes still held together)

Mix dry ingredients.  Mix wet ingredients in separate bowl; mix wet ingredients into dry. Let batter rest and get bubbly for a few minutes before baking on a hot, greased griddle or skillet.

OLYMPUS DIGITAL CAMERA

OLYMPUS DIGITAL CAMERA

I spread the batter out a little bit with the spoon to get a neater circle and a thinner pancake, although obviously they are not always the same size!

OLYMPUS DIGITAL CAMERA

OLYMPUS DIGITAL CAMERA

I cook at just hotter than medium in a little butter (and I really do mean a little) so they brown nicely and don’t have to be buttered after cooking, which can make pancakes soggy.   Allow bubbles to form and break before trying to flip, and make sure the pancakes are fully set and browned on the bottom before you flip them.  Don’t crowd the pan or griddle like I always try to do at least once.

You can make about a dozen small pancakes or 6-8 medium sized ones from this amount of batter.  We usually have a couple left over that I save and reheat for a weekday breakfast.

Buttermilk Pancakes (with wheat flour)

Wet ingredients:

1 egg

1 ¼ cups buttermilk or soured milk* (or milk kefir)

2 tablespoons melted butter or vegetable oil

Dry ingredients:

1 ¼ cups all purpose flour

1 teaspoon sugar

1 teaspoon baking powder

½ teaspoon baking soda

½ teaspoon salt

Beat egg.  Beat in buttermilk and melted butter.  Combine dry ingredients and beat into wet ingredients until batter is smooth.  Bake on hot, buttered griddle or skillet.  Flip when bubbles have formed but before they break.

*If you don’t have buttermilk or milk kefir, you can approximate the flavor and acidic action of these by souring milk.  To one cup of sweet milk, add 1 tablespoon of white vinegar or lemon juice.  Stir and let stand a few minutes to curdle.

Notice a few differences in techniques between these two recipes.  With gluten-free flours, you almost always mix the wet ingredients into the dry.  The gluten-free pancakes also need to cook a little longer before you flip them.  With wheat flour, it’s nearly always a case of mixing dry ingredients into wet.

If you’ve been eating pancakes made from a commercial mix, I hope you’ll try making buttermilk pancakes from scratch.  It really takes only a couple of minutes more to measure out the extra dry ingredients, and the taste and texture of the real thing is worth the tiny bit of extra time.


Standard
Remodeling the Kitchen

Another Handy Tip

I did something today that I thought I should pass along to all who might be in the midst of a kitchen renovation or who are contemplating one.

It’s sort of a no-brainer to label your boxes thoroughly and comprehensively when you pack up the contents of your kitchen before you start tearing out the cabinets.  One thing I wish I’d done is label the sides of the boxes rather than the tops.  If you label tops and then stack the boxes, you can’t tell what’s in the lower ones unless you wiggle the boxes around (risking a collapse), or move them, and some of them are darned heavy.  If the boxes are labeled on their sides, it’s much easier to tell what’s in them when you are looking at a stack of three or four boxes.  But that’s not my main tip for the day.

Packing up is no fun, but I love unpacking and putting things away.  I love figuring out where things are going to go, and how I can best organize my space.  So before I started unpacking boxes today, I printed out the drawings that the cabinet company (Gold Run Cabinet and Door Co. in Susanville, CA) gave me when Maurice emailed me with the estimate and work-up.  When I had drawings for both sides of the kitchen on paper, I sat down with a pencil and labeled each cabinet on the drawings with what I thought I wanted to put in it.

OLYMPUS DIGITAL CAMERA

OLYMPUS DIGITAL CAMERA

My boxes are heavy, and I really wanted to minimize lugging them around unnecessarily.  I also didn’t want to put a bunch of stuff in a cabinet and then decide that wasn’t what I wanted to put in that cabinet after all.  I’m recovering from an extended bout with the flu, and I’m not feeling all that up to snuff.  I didn’t want to expend any more energy than I absolutely had to.

With my doodled plan in hand, I was able to locate the boxes I wanted to unpack today (with some wiggling and moving the top ones, hence my first tip) and know where that stuff was going to go.  These new cabinets are so tall that I can only reach the bottom two or three shelves on the uppers unless I climb up on the step stool.  With the step stool, I can reach the top two shelves.  I know that only the things I don’t use often will go up on those top shelves, so today, I focused on the lower shelves of the uppers on the sink side, putting away drinking glasses, dishes, coffee mugs, tea and coffee, wine glasses, casserole dishes, and serving dishes.

OLYMPUS DIGITAL CAMERA

OLYMPUS DIGITAL CAMERA


OLYMPUS DIGITAL CAMERA

OLYMPUS DIGITAL CAMERA

I can’t put away a lot of things in the lower cabinets because I don’t have my roll-outs yet.  I’m ordering after-market roll-out shelves for several of the lower cabinets (and for my spice cabinet which is the upper just to the right of the stove), and there’s really no point in loading stuff into the cabinets and then having to take it out again to install the roll-outs.  I also can’t put anything away in any of the drawers until the countertops are installed.  So I’m mainly focusing on the uppers, but I did put away one box of baking pans because I kept tripping over it in the living room when I’d come around the corner in the dark!

OLYMPUS DIGITAL CAMERA

OLYMPUS DIGITAL CAMERA

I still have a lot of stuff to put away, but with my drawings and notes, I know I can put things away efficiently and with a minimum of effort.  And that’s important to me as I continue to recover from the flu.

If you are doing a kitchen renovation or thinking about one, keep in mind that those drawings the cabinet shop gives you will be really helpful in the unpacking and stowing away process.

Standard
Remodeling the Kitchen

A Neat Little Trick

This will be a shorty but a goody.  Today, I unpacked the first box and loaded some of my china into the glass-fronted china cabinet in the kitchen.  I had the cabinet guys line up my cabinet shelves with the grid on the glass door, but then I realized that the shelves had no routered groove for my china plates the way my old wooden hutch had.  I started thinking about how I would support those plates, and I came up with an idea that I ran by the cabinet guys.  I got the okay, yeah, that would work, so I did it today.

First, I cleaned the shelves with some ammonia-based glass cleaner to get off any dust or grease or anything that might keep the silicone from sticking to the shelf.  Then, I got out the big plate that needed to be supported and measured where I wanted the edge of the plate to rest and marked that spot with a pencil.  Then I used a ruler to measure for a line all the way across the shelf.  After that, I got out the smaller plates that needed to be supported, and I did the same, marked and measured and drew a line.  I determined that I only needed two different support lines, but I could have put in as many as I wanted.

Then I got a tube of clear silicone sealer, and I ran a bead of silicone all the way along the shelf, starting with the line furthest from me, closest to the back of the cabinet.  I ran the second bead, closer to me, along the shelf as well.  I went slowly and made sure I had a good, thick bead of sealer laid down.  I went back and filled in any spots that looked a little thin. Then I left the cabinet doors open and waited two hours, until the silicone sealer had set up firmly and was transparent.

OLYMPUS DIGITAL CAMERA

OLYMPUS DIGITAL CAMERA

When I thought the sealer was dry, I tested the strength of the silicone lines with my finger to see if they had actually adhered to the shelf.  They had, so I placed the plate and watched to see if the weight of it was going to dislodge the silicone bead.  It didn’t.  I left the plate in place, put in a couple more plates, and then filled the shelf.  I put a large teapot in front of the big plate, just in case it did dislodge the silicone line.  I don’t think it will, but I thought “better safe than sorry.”

OLYMPUS DIGITAL CAMERA

OLYMPUS DIGITAL CAMERA

The silicone dried clear, nearly transparent, and is invisible with the shelf full.  I’m pretty happy with how that little project turned out.

OLYMPUS DIGITAL CAMERA

OLYMPUS DIGITAL CAMERA

That’s it!  That’s my neat little trick that requires no power tools to make a plate groove out of any shelf.  All you need is a pencil, a ruler or tape measure, and a tube of clear silicone sealer. Now go out and stand up those plates!

OLYMPUS DIGITAL CAMERA

OLYMPUS DIGITAL CAMERA

Standard
Remodeling the Kitchen

Cabinets Are Here!

This post marks Day 2 of the cabinet installation.  By the end of today, the cabinet install will be finished!  Oh, no, I’m not excited or anything like that.

On Friday, the cabinet shop guys set all the cabinets in place.  Today, they are working on getting the soft close door apparatus installed, all the shelves in and the doors adjusted and leveled, the holes drilled for the pulls and knobs, and the trim nailed in on top and bottom.

OLYMPUS DIGITAL CAMERA

OLYMPUS DIGITAL CAMERA

I opted to forego crown molding on top of the cabinets for two reasons.  One, I chose a really plain style of cabinet door, and I thought crown molding would be too fussy.  Two, it would have added significantly to the cost of the job, and that added expense wasn’t covered in my budget.  So I’m getting just a small strip on top to hide the unlevel ceiling (absolutely nothing in this room is square or truly level) and the usual toe kick on the bottom.

OLYMPUS DIGITAL CAMERA

OLYMPUS DIGITAL CAMERA

When the guys were here Friday, we still had a small patch of floor in the corner which we hadn’t finished.  We just ran out of time, but we made sure we had finished the places where the cabinets had to go, and we’d finished the inset spot by the door.  After we had a bite to eat Friday night, we decided to finish that patch in the corner.

That small spot in the corner turned out to be the most difficult and time-consuming to lay because of the way we had to butt it up against the vertical inset, and the angle that Dennis had to use with the nail gun once we got too close to the wall to use the staple gun.  We had several mishaps with the nail gun that cost us a lot of time (and ripping out of ruined boards) before we got within one run of the wall at 11:15 that night.  We decided to hold off on the last run and and fill strip until the next day, when there was daylight to cut by.  That proved to be a good decision, because the last run required more delicate cutting, and the ¾ inch to ¼ inch along the wall that was a result of the room not being square needed to be cut precisely to fit properly.  And my hero came through and did a really good job on it.  I am in love with the floor.

OLYMPUS DIGITAL CAMERA

OLYMPUS DIGITAL CAMERA

OLYMPUS DIGITAL CAMERA

OLYMPUS DIGITAL CAMERA

I can’t wait to uncover the floor and get a good look at the cabinets juxtaposed with that beautiful new oak.  Right now the floor has to stay covered because it is snowing outside, and the guys have to go in and out from their big chop saw which is set up outside under the overhang.  I was going to uncover the floor tonight, but the granite fabricators are coming tomorrow to measure for the countertops, so it’s best to keep a cover on them until no more wet work boots are going in and out of the house.


Standard
Remodeling the Kitchen

Floored, Continued

We have been working on putting the hardwood down on the kitchen floor this week.  Our son, Joel, came over and helped us decide how to lay it.  We can’t lay it vertically as I’d planned, because as Joel and Dennis discovered, the room isn’t square.  In fact, it is so out of square that if we laid the wood vertically, we’d end up with more than an inch gaps on either side against the walls that would have to be filled in, and would still show when the baseboards were put in.

It took two hours of measuring and discussing before we decided we had to lay it horizontally, across the width of the kitchen.  It doesn’t line up with the living floor, which is a shame, but there was no help for it.

OLYMPUS DIGITAL CAMERA

OLYMPUS DIGITAL CAMERA

There’s one good thing about laying the hardwood horizontally.  It will give the kitchen the illusion of more width.  The room is not especially narrow, but certainly it’s longer than it is wide by about 9 feet, and when the cabinets go in on the side walls, it’ll narrow the room visually even more.  How the horizontal strips will look with the backsplash laid in a vertical pattern on the side walls, I have no idea.  We’re just going to have to see.

OLYMPUS DIGITAL CAMERA

OLYMPUS DIGITAL CAMERA

It took some finessing to even start putting the wood down against the transition strip that deals with the change in level from the living room to the kitchen elevation.  But Joel got us started, and we’ve been creeping along every evening after work.  Dennis does the nailing; I do the layout and cutting on the chop saw.  I’d never used a chop saw before, but Joel gave me some basic training, and now I’m good to go.  Who’d a thunk it, me using any power tool other than a sander?

OLYMPUS DIGITAL CAMERA

OLYMPUS DIGITAL CAMERA

Last night, Joel came over and helped us handle the tricky section by the door, where the room goes badly out of square.  We decided we had to do a little inset pattern by the door and run the flooring the opposite way.  None of us were sure how it was going to turn out, but I love it.  Joel is going to notice where it isn’t square every time he comes in the door, but I really doubt anybody else will notice it.  I can’t really see it myself!

OLYMPUS DIGITAL CAMERA

OLYMPUS DIGITAL CAMERA

We had to have most of the floor done by Friday, because that’s when the cabinets are being installed.  We have the floor done to the corner where the table goes, so we opted to stop there for now, so Dennis can work on the electrical outlets tonight that have to be moved/installed before the cabinets go in.  If the cabinet guys can’t finish on Friday, they’ll come back on Monday.  Countertops are being measured and templated on Tuesday.  We’ll probably finish the floor sometime this weekend.  We are getting there!


Standard
Remodeling the Kitchen

Buttoning Up

The last couple of weeks have been all about the floor in the kitchen.  Last time I wrote, Dennis was getting ready to pull up the subfloor in one area to repair a rotted support piece, a sill plate.  The sill plate that was rotten was in direct contact with the old concrete foundation that would have been on the outside (before the kitchen addition was done). For a couple of days, the floor was open down to dirt while he pulled out the rotten piece and another piece that was resting on it but not rotten, replaced the sill plate, treated the piece that went on top of the sill plate (I think Joel called it a drip plate), and replaced it as well.

OLYMPUS DIGITAL CAMERA

OLYMPUS DIGITAL CAMERA

Then Dennis replaced the plywood subfloor over the addition in the kitchen.  With the top flooring off, you can see the kitchen addition clearly.  We don’t know exactly when the kitchen was added to the original “cabin,” but we think this addition to the kitchen was done in the ‘70s, when the back part of the house that contains bedrooms and bathrooms was added.  A new foundation was poured at that time, and new floor joists were laid.  The builders didn’t use the same building techniques of laying planks for the subfloor.  They used plywood, so the addition becomes visible when the subfloor is exposed.

OLYMPUS DIGITAL CAMERA

OLYMPUS DIGITAL CAMERA

When that was all replaced and the floor closed up again, Dennis began laying the ¾ inch tongue-in-groove subfloor over the plank floor to level the entire floor so the hardwood can be nailed down. In the photo below, the floor is almost buttoned up.

OLYMPUS DIGITAL CAMERA

OLYMPUS DIGITAL CAMERA

Soon, hardwood!

Standard