Main dishes

Bear and Mushroom Fricassee with Creamy Polenta

Here’s a nice dish for a special, stay-at-home St. Valentine’s Day dinner.  Don’t be afraid of the bear.  I make dishes with the meat I have on hand, which is usually bear or venison, or sometimes, when I’m really lucky, bison, or if I’ve found a good deal, grass-fed beef.  You can make this recipe with any red meat, including elk or goat.  It could probably be adapted for pork or chicken as well.  Changing the kind of meat will of course change the flavor of the finished dish, but it will be good no matter what kind of meat you use.  The original version, from Scott Conant’s Scarpetta cookbook (the recipe was posted on the Food Network), was meatless.  You might want to follow the link to the original recipe to decide whether or not you’d like it without meat, but I can guarantee you that even with the addition of meat, my adaptation is simpler.

Why add meat?  Well, if I’m going to consume as many carbs as polenta contains (and I really shouldn’t even so), I have to balance those carbs with plenty of protein, more than mushrooms provide.  And bear, according to my expert hunter son, contains the highest levels of protein of all red meats.  I have not been able to find a scientific study confirming this, but it makes sense to me since bears are constantly on the move, and their bodies are all muscle.  The black bears in our California mountains are omnivores, but few of them reach the huge size of bears with a more plentiful food supply, like Alaskan salmon.  Our bears typically eat little fish, but lots of grubs, berries, and some carrion.  If they haven’t been raiding campground dumpsters, they are very lean, and very good eating.  Take a look at the picture below of the bear round steak (deboned by the butcher, darn it), and I’ll bet you’ll be surprised.  There’s not a bit of fat on that meat.  It’s all lean muscle, which means it’s going to take some low, slow cooking.

OLYMPUS DIGITAL CAMERA

In addition to adding meat, I had to change the original recipe because I’m not a rich chef.  I don’t have access to some of the ingredients Scott Conant uses.  (Boy, would I love to try this dish in his restaurant and compare it to my bear and mushroom fricassee!)  The original recipe calls for shallots, which are pricey where I live, so I used a sweet white onion.  The recipe also calls for a Chicken Reduction, which sounds amazing, but I didn’t have time to make that and didn’t want to use my homemade turkey stock (I have other plans for it), or my homemade chicken stock (because it has chicken meat in it for soup), nor did I have access to the substitutes mentioned in the original recipe.  So I used some of the roasted vegetable stock I made last week:  3 bags of frozen onion, celery, and carrot scraps and peelings, roasted at 425 degrees with salt, pepper, and a little olive oil, and then covered with water in a pot, cooked down, and strained.  This stock is so rich and delicious, you’d never know it was made with scraps, and I doubt the Chicken Reduction could be that much better.

OLYMPUS DIGITAL CAMERA   OLYMPUS DIGITAL CAMERA   OLYMPUS DIGITAL CAMERA

The original recipe also calls for a mix of half milk and half heavy cream.  Well, that’s half & half, which I can get for half the price of the same amount of milk and cream.  Scott Conant’s recipe used a mix of domestic and wild mushrooms.  When I priced mushrooms in our little town, the few exotic species were something like $8.99 for 4 ounces.  I can’t afford that!  But I did find a deal on sliced crimini mushrooms (baby portabellas), and I stretched those with some sliced white button mushrooms, the red-headed, bastard stepchild of mushrooms according to many famous chefs, but button mushrooms will still give some flavor and good meatiness.  Of course, the recipe calls for Parmigiano-Reggiano.  My budget can’t handle that, even if I knew where to get it where I live, but I can get tubs of freshly-grated domestic parm at Grocery Outlet (sometimes I can get chunks of it fresh and grate my own, but not this time), so that’s what I used.  My chives aren’t up in the garden yet, and I wasn’t going to make a special trip to town to buy chives for a garnish, although it would have made the dish a little dressier.  Finally, I cut the polenta recipe in half.  The fricassee serves 4, but the polenta recipe said it made 8-10 servings.  That’s a lot of polenta, and while there are a lot of things you can do with leftover polenta, I don’t need the extra temptation, nor did I need to buy that much milk, cream, or half & half.  And the altered proportions worked perfectly: it made the right amount of polenta to serve with the amount of fricassee.

Even though I’ve simplified this recipe and used less expensive, more common ingredients (except for the bear), it still is not something I’d want to make and serve to guests because it is pretty time-consuming (although well-worth the time), and requires quite a bit of attention.  But if you’re staying home on St. Valentine’s Day and thinking about a special meal for your sweetie, this one qualifies.  You do have to tend the polenta, stirring it every 15-20 minutes for a couple of hours.  The fricassee simmers away on its own after you get all the ingredients together.   I hope you’ll set aside some time to try this dish, because it is truly memorable.

Bear and Mushroom Fricassee with Creamy Polenta

For the fricassee:

1 lb. of red meat, such as round steak (you can use any of the meats mentioned above, but beef will probably be the choice of most).

Mix the next five (or four) ingredients together for the rub for the meat.

¼ teaspoon crushed dried thyme

Pinch of red pepper flakes OR 1/8 teaspoon cayenne pepper (I used my Nigerian ground red pepper)

½ teaspoon kosher salt

¼ teaspoon freshly ground black pepper

1 tablespoon dried tomato skin powder (optional, will discuss a replacement below)

OLYMPUS DIGITAL CAMERA

6 tablespoons of olive oil (I used my rosemary-infused olive oil and omitted the rosemary below)

1 clove garlic, minced finely

1 sweet white onion, chopped

10-12 oz. cleaned, sliced mushrooms (I used crimini and white button)

Several sprigs of fresh thyme, one bay leaf, and one sprig of fresh rosemary

½ cup of dry white wine

2 cups of chicken or vegetable stock (I used the vegetable stock I made last week—see above)

1 tablespoon tomato paste

1 tablespoon butter plus ½ tablespoon olive oil for searing meat

For the polenta:

4 cups half & half

1 ½ teaspoons kosher salt

½ cup coarse polenta

2 tablespoons butter

¼ cup grated parmesan cheese

Directions:

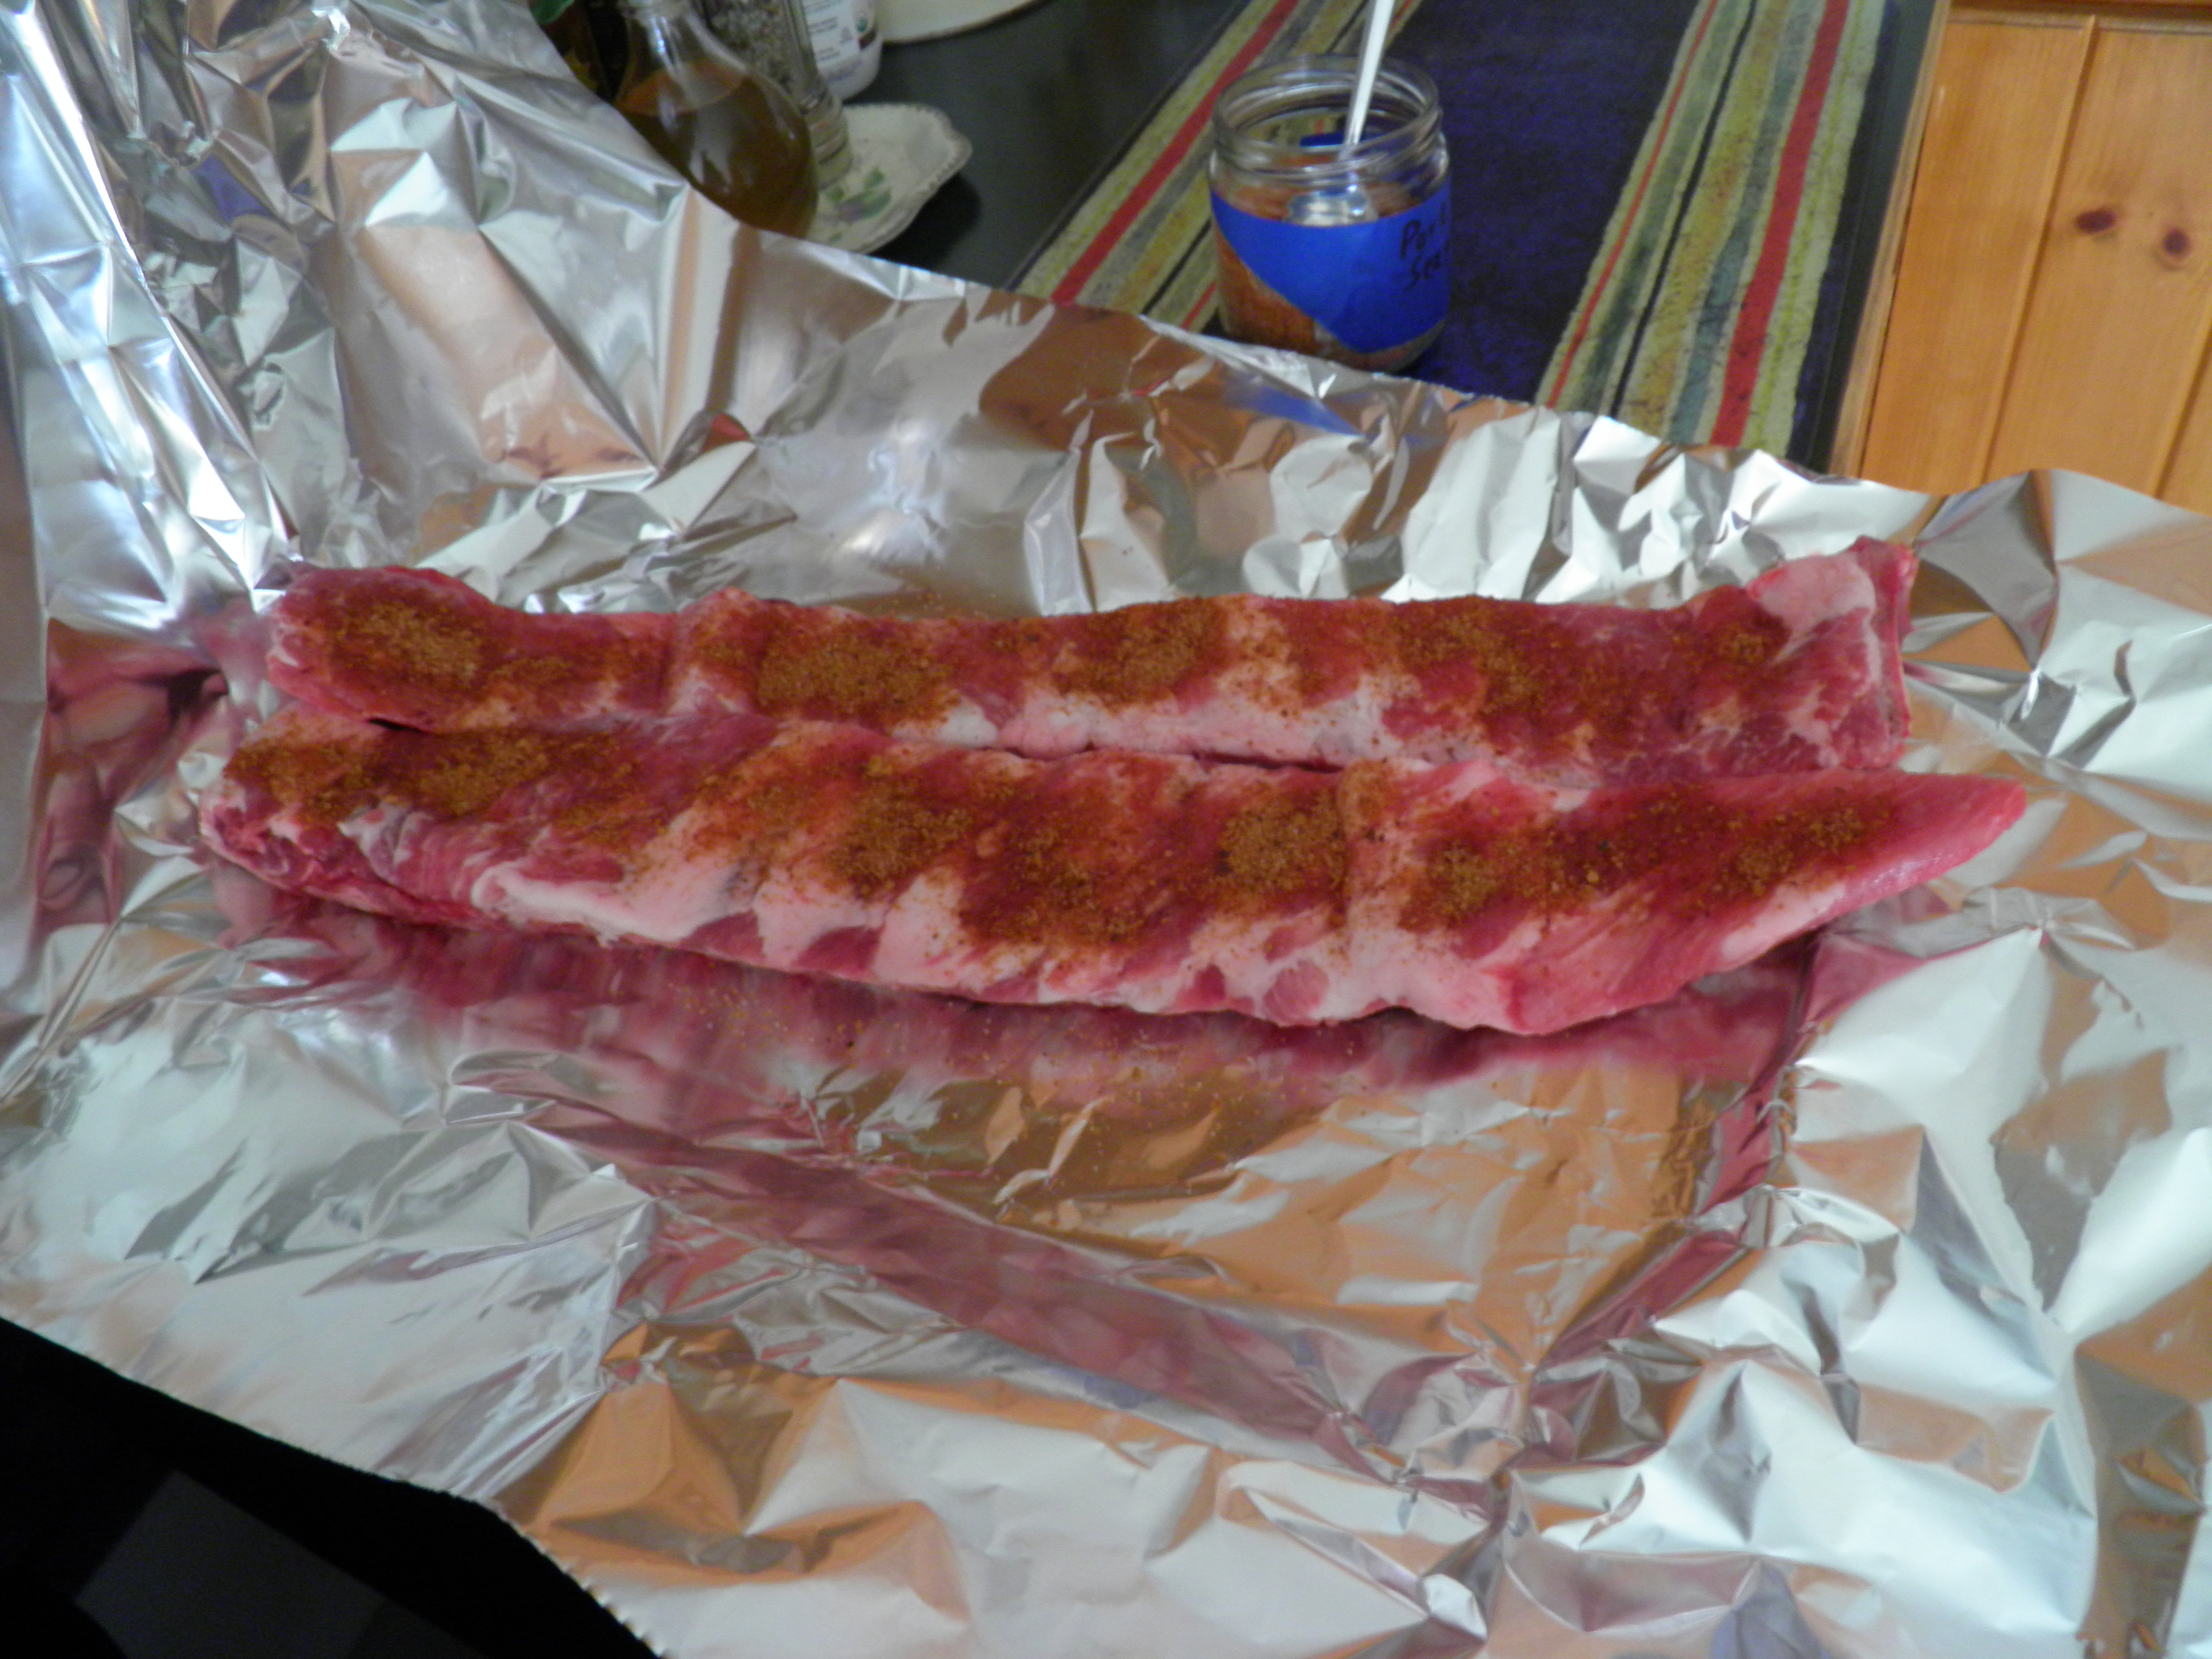
Pat meat dry, trim off any fat or silver skin, cut into cubes.  (Because my bear round steak was so lean, I left it to marinate whole and cubed it up just before searing off.)  Mix rub ingredients together, sprinkle on meat, wrap in plastic or place in zipper top bag, refrigerate for at least 1 hour, up to 8 hours.  Remove meat from fridge at least 15 minutes before ready to sear.

OLYMPUS DIGITAL CAMERA OLYMPUS DIGITAL CAMERA OLYMPUS DIGITAL CAMERA

Heat 6 tablespoons of olive oil on medium heat in large heavy pan (I used my old cast aluminum Dutch oven) with a tight-fitting lid.  Add the chopped onions and sauté until they begin to turn golden.  Add garlic and mushrooms, cook and stir until mushrooms have begun to release some liquid.  Remove mushrooms and onions from the pan, scraping out all the little pieces; set aside.

OLYMPUS DIGITAL CAMERA

In the same pan, heat 1 tablespoon butter and ½ tablespoon olive oil; sear meat cubes until brown.

OLYMPUS DIGITAL CAMERA

Deglaze the pan with ½ cup dry white wine.  Add the stock, the fresh herbs, and add the mushrooms and onions and all the collected liquid back into the pan.  Add the tomato paste and stir well to blend.  (I used my dried tomato skin powder again, 2 tablespoons of it, but the tomato paste will give a similar, even richer flavor.)

OLYMPUS DIGITAL CAMERA

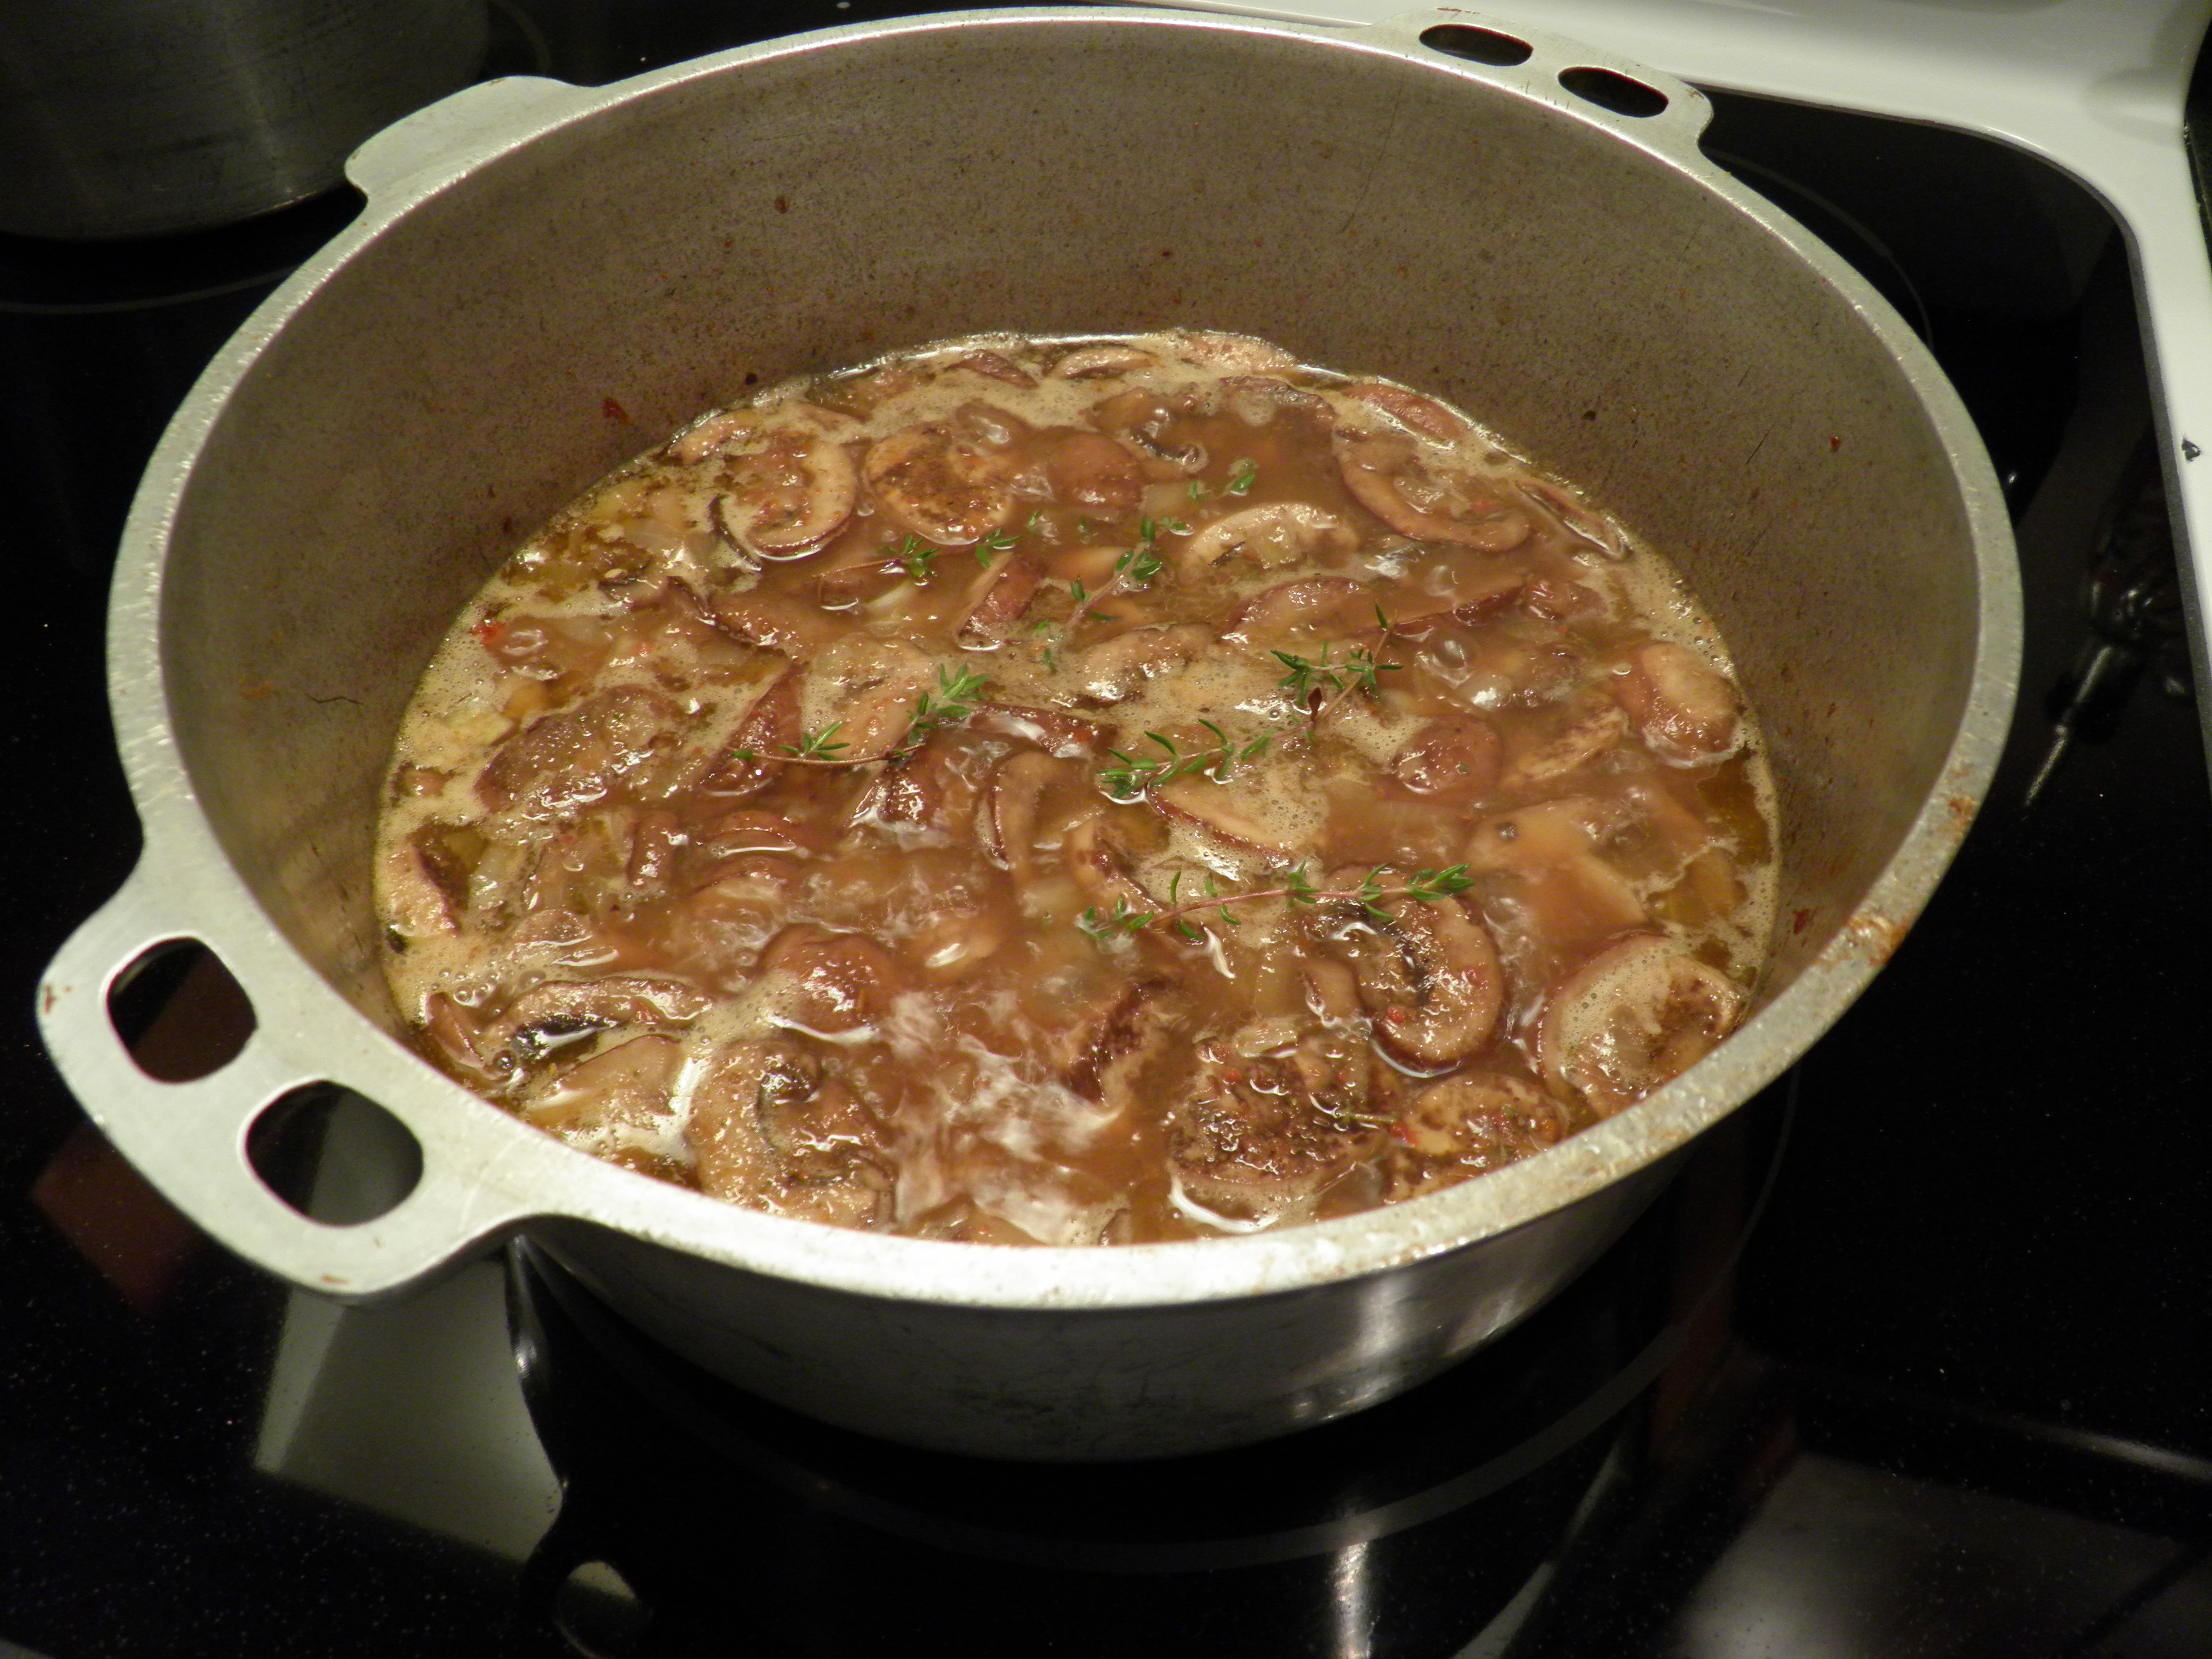
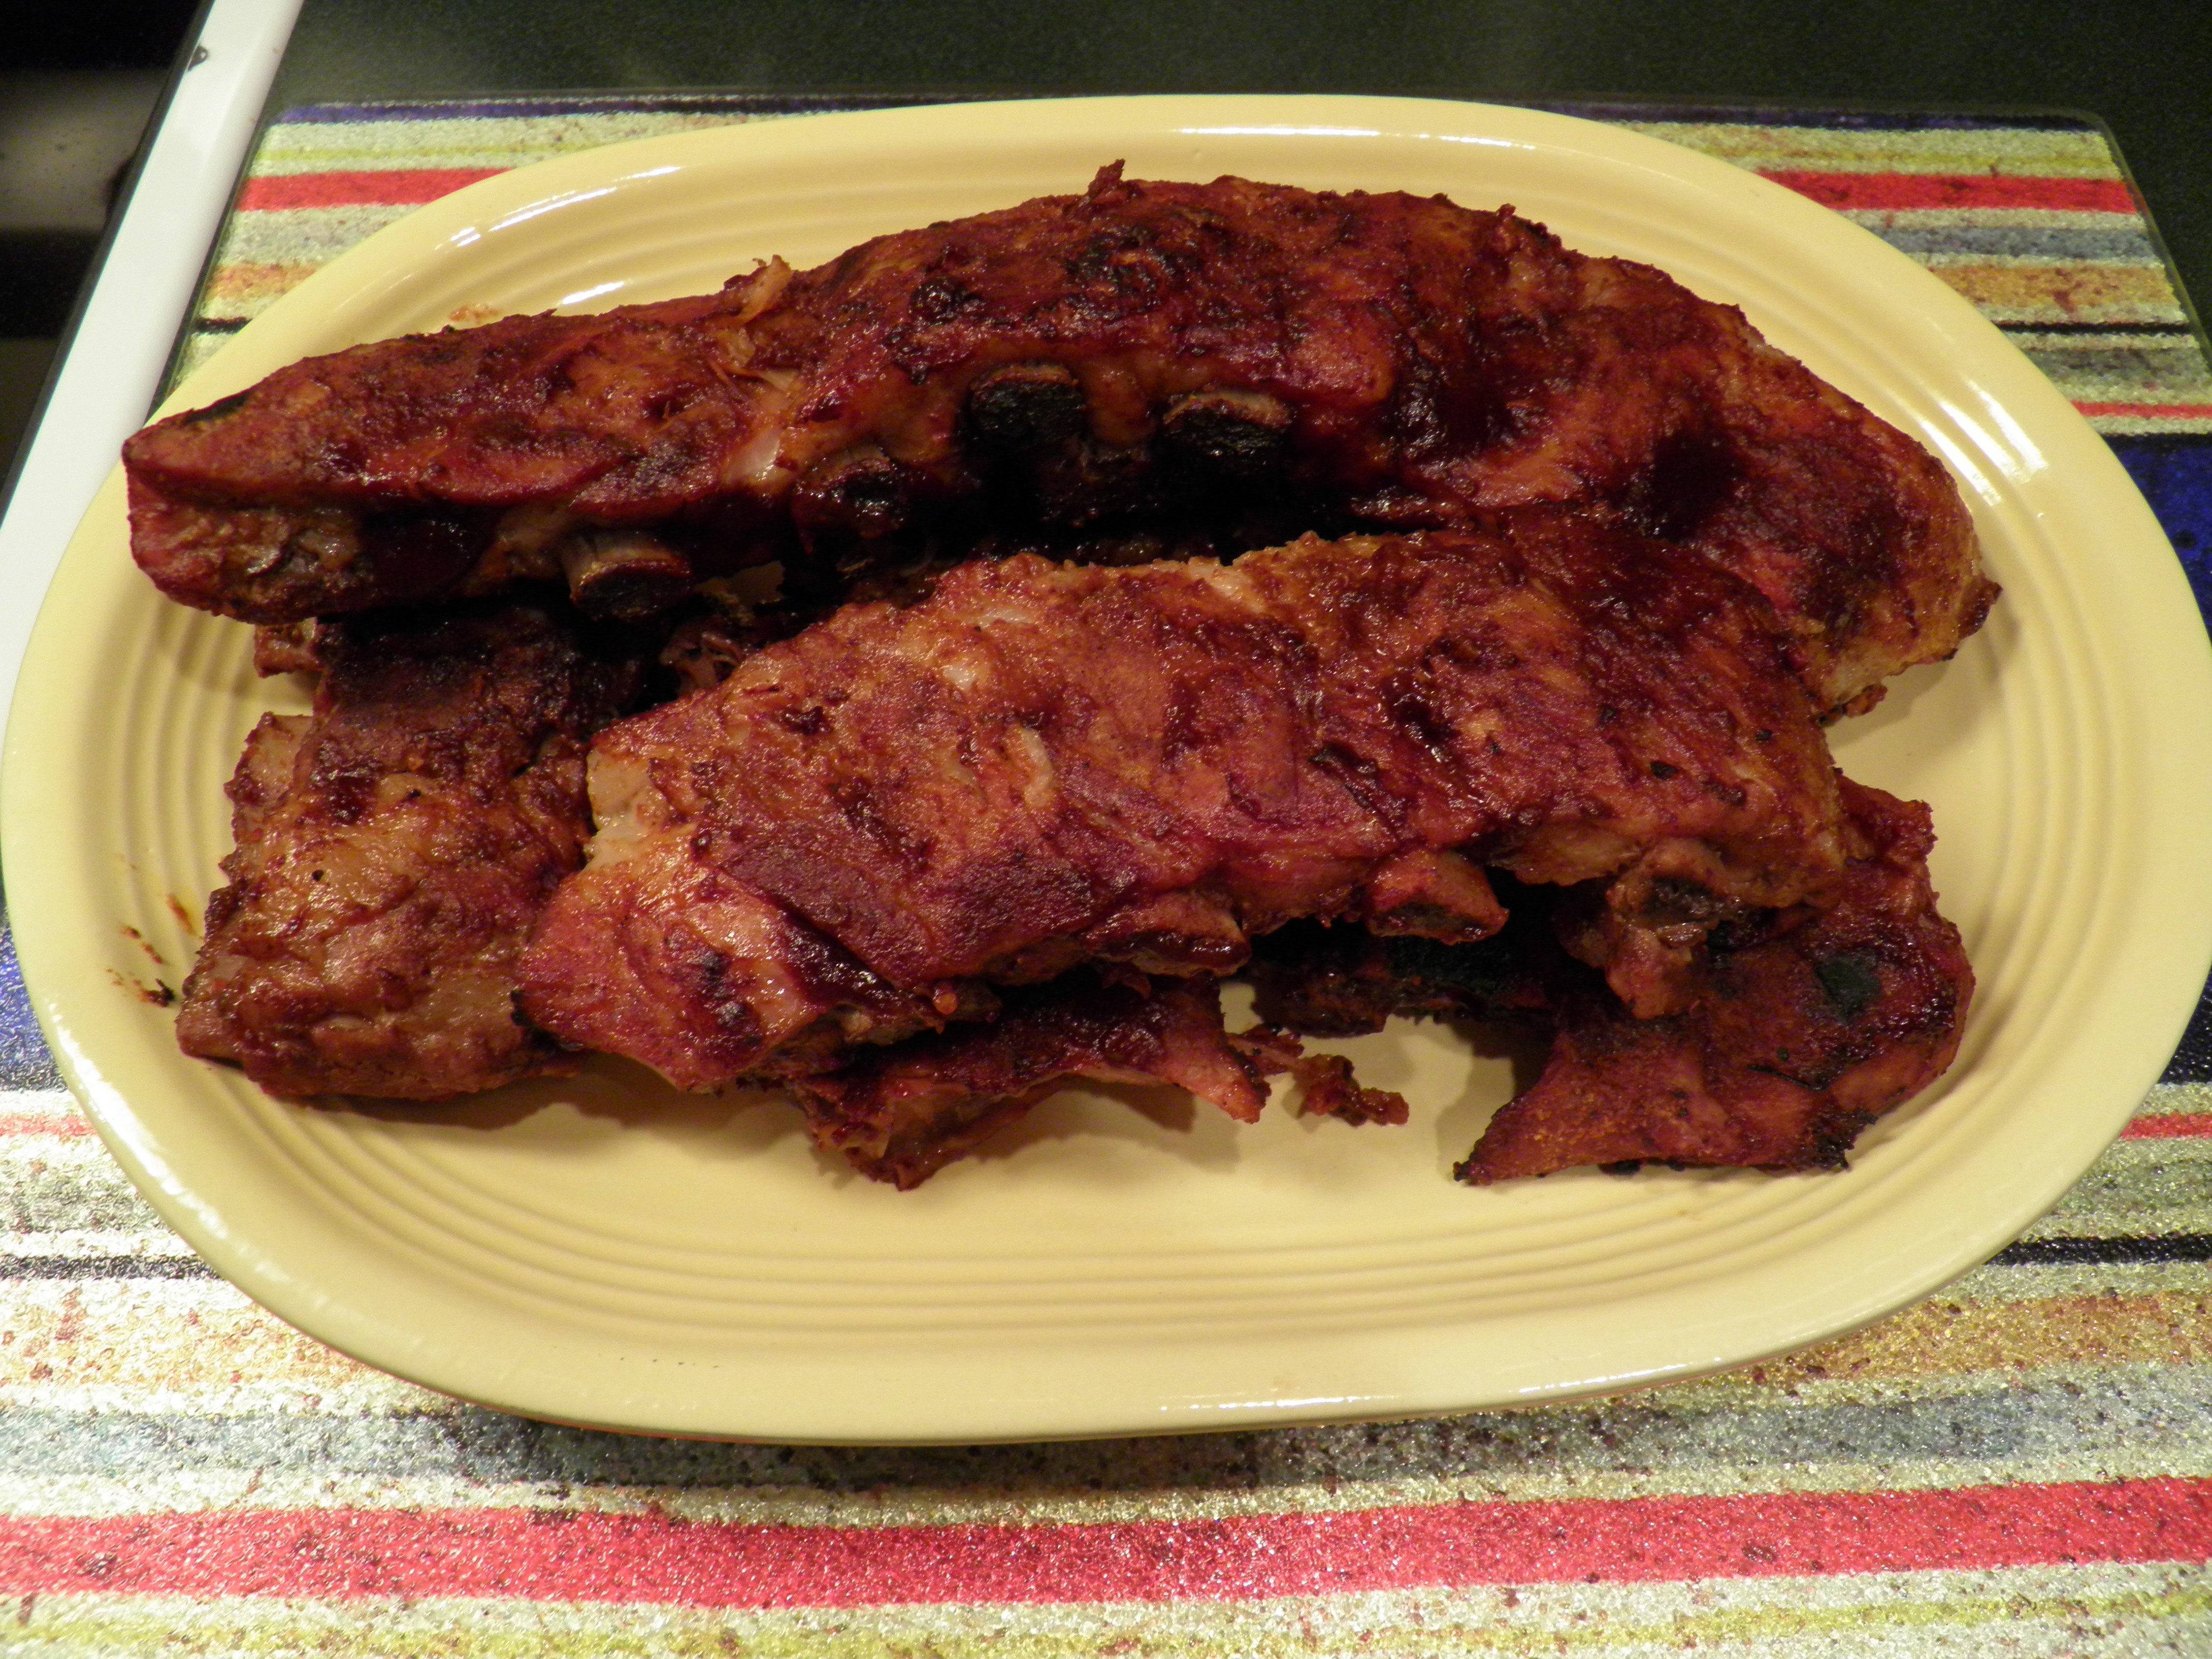
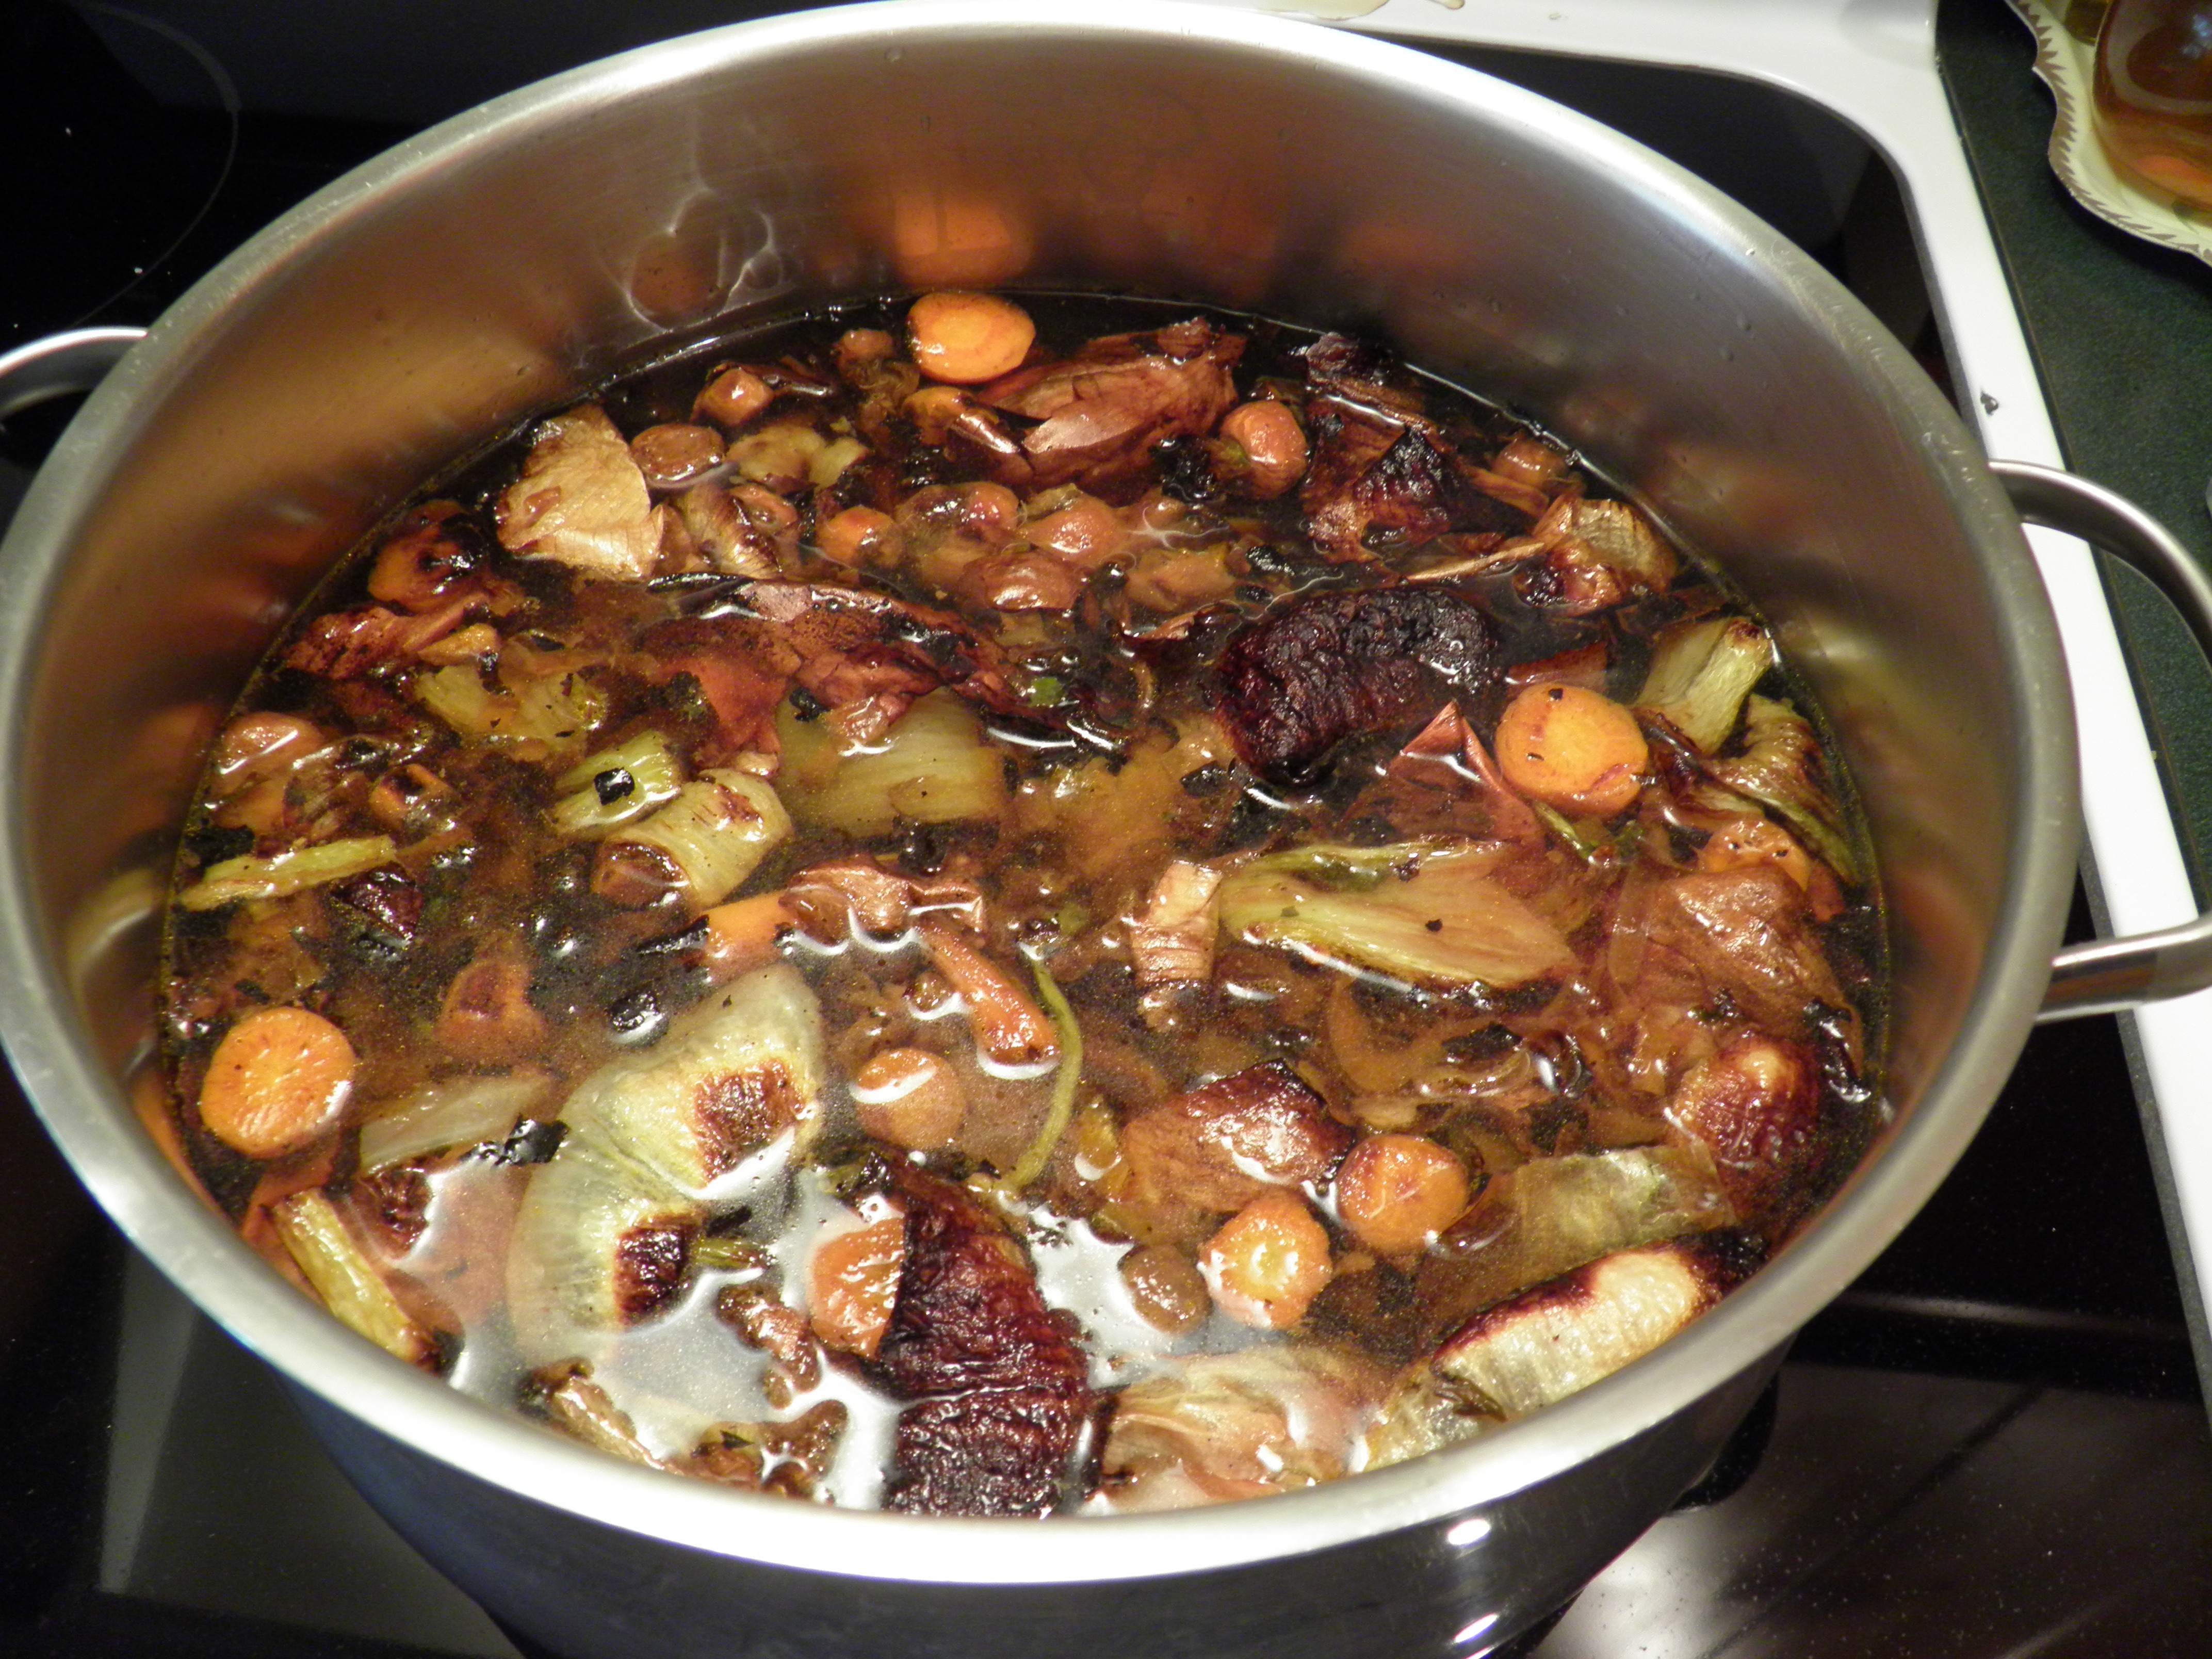
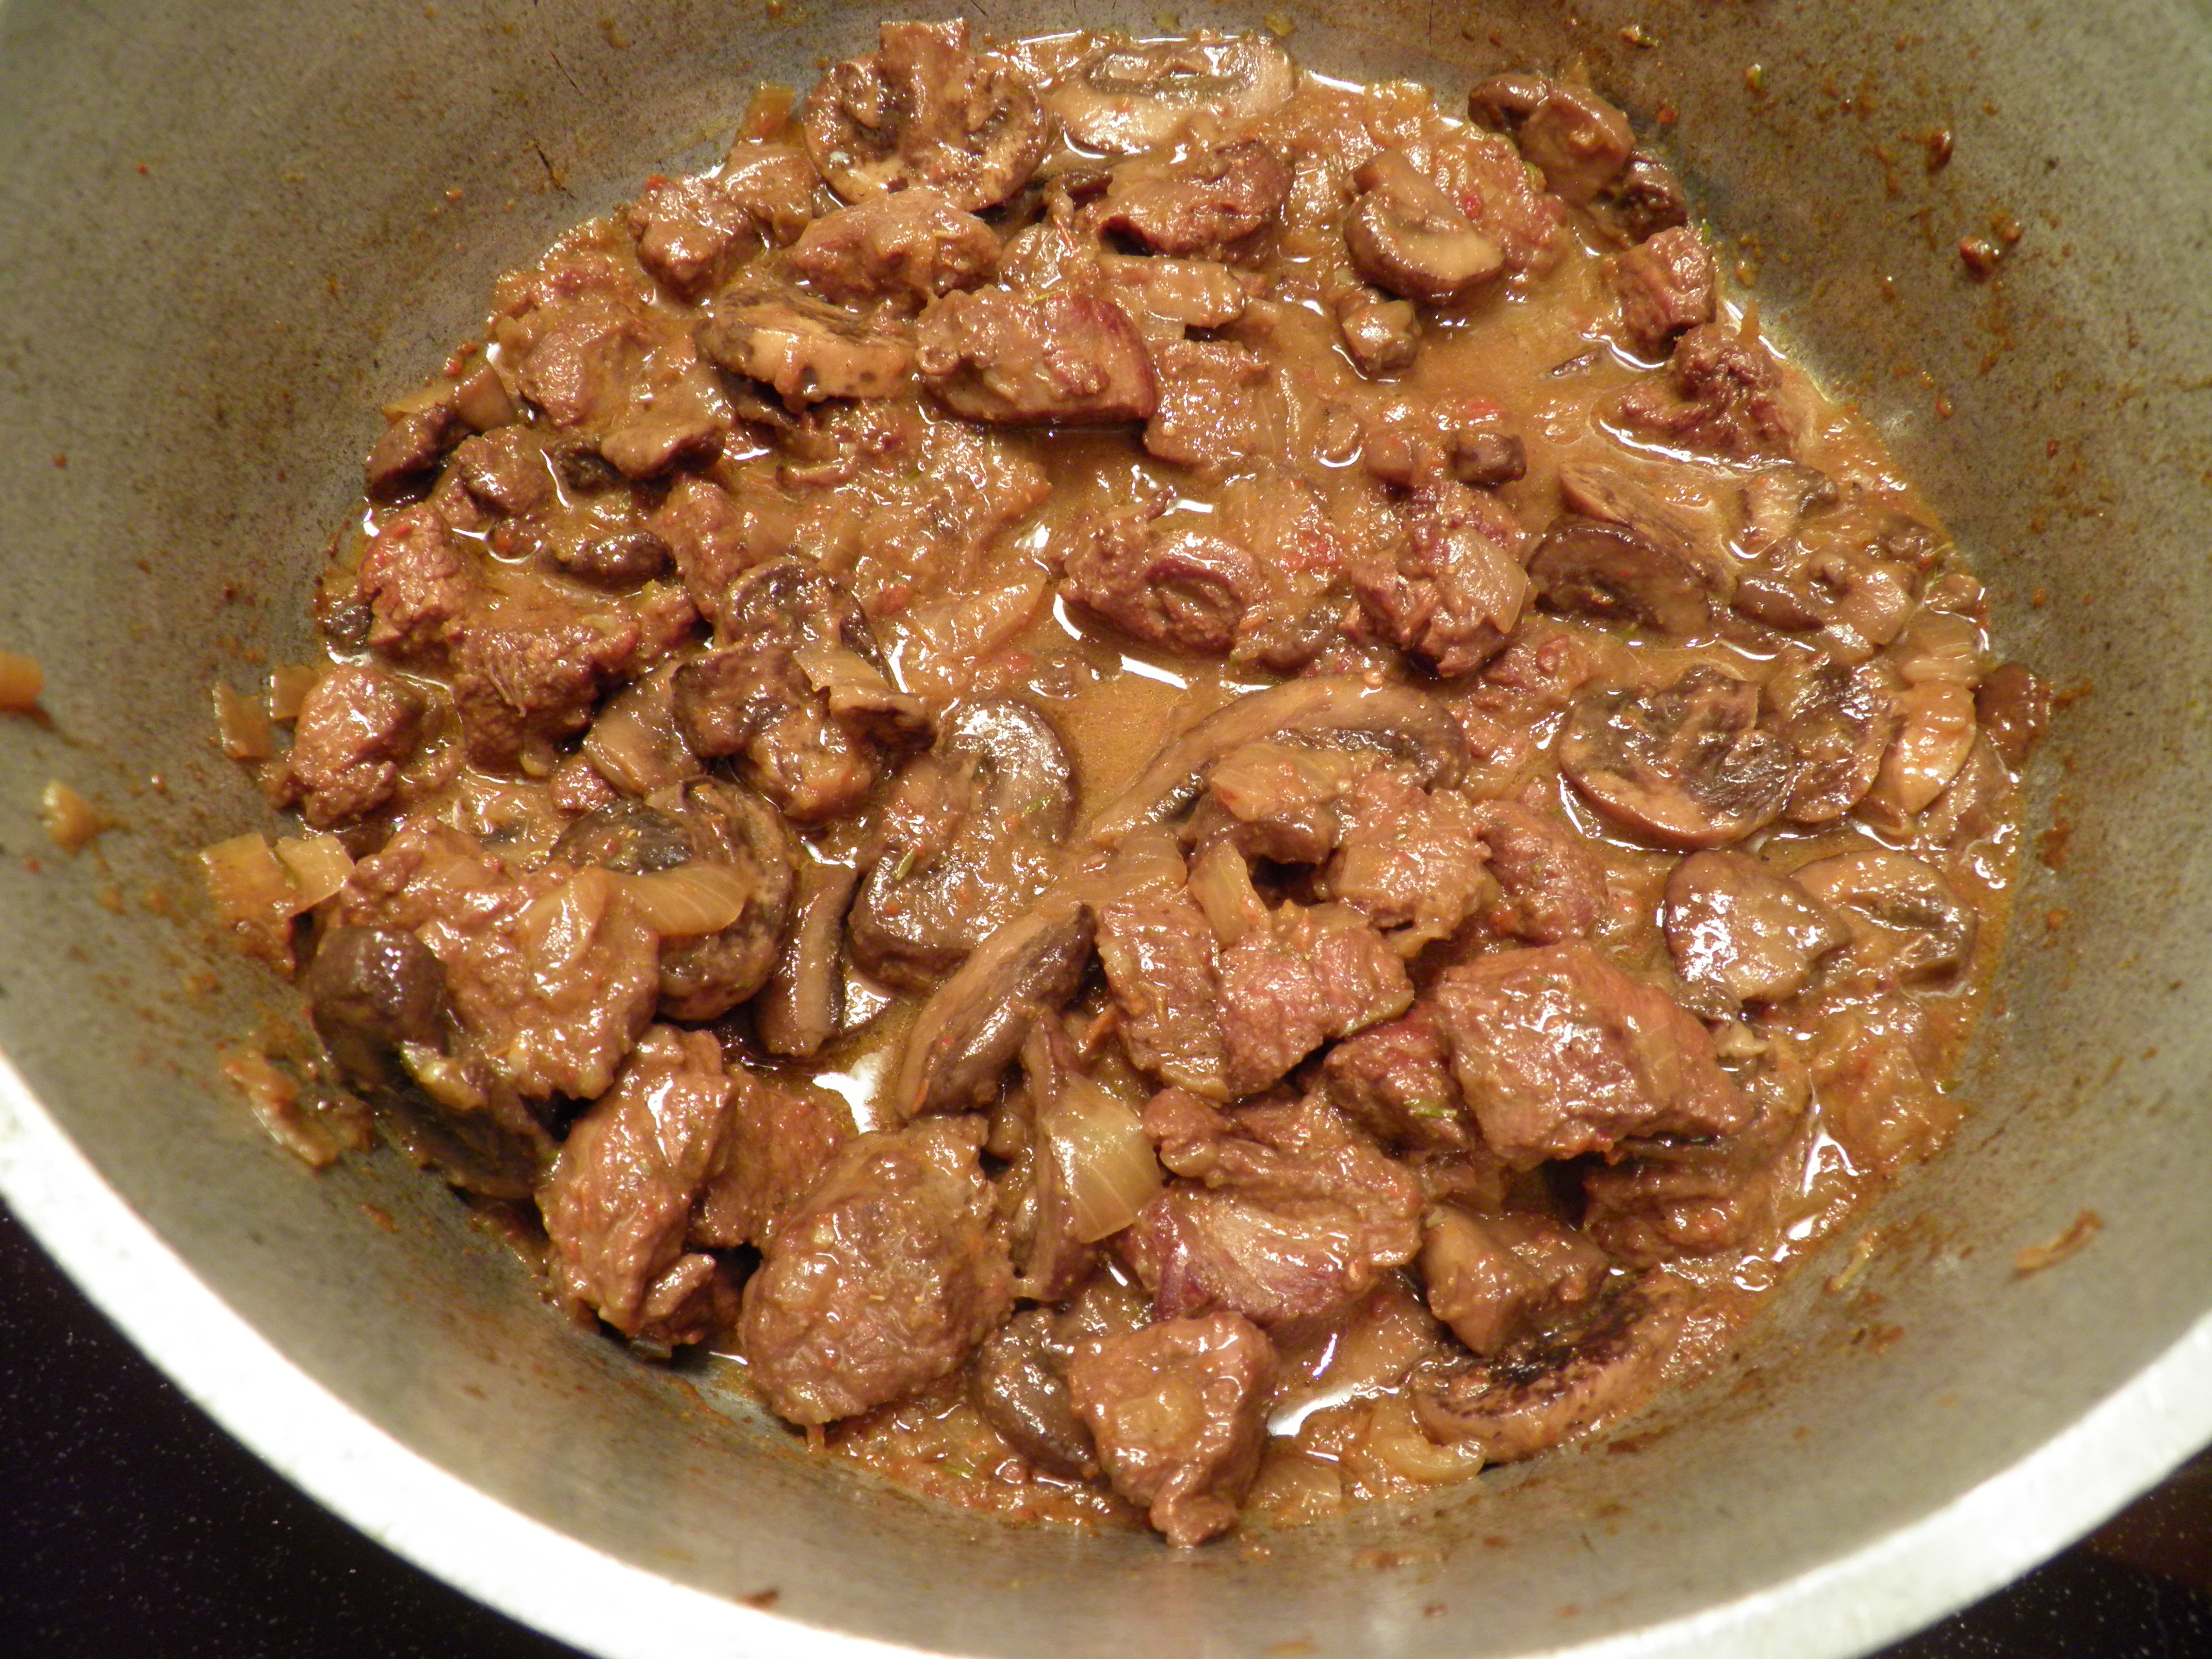
Reduce heat to medium low (you want a good simmer) and cover with the lid, leaving it cracked just a bit to let the sauce reduce.  Keep an eye on this, and add a little more stock if it cooks too dry, then cover tightly and reduce heat to low to hold it.  Simmer until meat is tender, about 1 ½ – 2 hours, and there is still enough sauce to coat the meat and mushrooms.  This should be saucy but not watery, and now is the time to taste the sauce for seasoning, adding more salt if necessary.  You can see from the photo below what the consistency of the sauce should be after it reduces and just before serving.

OLYMPUS DIGITAL CAMERA

When the meat is simmering, start the polenta.  This is a slow-cooking polenta, but boy, is it worth it. It does take a bit of attention, especially at first.

Creamy Polenta:

In a medium-sized saucepan with a heavy bottom, heat 4 cups of half & half on medium-high heat, stirring with a wooden spoon until it begins to steam, then whisking until it gets foamy and is about to boil.  When the half & half is foamy, whisk in 1 ½ teaspoons kosher salt, and slowly sprinkle in polenta a little at a time, whisking until all the polenta is in the pan.  Continue to whisk the polenta until it thickens, about 8 minutes.  Switch back to the wooden spoon, turn the heat down to medium, and stir the polenta until it is bubbling and getting thick, about 5 more minutes.  Reduce the heat to low, cover with a tight-fitting lid, and continue to cook, stirring every 15 minutes or so.  If it starts to stick to the bottom of the pan, lower the heat a little more.  The polenta should cook on low for about 1 ½ hours, at which time, the fricassee should be ready as well.

Just before serving, raise the heat under the polenta to medium and stir in 2 tablespoons of butter and ¼ cup of parmesan cheese.  When the butter is melted and the cheese is incorporated, remove from heat.  It will be very thick and rich and almost sweet.

OLYMPUS DIGITAL CAMERA

To serve, place about ½-1 cup of cooked polenta in a wide bowl or deep plate.  Make a well in the center, and fill the well with about ½-1 cup of fricassee and sauce.  (I have more plates and bowls than I can possibly use unless my entire extended family comes to visit, but I do not have big, restaurant-style, shallow bowls, which would be perfect for serving this dish, so I used a deep plate.)  Dennis and I had a green salad to start, and I poured a glass of wine.

OLYMPUS DIGITAL CAMERA

And then, I closed my eyes on the first bite and had a moment.  I deserved it.  And so do you.

Standard
Gluten-free, Recipes

Grain-free Granola and Hot “Cereal”

OLYMPUS DIGITAL CAMERA

I’m new to the grain- and gluten-free world.  I’m not a celiac, but I wanted to cut carbs, lose weight, and feel better.  So I’ve given the grain- and gluten-free diet a chance.  I’ve been eating this way for over six months now, and I must say, I feel better.  I haven’t lost much weight, but my digestive system is very happy with the new regime, and if I do eat grains (which happens occasionally), I feel uncomfortable, especially when I’ve eaten wheat.

You know how it goes when you’ve been cooking for a long time.  Well, maybe you don’t, so I’ll tell you. You might start with a recipe, but you just can’t resist tweaking it.  I was fortunate to learn the basics as a child, in 4-H classes taught by Mrs. Arlene Bennett, where I learned the science behind leavening, and the reason why measuring for baking is important, which cooking methods are appropriate for various cuts of meat, and which herbs and spices are complimentary and which conflict with each other.  I’ve loved playing with my food ever since.  The grain- and gluten-free diet has given me a whole new arena of creativity, and I’m just getting started.

I love granola.  I used to make it for my kids, but it was really, really sweet.  (I found that old recipe not long ago, and my goodness, the amount of brown sugar and honey in it was appalling!)  One of the things that often happens as you get older is that your sweet tooth starts to turn sour.  Overly sweet things don’t appeal anymore.  Most granola is so sweet, I can’t bear it.  A few years ago, my good friend, Karen, gave me a recipe for traditional, oat-based granola, and it wasn’t too sweet.  I made gallons of this stuff, and I still make it for my husband.  But when I stopped eating grain, there went the granola.  So I set about finding and tweaking recipes for grain-free granola.  Here’s my version, and I think it’s pretty darn good.  In addition, you can turn it into a hot cereal lickety-split.

OLYMPUS DIGITAL CAMERA

Grain-free, Gluten-Free Granola

1 cup raw nut pieces (walnuts, cashews, pecans, whatever you like other than almonds)

1 cup raw pumpkin seeds, shelled

1 cup sliced almonds

1 cup raw sunflower seeds

¼ cup whole flaxseeds or sesame seeds

1 cup unsweetened shredded or flaked coconut

½ cup chia seeds

1 tablespoon cinnamon

¼ teaspoon kosher or sea salt

2 tablespoons olive oil, grapeseed oil, or melted coconut oil

1-2 tablespoons agave nectar, honey, or real maple syrup

2 teaspoons vanilla extract

Mix all ingredients together.  (If using coconut oil, don’t worry if it clumps when you add it to the nuts and seeds. It will melt in the oven.)  Transfer to baking/cookie sheet, spread in a thin layer.  Use two sheets if necessary to get a thin layer.  Bake in preheated oven at 340 degrees, stirring after 5 minutes and 10 minutes, continue baking until golden brown, 12-15 minutes.

OLYMPUS DIGITAL CAMERA

Cool completely.  Then, if desired, add:  1-2 cups dried chopped fruit (apricots and cherries are really good, or raisins, or dried cranberries).  To minimize carbs, make sure fruit has no added sugar.  (Be aware that cranberries are soaked in a sugar syrup before dehydrating, and they can add a significant amount of sugar to whatever you put them in.)

This makes about 6 cups of granola, or about 12 servings.  Store it in an airtight container.  Serve with your choice of milk or eat as trail mix out of hand.  Or, stayed tuned for a hot “cereal” version.

Notes:  The nut and seed mixture is not very sweet, but it’s plenty sweet enough for me!  In trying to keep the carb count low, you have to keep the sugars down as well. Dried fruit adds some sweetness but also carbohydrates.  If the mixture isn’t sweet enough for your taste, add 1-2 tablespoons more of your desired sweetener before baking.

*As an even lower carb variation, try replacing some or all of the honey or other sweetener with the same amount of applesauce mixed with the oil, and a few drops of liquid stevia.  For my last batch, I used 2 tablespoons of unsweetened applesauce, 1 tablespoon of honey, and 6 drops of liquid stevia.  This mixture was a little wetter than usual, and it took 20 minutes in a 350 degree oven to brown and crisp up.  It was a little sweeter than usual as well.  Next time, I’ll try the same amount of applesauce and stevia and cut down on or eliminate the honey.

This “granola” is high-protein, low-carb, a good source of fiber from the nuts, seeds, and coconut, and full of Omega-3 oils from the flaxseed and chia seeds.  It’s actually much better for you than granola made with oats.

Since going grain-free, I’ve learned to make bread, muffins, tortillas, chips, crackers, pie crust, and now, “granola.”  But when winter hit, I was really missing hot cereal. You know, Cream of Wheat, Malt-o-Meal, Ralston Farina, oatmeal.  I wanted porridge, to use a lovely, old-fashioned word.  I set out to find some way of creating that creamy, grainy, comforting goodness without grains, and I think I have.  And it is ridiculously easy.

Grain-free, Gluten-free Hot “Cereal”

Place 1/2 to 3/4 cup milk in a cereal bowl or microwaveable glass measuring cup and heat in microwave (or if you hate mics, heat it in a pan on the stove) until foamy.  In blender or food processor, finely grind ½ to ¾ of a cup of grain-free granola (above).  (Use the lesser amount of milk for the lesser amount of ground granola. You can always add more milk if desired.)  You want a fairly fine texture, but don’t over-process, or your granola will start to turn to butter as the grinding releases those healthful natural oils in the nuts and seeds.  I use the little food processor that attaches to my stick blender, and it works perfectly for one serving.

OLYMPUS DIGITAL CAMERA

It looks like Grape Nuts cereal when it’s ground, but it tastes better!  (And I always liked Grape Nuts.)

OLYMPUS DIGITAL CAMERA

Either pour the ground granola into the bowl containing the hot milk, or put the ground granola into a bowl and pour the hot milk over it.  Let it sit for about a minute.  If it’s not thick enough, you can cook it a little longer in the microwave, for 30 seconds to a minute (don’t let it boil over!) and then let sit for a minute.  The porridge thickens a bit as it cools.  There should be no need to add sugar or any other flavor to the porridge because it already has cinnamon, vanilla, and coconut in it, as well as whatever you used for sweetener, and the dried fruit.  I think it’s delicious, and a healthful replacement for ground grain hot cereals.

OLYMPUS DIGITAL CAMERA

I love the fact that I can get a two-for-one deal out of one preparation:  hot “cereal” from grain-free granola.  That’s a pretty sweet deal.

Standard
Main dishes, Recipes

Spicy Sausage and Lentil Soup

OLYMPUS DIGITAL CAMERA

I love lentils.  I grew up eating a lot of beans, but I didn’t discover lentils until I was in my forties.  Imagine my delight when I realized I could cook a legume in just 30 minutes without presoaking!  Lentils are something I can cook up fast if I haven’t figured out what to do for dinner that day, and you can throw just about anything in a pot of lentil stew.  But they reward more thought and care.

Recently, Dennis and I went out for dinner and a movie.  The best place to eat in our small town is a microbrew pub, Lassen Ale Works.  I like to order the soups there.  I think soup is where a cook gets to really strut his or her stuff, and often, you’ll get a chef’s most creative cooking in a soup.  I saw linguica and roasted red pepper soup on the LAW specials board the other evening, and it sounded really good on a chilly night.  It turned out to have lentils in it, and while I couldn’t find any roasted red peppers, the linguica was delicious.

I went home resolved to see if I could come up with something similar, and I have.  My spicy sausage and lentil soup doesn’t have any linguica in it (because I didn’t have any), but if you can score some hot smoked paprika for my sausage and lentil soup, you’ll get one of the essential flavors of linguica without the price tag.  Ground pork sausage is much more economical than linguica.  Just look at the price per pound the next time you go to the grocery store and decide which fits your budget.  Ground sausage fits mine.  I used a combination of pork sausage and bear sausage.

OLYMPUS DIGITAL CAMERA

Spicy Sausage and Lentil Soup

1 cup lentils

3 cups water

1 lb. ground pork sausage (medium or hot)

6 cups of chicken or vegetable stock

4 carrots, diced

1 onion, chopped

2 cloves garlic, minced

1 stick celery, diced

1 small (or half of one large) red bell pepper, diced

Ground black pepper to taste

Red pepper flakes to taste

1 teaspoon smoked hot paprika

½ teaspoon Cajun seasoning

¼ teaspoon ground cumin

1 tablespoon dried tomato skin powder (optional)

In a large pot, bring water and rinsed and sorted lentils to boiling, reduce heat to simmer, cover and cook until lentils are tender and most of the water has been absorbed, about 30-45 minutes.

While the lentils are cooking, crumble and brown sausage.  Remove sausage from skillet, drain on paper towels, and drain fat from skillet.  Add a little olive oil (enough to just coat the bottom of the pan), and sauté the vegetables (start with the hardest vegetables first) until they have taken on a little color.  When vegetables are done, turn off heat and add minced garlic. Cook for one minute.  Set aside until lentils are done.

To the cooked lentils, add the sausage and vegetables, then pour in at least 5 cups of stock.  (I used a combination of mushroom stock, because it needed to be used up, and chicken stock.)

Add ¼ – ½ teaspoon ground black pepper, a good pinch of red pepper flake if you like spicy (I used my hot Nigerian red pepper), the dried tomato skin powder (if you have it), the other spices, and a little salt if needed, all to taste.  (When I made this, it didn’t need any extra salt.  There is a little salt in the Cajun seasoning I like).

Let the soup come up to a simmer and cook it for at least 20 minutes to blend the flavors and tenderize the sausage.  If you can let it cook longer, the soup gets even better.  I like to cook it on a very low heat until the lentils are just barely holding their cute little shape (about 2-3 hours).  This thickens the soup a little bit.  Add more stock if needed to keep the soup at the consistency you like, and if you add stock, taste for seasoning.

This makes a big pot of hearty soup, suitable for at least 4 people (with leftovers possible).

Add a salad and some nice crusty bread, and you won’t need anything else.  Except maybe some ice cream for dessert.

Standard
Main dishes, Recipes

Braised and Barbecued Pork Spareribs

OLYMPUS DIGITAL CAMERA

It used to frustrate me that I could never produce falling-off-the-bone spareribs at home.  I knew I must be doing something wrong, but I didn’t know what it was.  You barbecue them, right?  Then I watched an old Good Eats with Alton Brown, and I learned how to cook ribs.  As with my previous post, this one is more about the method than it is a recipe.  Producing good spareribs at home without a commercial smoker is a three-step process:  rub and rest, braise, then glaze on the grill.

Rub and Rest

You can use any kind of rub you like.  Montreal Seasonings makes a good pork rub.  I also like the barbecue rub I’ve found in the bulk spices section at WinCo.  I’m sure there are others.  But my current favorite is the one I used for my recent post about pulled pork.  I’ll post the rub recipe again here.  It can be made without the dried tomato skins, of course.

Pork Rub (with Dried Tomato Skins)

1 tablespoon dried tomato skin powder

1 tablespoon brown sugar

1 tablespoon kosher or coarsely-ground sea salt

¼ teaspoon cayenne pepper (optional, adjust to taste)

2 teaspoons hot smoked paprika (optional, regular paprika can be used)

½ teaspoon ground cumin

¼ teaspoon ground cinnamon

½ teaspoon garlic powder

Sprinkle all sides of 3-4 lbs. of spareribs with 2-3 teaspoons of the rub, and . . .  you guessed it . . . rub it in.

OLYMPUS DIGITAL CAMERA

Create a packet from heavy duty aluminum foil that will hold your ribs, and leave one edge loosely sealed to create a place where you can easily uncrimp the foil to add your braising liquid later.  Place foil packet of ribs into a baking pan (not cookie sheet, just in case a bone punctures the foil) large enough to hold them, and put in fridge for 4-8 hours.  Then, it’s on to the next step.

OLYMPUS DIGITAL CAMERA

Braise

You can braise meat on the cooktop, in a crock pot, or in the oven.  For meat that needs to marinate first (which is what a dry rub does, even though it’s dry), I prefer the oven.   You can use a crockpot if you put the rub on the ribs and stash them in the fridge overnight, then put them in the crock pot in the morning for 6-8 hours, depending on hot your crock pot cooks and what temperature setting you use.  You can also braise in a Dutch oven on the stove top, keeping the braising liquid at a low simmer.  But the dry heat of the oven that surrounds your foil packet (or Dutch oven) produces, in my opinion, the best flavor in the ribs.  And using foil makes for easy clean-up.

To oven-braise, remove the foil packet of ribs from the fridge about 3 hours before you want to serve dinner, and let them sit out on the counter to warm up for about 15 minutes while you prepare your braising liquid.  Turn your oven on to 350 degrees.

You can use almost any liquid or combination of liquids to braise the ribs if you remember a few simple guidelines.  The braising liquid should be flavorful (so plain water isn’t a good choice), slightly sweet, and slightly acidic, but it should contain little to no added salt because of the salt that’s already in your rub.  This is where you can get creative and have some fun.  Here are some possibilities for braising liquids.  You’ll only need about 2 cups unless you are cooking more than 3-4 lbs. of ribs.

Lemon-lime soda, 2 tablespoons ketchup, 2 tablespoons Worchestershire sauce

Cola, ginger ale, or root beer with 2 tablespoons ketchup, 2 tablespoons Worchestershire sauce

Weak coffee, slightly sweetened with honey, brown sugar, or molasses

Lemonade or orange juice, 2 tablespoons ketchup, 2 tablespoons Worchestershire sauce

Tomato juice, 2 tablespoons of molasses or brown sugar, 2 tablespoons Worchestershire

Beer, 2 tablespoons of molasses, and ¼ cup of tomato sauce or 2 tablespoons of ketchup

Sake, 2 tablespoons of brown sugar, a tablespoon of low-sodium soy sauce (1/2 teaspoon of Chinese five spice powder is good with this one, or it can be added to the rub)

The variations are pretty much endless, depending on the flavor profile you want to create.  It isn’t often you’ll see me using an item like a can of soda in my cooking, but it really does work well in this application.  I used the first mixture on the list above for the ribs in my pictures this week.  I added to it a pinch of my Nigerian pepper (and I could have used more, but I have to watch the heat level for Dennis), and a ¼ teaspoon of espresso powder, and it smelled really good going into the meat.  It sounds like a strange mix, but it was really tasty, which is my point about getting creative with your braising liquid.

You can also add a drop or two of liquid smoke to mimic the flavor of a smoker, although you will get a bit of smoke flavor from the finish on the grill.  Because the braising liquid is going to become the barbecue sauce or glaze, and because I like a chunky sauce, I add a chopped onion and a couple of cloves of garlic, minced, to whatever braising liquid I use.  The sauce can be smoothed out in a blender or with a stick blender before glazing the meat, if desired.

Heat the braising liquid and any flavor additions, like sweeteners, more spice, onions, garlic, in a small saucepan that you can pour from (or as I did, heat it in a glass measuring cup in the microwave).  When all the ingredients have mixed, set it aside to cool slightly.  It should be warm, not hot, and the meat should be cool, not cold.  Open the foil packet of ribs just enough to pour in the braising liquid, and then close the foil up tightly.

OLYMPUS DIGITAL CAMERA

Place in oven at 350 degrees and cook 2-3 hours or until ribs are fork tender but not quite falling apart.  Remove the ribs from the oven, pour off the braising liquid, and leave ribs in foil packet to rest while you create the glaze and fire up the grill.

Glaze and Grill

If you have a fat separator, you’ll want to use it here to pour off the braising liquid and eliminate some of the fat that has cooked out of the ribs.  If you don’t have a fat separator, use a large spoon to skim as much of the fat off the top of the braising liquid as you can.  Then put the braising liquid back into the small saucepan and start it boiling.  You’ll probably have about 1 ½ cups of liquid.  If you have less than that, you might want to add a little more of whatever liquid you used to start with.  To the braising liquid, add about ½ cup of ketchup or tomato sauce, or ¼ cup of tomato paste.  Let this reduce a bit, and then check for seasoning and sweetness.  I almost always add some more molasses or brown sugar to my sauce because I like a fairly sweet sauce.  I think the flavor profile of a great barbecue sauce is spicy/tangy/sweet.  Think about the flavor profile you like and taste the sauce as it reduces, adding more sweetener, salt or pepper, liquid smoke (this can be very strong, so go easy, a drop at a time), or other flavors to get a sauce that tastes good to you.  Add just a bit at a time and keep tasting.  Reduce the sauce until it’s the consistency you like (some like thick, some not).  Blend the sauce if you want it smooth.

The ribs are done, so there’s no actual cooking left to do.  All you’re going to do is glaze your meat with the sauce.  You’ll want your grill at medium, not hot, so that the glaze doesn’t burn.  (You could do this under the broiler if you’re careful, but you won’t get the same flavor.)  The sauce has sugars in it, so if the grill is too hot, the sugars will burn instead of caramelize.  Paint one side of the ribs liberally with the sauce, place sauce side down on the grill and allow the sauce to bubble and brown on one side before turning.  It shouldn’t take more than five minutes per side to glaze the ribs.  Watch them carefully.  As I tell Dennis, do not walk away from the grill!

OLYMPUS DIGITAL CAMERA

Serve your tender, braised and barbecued pork spareribs hot off the grill with the extra sauce for dipping.  If you accompany your ribs with the traditional sides–cornbread, coleslaw, greens cooked with bacon, onion and vinegar, and beans or black-eyed peas—you’ll think you’ve been transported temporarily to the South.  And if you still have leftover sauce after the meal, save it for barbecued chicken later in the week, or put it in the freezer.  It’s too good to throw away!

Standard
Leftovers, Main dishes, Recipes

Sublime Roasted Chicken Soup

I actually call this soup Everything But the Kitchen Sink Chicken Soup, or sometimes, it’s known in our house as Clean Out the Fridge Chicken Soup.  But that’s a pretty long title for a blog post.  So, to shorten it up, and to give credit to the technique that produces the delicious flavor of this soup, I went with Sublime Roasted Chicken Soup.  I had to throw in “sublime” because there are just way too many “the best chicken soup” posts out there in online foodie land.  I’m not saying I make the best chicken soup in the world.  I don’t have to.  My family says it for me!

My chicken soups are always made with the carcass from a roasted chicken, so let’s start there.  Roast chicken was one of the first things I taught my daughter-in-law to cook when she and my son were married, and it’s just about the easiest thing to put on a dinner table to feed a family.  What follows is more of a technique than a recipe, which allows you to use your own creativity (and eventually, your leftovers).

Roast Chicken

Season a fresh or thawed chicken, inside and out, with any of the following seasonings or get creative and make up your own:

1 tablespoon of Cajun seasoning mix (this is a blend of peppers, salt, and spices you can buy in the grocery store, and I like it a lot for chicken) OR

1 tablespoon Montreal chicken seasoning mix OR

1 tablespoon coarse sea salt mixed with 1 teaspoon freshly ground black pepper and 1 teaspoon dried crumbled sage and 1 teaspoon dried crumbled thyme (or a teaspoon of ground poultry seasoning)

Whatever kind of seasoning you choose, sprinkle it inside the body cavity and rub it outside on the skin, then place the chicken into a roasting pan or Dutch oven with a lid. I always cook my chicken in a roasting pan with a lid (so technically, it’s baked or braised, I suppose, not roasted) because the meat is always moist and juicy, and I don’t have to worry about basting.  This is easy-peasy chicken dinner!

If you want to fancy it up, you can stuff the body cavity with any sort of stuffing you like (I have a recipe for cornbread stuffing in another post) or with sliced lemons, onions, garlic, and a sprig or two of rosemary, and you can also place root vegetables like carrots and parsnips and potatoes around the chicken, if there’s room in the pan, when you’ve got about an hour of cooking time left.

Cook the chicken at 325-350 degrees for 2-2 ½ hours  (depending on the size of the chicken) or until the meat reaches an internal temperature of 160 degrees in the thickest part of the leg.  You can also tell the chicken is done when the meat on the drumstick starts to pull away from the bone and the thigh joint jiggles easily when you move the leg.

Remove the chicken from the roasting pan to a carving board or platter and cover it loosely with foil.  Let it rest until it stops steaming, about 20 minutes.  Don’t carve your breast meat while there is still steam escaping from the bird.  It will dry out.  If you stuffed the bird, remove all the stuffing as soon as you remove the bird from the oven.  Don’t let stuffing cool inside the bird.

Pour off the cooled pan drippings and refrigerate.  You can make gravy with the drippings, but there tends to be a lot of fat in it, so if you have one of those fat separators, it’s helpful for making gravy.  Cooling the drippings allows the fat to be scraped off the top, so you can use just the flavorful and nutritious drippings in your soup and discard the fat.  If you do make gravy, save any leftovers for adding to your soup, just like you would the drippings.  Enjoy your roast chicken dinner!

Dennis and I get at least 4 or 5 meals from one chicken.  We eat several meals from the roasted meat itself, and then, I make soup from the carcass.  Here’s how to get all the goodness from that chicken carcass.

Sublime Roasted Chicken Soup

First, place the carcass on a cookie sheet.  Rub a little olive oil on the exposed shreds of white meat that are left on the carcass and sprinkle it lightly with salt and pepper or the same seasoning mix you used before roasting the chicken.  Turn the chicken carcass upside down! Place in 400-425 degree oven for 15-20 minutes, or until the carcass is a golden, toasty brown color.

The reason for roasting the carcass again is two-fold.  First, roasting creates flavor and color in your broth.  (If you want clear, pale chicken broth like the stuff that comes out of a can, don’t roast.  But you won’t have nearly as much flavor.)  The second reason to roast is that the high heat on the bones helps them release minerals and nutrients into the broth or stock.

While the carcass is roasting, peel and cut four large carrots into bite-sized chunks or cubes.  Chop or slice four ribs of celery.  Chop one onion.  (You can add more of any vegetable if you like.  I often add more carrots because I love carrots in soups and stews.)  When the carcass is golden brown, remove it from the oven and place it in a large soup pot.  Add just enough water to cover the carcass and bring to a boil, reduce to a simmer, and cover with a tight-fitting lid.  You will immediately notice how rich the broth looks, much darker than broth from an unroasted carcass.  Color equals flavor!

OLYMPUS DIGITAL CAMERA

The carcass will need to cook about an hour to loosen all the meat from the bones and to release the flavor.  Drain the fat from the cookie sheet, and place carrots, celery, and onions on it, stirring to coat them in the leftover chicken fat.  Spread the vegetables out on the cookie sheet, sprinkle them with a little salt and pepper or the seasoning mix you used on the chicken/carcass, and return to the oven, roasting the vegetables until they also begin to take on some color.  You’ll be amazed at how much more flavor you get out of your vegetables by roasting them.  (You can also sauté them in a little olive oil or butter on the stovetop, but why dirty up another pan, and the oven is already hot!)

OLYMPUS DIGITAL CAMERA

When the vegetables are a little browned, remove them from the oven and scrape the cookie sheet to loosen any that have stuck to the pan.  Set them aside.  Do not add them to the soup pot until after you have removed the chicken carcass and bones from the pot.

When the carcass is falling apart in the broth, it’s time to remove it.  Use a spider or slotted spoons to remove the carcass from the broth, and set it aside to cool.  While the carcass is cooling, you can add your roasted vegetables to the broth.  (I also rinse the cookie sheet with the broth, holding it over the soup pot and ladling the broth over it, to get off any little stuck bits of brown goodness, which adds flavor.)  This is the time to add the pan drippings you saved when you roasted your chicken, or any leftover gravy.  If you saved pan drippings, before you add them, be sure to remove the fat that rose to the top of the drippings as they cooled.  Your drippings should be mostly gelatinized.  That means flavor!  Taste the broth and adjust for seasoning.  Remember to use the same seasoning mix you used when you roasted the chicken as you season your broth.  This keeps competing flavors at a minimum.  When the carcass is cooled enough to handle, pick the remaining meat from the bones and add it back into the broth.

OLYMPUS DIGITAL CAMERA

At this point, your soup is essentially done, and you can serve it as is.  But there is much more you can do with it.  You can turn it into Everything But the Kitchen Sink or Clean Out the Fridge Roasted Chicken Soup.  Just start prospecting in your fridge and pantry.  To my last batch of soup, I added a couple of cubed potatoes, a cup or so of leftover green beans, about a cup and a half of leftover Seven Bean and Ham Soup (made with the leftover Christmas ham), and some Swiss chard I put in the freezer last year and rediscovered recently.  This produced a rich, hearty, soup-that-eats-like-a-meal.  One bowl of this contains all the meat and veggies you need for a complete meal, and if you are watching your weight, this soup is very figure-friendly.

OLYMPUS DIGITAL CAMERA

Of course, you can add noodles or rice, if you wish, but since I have been trying to eliminate grains from my diet, I usually add a can of rinsed, dark red kidney beans, or a can of black beans to my chicken soups in lieu of pasta.  This keeps the soup low-carb but hearty and full of protein.  I sometimes cook noodles or rice separately so that Dennis can put some in the bottom of his bowl and pour the soup over it.  That way, we both have what we want.  We will have several meals from a big pot of soup, and I’ve been known to freeze a quart for a snowy day.  I’ve found that soup is one of the best ways to stretch my food dollars and use leftovers that would otherwise be wasted.

Is soup-making work?  Yes.  Is it time-consuming?  Yes.  Is it worth it?  Yes, yes, yes.  Flavorful and nourishing:  it’s no wonder chicken soup has been known for years not just as comfort food, but as food for the soul.

Standard
condiment, Main dishes, Recipes

Dried Tomato Skin Rub and Pulled Pork

OLYMPUS DIGITAL CAMERA

I have about a pint of powdered dried tomato skins, a by-product of canning tomatoes this summer.   I know some people thought I was nuts for saving, drying, and grinding the skins you have to peel off the tomatoes for salsa, sauce, and canned tomatoes.  But I have learned that these dried tomato skins pack quite a flavor punch.  I’ve been using them in chip dips, soups, and sauces.  Now, I’ve added them to a homemade pork rub which produced beautifully-seasoned pulled pork cooked in the crock pot.   Of course, the rub is still very good without the tomato skins.  Why wouldn’t it be with all that wonderful spice!

Pork Rub (with Dried Tomato Skins)

1 tablespoon dried tomato skin powder

1 tablespoon brown sugar

1 tablespoon kosher or coarsely-ground sea salt

¼ teaspoon cayenne pepper (see note below)

2 teaspoons hot smoked paprika (see note below)

½ teaspoon ground cumin

¼ teaspoon ground cinnamon

½ teaspoon garlic powder

Mix well and rub on dry meat.  This rub would be good on spare ribs or chicken, as well as the pulled pork recipe below.

OLYMPUS DIGITAL CAMERA

Easy Pulled Pork

4-5 lb. pork shoulder, pork tenderloin, or pork loin roast (see note below)

1 onion, chopped

4 cloves of garlic, chopped

a few drops of liquid smoke (optional)

2 cups chicken stock

Rub all sides of pork with seasoning mix (above).  At this point, you can rest the pork in the fridge for up to 12 hours to get the most flavor out of the rub.  Or, you can start cooking it right away in the crock pot.  Because this big hunk of meat takes so long to cook in the crock pot (8-12 hours), the rub gets into the meat nicely during cooking.  When you are ready to cook your pork, proceed as follows.

OLYMPUS DIGITAL CAMERA

Place onion and garlic in bottom of large crock pot, pour in chicken stock, add a few drops of liquid smoke if desired (be cautious, it’s strong) and place rubbed pork on top.  Cover and cook on high for about 8 hours; on low it may take up to 12 hours.  Cook until the meat is falling off the bone or shreds easily with a fork .  Remove meat from crock pot.  Rest, covered loosely with foil, until steam is no longer rising from meat.  While meat is resting, make sauce.

Barbecue Sauce

Pour the liquid, onions, and garlic from the crock pot into a medium-sized sauce pan.  Add 1 cup of ketchup or 1 ½-2 cups of tomato sauce, 1/3 cup of molasses or 1/4 cup of brown sugar (adjust sweetness to your taste), 1 tablespoon of Worchestershire sauce, 1 tablespoon of apple cider vinegar, and bring to boil over high heat.  Lower heat to produce medium boil and reduce sauce until it reaches desired consistency, stirring frequently to prevent sticking.  It should thicken to a gravy-like consistency but not be too thick to pour.

Pull rested meat into shreds with two forks.  Pour sauce over meat or serve sauce on the side.

Notes:  I have listed cayenne pepper here, but of course, if you are heat-sensitive, you can omit it or use less.  I actually didn’t use cayenne.  I used a hot pepper mix that Theresa, my son-in-law’s mother, gave me.  She buys two varieties of very hot peppers in the market in Kaduna, Nigeria, boils them, dries them in the sun, and grinds them to powder.  She gave me a half-pint of this stuff, and I love it.  It is very hot, hotter than cayenne, but very flavorful.  I intend to try her technique with my habaneros I’ve been ripening on the cut bush in the laundry room.

Also, I listed hot smoked paprika, which I just discovered in bulk at the WinCo store in Reno.  I’ve heard about it for years, but it isn’t easy to find, and it normally isn’t cheap.  It’s quite affordable at WinCo.  I love the flavor it gives, but you could easily substitute plain paprika and add just a drop more of liquid smoke, if you wish.

You can make pulled pork with boneless pork tenderloin or loin roasts, but the best cut of pork for this dish is a pork shoulder roast (also known as butt).  Bone-in is best because the meat has more flavor when cooked on the bone.  The long, slow cooking time tenderizes this tougher cut of meat and allows the fat to cook all the way out, producing a tender, flavorful, and juicy dish.  This dish can also be cooked in a large Dutch oven or turkey roaster with a tight-fitting lid.  Bake at 325 degrees until meat is tender and pulls apart with a fork.  It will take slightly less cooking time in the oven, so keep checking for desired tenderness.

The rub mix gets into the liquid in the crock pot as the meat cooks, so there is no need to add more salt or pepper to the sauce when you use the cooking liquid as the base of your sauce, unless you are a salt fiend.  This produces a medium-hot barbecue sauce.

OLYMPUS DIGITAL CAMERA Nigerian pepper mix on left, tomato skins in center, finished rub on right.

We enjoyed this dish so much the other night, I’m planning to cook it again on New Year’s Eve for the family get-together.   I normally take pictures of the finished food, but after smelling this pork cooking all day, we just couldn’t wait to dive into it.  I served the pulled pork and sauce with sourdough rolls, baked beans, and coleslaw, but on this New Year’s Eve, we are having a feast of Nigerian food, prepared by my son-in-law, Solomon, and his mother, Theresa, with help from Amy and me.  I think the pork will go well with the Nigerian dishes, and hopefully, I’ll have some Nigerian recipes to share with you all at a later date.  Happy New Year, everybody.

Standard
Fermenting

Science Experiment: Homemade Ginger Ale

Update:  December 21, 2014

I’ve updated again!  For making, feeding, storing, and maintaining your ginger bug, scroll down.  For the best ginger ale recipe and fermentation method, please click on Ginger Ale Update.

Update: February 21, 2014

I’ve been experimenting with the ratios and mixtures and fermenting times, and so far, my best result has been with my Sweeter Ginger Ale recipe given below.  I made some more with this mix this week, with only one alteration (I used only 2 tablespoons of fresh ginger in the hot mix with the sugar and water), and I ended up with the best batch ever.  I fermented it for 3 days by the heater, so it was nice and warm, and then when I had lots of small bubbles for a day and big bubbles for two days, I put it into the fridge without opening the jug.  I was using the glass gallon juice jug in the pictures below.  That seems to be the ideal container.  I chilled the jug in the fridge for a day before opening it, and I had so much carbonation when I opened it the next day, it sounded like a bottle of store-bought soda that had been shaken and then opened.  It didn’t spew, though!  I strained off a glass, and it had so much carbonation, it sat there and fizzed in the glass like a store-bought soda.  The flavor was delicious, gingery but not overwhelmingly so like some previous batches have been.  I’m so pleased with the recipe now, I wanted to share my update with you all.

I should also mention that I’ve been experimenting with how the ginger bug reacts after being stored in the fridge.  I’ve gone ten days between feedings, and my bug still seems healthy.  I always take it out and let it warm up for a few hours before I feed it, then let it sit overnight to work before I stash it in the fridge.  I have also noticed that it does just fine when I feed it only a tablespoon of raw sugar with a tablespoon of water occasionally if I am building up the volume of my bug before making a batch of ginger ale.  I did this when I was running low on ginger, and since it looked like there was plenty of ginger in the jar, I figured all the bug probably needed was a little sugar to feed the yeasts.  That seems to be the case.  I will continue to do this, feeding my bug every other time with just raw sugar and water, because I find that it becomes a little too strong with ginger otherwise.  End of update!  Original post (with Sweeter Ginger Ale recipe below) follows.

Original post:

As some of you know, I’ve been learning more about fermenting and culturing foods lately.  I’ve made yogurt and apple scrap vinegar for years.  Now, I’ve moved on to homemade ginger ale.  And it’s pretty darn good.  Dennis liked it, and while he’ll eat anything, he’s a bit picky about beverages, so his is an important endorsement.

I followed another blogger’s process (Wellness Mama), but I, and others, found the written directions somewhat confusing.  It was necessary to scroll through all the comments and read the contributions of followers to figure it all out, so I’ve decided to write the process down myself, using what I’ve learned about fermenting other foods, and hopefully making it clearer for myself and for a few other folks who want to try making their own fermented beverages.

Now, why make your own ginger ale rather than buying it?  For one thing, you won’t be getting any high fructose corn syrup in your homemade ginger ale.  You can sweeten it with whatever you like if it’s not sweet enough for you as is.  Secondly, because it is naturally fermented and carbonated, it contains some probiotic material that is good for your gut.  And finally, it contains real ginger, which has long been known as a healing agent, particularly good for stomach troubles.  And, I would add, it’s kind of fun to make.  Well, if you’re into food-related science experiments like me.

This is a two-step process.  First you have to make what’s known as a ginger “bug.”  I assume it’s called a bug because it is actually alive.  (Mmwha-ha-ha-ha . . . translation:  evil laugh.)   All the bug is, really, is an environment to keep the beneficial bacteria responsible for fermentation alive and well.  After you have the bug going, and it’s thriving, you’re ready to make ginger ale, another step in fermentation that produces the bubble and fizz of carbonation.  Oooh, fun stuff.

You need some containers, one for the bug, and one for the ginger ale.  For the bug, a quart glass jar is fine.  You need some nylon tulle, some breathable fabric, or a coffee filter (just as if you were making vinegar) and a big rubber band off a bunch of broccoli to hold your breathable fabric or coffee filter on the mouth of your jar.  For the ginger ale, you need a bigger jar.  Contrary to the original instructions from Wellness Mama, a half-gallon jar will not work.  The liquids add up to more than two quarts.  If you have a gallon-sized glass juice jug, or something between a half-gallon and a gallon, that will work.  You need a jar or jug with a tight-fitting lid to capture the fizz.

Ginger Bug

In your clean quart jar, combine:

2 cups of water

2 tablespoons of grated or chopped fresh ginger root (peeled if not organic)

2 tablespoons of sugar

You can use whatever sugar you have on hand.  I used raw sugar, and it worked very well, but others say you can use white table sugar; some recommend adding a teaspoon of molasses for color, flavor, and minerals if white sugar is used.  Sugar feeds the organisms on the raw ginger that create fermentation.

A word on water.  Some folks use filtered or bottled distilled water, and I would do this if I had chlorine in my water.  I have hard well water, and it worked just fine.

Cover your quart jar with the breathable material, secure it, and place it somewhere warm. My kitchen was cold when I started the bug, so I kept it near the heating stove, where it stayed about 78 degrees.  A warm, not hot, temperature encourages the growth of yeasts, etc. in your ginger bug.  If it’s cold, you’re more likely to get mold than fermentation, and you’ll have to throw it out and start over if you get mold.  Mold does not taste good.  This is what it looks like when you have the bug going.

OLYMPUS DIGITAL CAMERA

Now, every day for five days, add 1-2 tablespoons of grated or minced ginger root, 1-2 tablespoons of sugar, and 1-2 tablespoons of water to your bug, stirring well.  Some folks say you shouldn’t use a metal spoon, but this is just silly because you use a metal knife or food processor to chop the ginger.  Stirring with a metal spoon isn’t going to harm your bug, but if you are worried about it, by all means, use a wooden or plastic spoon.  (I wouldn’t use a silver or iron spoon, but who uses spoons like that to stir things like this anyway?)  The thing to remember is to use the same proportion of ginger to sugar to water each day.  Cover the bug, put it back in its cozy spot, and go on about your business.  In a day or two, you should start to see some foaming or bubbling, maybe hear a little hissing, see a little fizzing when you stir the bug.  That means your bug is fermenting, and all those little organisms (bugs) are growing.  Yay!  After five days of this, you are ready to make ginger ale.  (When you have used some of your ginger bug for ginger ale making, you need to add back ¼ cup of water, 2 tablespoons of sugar, and 2 tablespoons of fresh chopped ginger to the bug before storing it.)

But first, it is important not to let your ginger bug sit at room temperature more than about 5 days after it starts to ferment, because it could start to turn to vinegar (move from alcoholic fermentation to acetic fermentation) after that time.  If you want to hold your bug at readiness and not make ginger ale right away, you can put a tight lid on the jar and stash it in the fridge indefinitely, as long as you take it out and feed it once a week.

To feed your ginger bug, bring it out of the fridge, bring it to room temperature, add a tablespoon of minced/grated ginger, a tablespoon of sugar, and a tablespoon of water.  Let it sit out at least 8 hours in its cozy place, then it can be refrigerated again.  If you are using your ginger bug after resting in the fridge, take it out 8 hours before you want to use it to make ginger ale, feed it, and let it sit and get warm and active before adding it to the ginger ale ingredients.  Now, here are the directions for making ginger ale.

Homemade Ginger Ale

In a large sauce pan, heat:

2 tablespoons of grated or minced fresh ginger root (peeled if desired or if not organic)

½ cup sugar (raw/demerara, organic, or if white sugar is used, add 1 tablespoon molasses as well)

½ teaspoon sea salt (kosher salt is fine, and I don’t imagine that plain table salt would adversely affect the ginger ale)

3 cups of water (filtered or distilled if you have chlorinated water or if you think the mineral content of your water would produce a nasty taste)

Simmer for about 5 min. to dissolve sugar and infuse the water with the ginger.

Add:

5 cups of cool, filtered water (if filtering is necessary)

½ cup fresh lemon or lime juice or combination thereof

½ cup ginger bug

Make sure the water/sugar/ginger mixture is cool before adding ginger bug.  (You don’t want to cook the bugs!)  Mix well.  Pour into large jug and cap tightly.  (Again, a half-gallon jar will not work.  With 8 cups of water, ½ cup of juice, ½ cup of ginger bug, you have at least 9 cups of liquid, and that won’t fit in a half-gallon jar.)

Put this tightly capped jug in the warm, cozy place, and let it sit.  If your ginger bug has fermented properly and is active, the ginger ale should begin to bubble within a few hours.  Here’s what mine looked like (my second batch).

OLYMPUS DIGITAL CAMERA

Let it sit until bubbles just begin to diminish.  At this point, it’s ready to drink.  Chill the jug well before opening.

Now, here’s what’s going to happen when you open the lid on your ginger ale.  Just as with commercial sodas, there will be a loss of carbonation as soon as you open the jug.  I got a big hiss of escaping gas when I opened the lid on my gallon juice jug.  I tried to tighten it back down, but the gas kept escaping.  For this reason, it’s best not to open your ginger ale until you are ready to drink it, and then to pour it quickly through a strainer (so you aren’t chewing little bits of ginger, but save the ginger because you can use it in your next batch of ale) into glasses loaded with ice and whatever else, if anything, you want to put in the ginger ale (various kinds of alcohol spring immediately to mind) and drink it up right away.  If there is any left over, pour it off straight away into a smaller bottle and cap tightly.  It will not be as fizzy when you open it, but it will still taste good.  Here’s what my first batch looked like after I strained it off out of the big gallon juice jug.  (I saved the ginger and put it in the second batch with some additional fresh ginger to feed the fermentation.)

OLYMPUS DIGITAL CAMERA

It should be stored in the fridge, where it will keep indefinitely.  If stored at room temperature, it will eventually become alcoholic.  (Yeasts + sugar + time = booze.)

I should say a few words here about sweetness.  This stuff is not sweet.  It was not sweet enough for my son and husband until I stirred about a teaspoon of raw sugar into it.  It was sweet enough for me as is, and very refreshing.  But when I wanted something a little sweeter, I stirred about a half teaspoon of raw sugar into mine.  I also tried it with a little Splenda, which I use very sparingly these days, and it was quite good.

Because I wanted to see if I could produce a batch that would be sweet enough out of the jug for the family, I altered the recipe a bit.  Wellness Mama’s instructions add that you can adjust the volume of the recipe by using a ratio of ¼ cup sugar per 1 quart of water and adding ¼ cup ginger bug for each quart of water used.  I followed these directions for increasing the volume of my second batch but doubled the sugar and kept the amount of lemon/lime juice the same, since the first batch was very acidic.

Sweeter Ginger Ale

Simmer for 5 minutes:

1 quart water

4 tablespoons minced ginger

1 cup raw sugar

1 teaspoon sea salt

Add:

2 qts. cool water

½ cup lemon or lime juice (I used about ¼ cup lemon and ¼ lime juice)

¾ cup ginger bug

Mix well and pour off into gallon jug; cap tightly.  Let sit in warm place for 2-3 days.  Chill and strain before drinking.

I should note that this mixture bubbled up very quickly, producing a lot of carbon dioxide the very first day, but was not as fizzy as my first batch when the jug was opened.

OLYMPUS DIGITAL CAMERA

Given my experience with making vinegar (which also ferments), I believe it was the added sugar in this mix that caused a faster fermentation.  I also think that for great fizz, the mixture should have been drunk immediately, rather than chilled and stored for two days, as I did.  It’s also possible that the cap on my jug released carbonation.  I am using a glass gallon-sized apple juice jug with a metal, screw-on lid.  A bottle with a bail closure and rubber seal on the stopper might work better to contain the carbon dioxide.

These ratios produced a slightly sweeter ginger ale that no one needed to add sugar to, and everybody liked.  My son-in-law, who was born and raised in Nigeria, says he grew up drinking something very similar.  He was particularly appreciative of my homemade ginger ale and wants me to make it again for New Year’s Eve, when his mother and nephews will be visiting with us.

Wellness Mama cautions against over-fermentation to prevent the bottle from exploding.  Frankly, I think this is highly unlikely unless the bottle was made of very, very thin glass and the lid were truly air-tight.  This stuff would be more likely to blow the lid off.  However, I also think that if a jug is going to blow its lid, it’ll be because it doesn’t hold enough space for the gas.  When that space is full and gas is still being produced, it has to exhaust somehow.

I liked my first batch of ginger ale made following Wellness Mama’s directions, but we all liked the second batch best, made with more sugar and less lemon/lime juice.  I think it would be fine to eliminate the citrus juice altogether, and just add a twist of lemon or lime to the glass before drinking.

For my next batch, I think I’ll start with the original instructions, double the sugar, reduce the water by one cup, eliminate the citrus, and see if it will almost fill but not overflow a half gallon jar.  I’m curious to see if I will get more fizz from an almost full jar when it is opened.

At any rate, I’ll have fresh, homemade ginger ale for Christmas Day and New Year’s Day.  How fun is that?  For this nutcase food nerd/amateur scientist, it’s pretty darn fun.


Standard
Desserts, Recipes

Christmas Cookies

This week’s post is a Christmas cookie story.  But more than that, it’s a story about families, and it’s the story of traditions.  Hang with me, and there will be some recipes in it for you.

Christmas means, among other things, Christmas cookies.  For our family, there are two kinds of Christmas cookies: gingerbread and sugar cookies.  These are two old-fashioned cookies whose goodness, for me, never goes out of style.

I usually make crisp gingerbread cookies to hang on the tree.  They smell good, taste great dipped in coffee like biscotti, and because there is no butter or egg in them, they keep until well after the tree comes down, if there are any left.  After the cookies are rolled, cut, and on the cookie sheet, I poke a hole in the top of each cookie with a straw, so it can be threaded with a ribbon and hung on the tree.  These cookies will perfume the room with spice and give an old-fashioned look to our tree.  For the tree, I don’t decorate them, because I don’t want bits of icing or sprinkles falling on the floor, and besides, I like the way they look, plain, among the brightly-colored ornaments.

OLYMPUS DIGITAL CAMERA

If I want to give them away or put them in the cookie jar, I’ll let the kids ice them or sprinkle them with colored sugars or candy sprinkles.  It turns out that my son-in-law, Solomon, loves spicy gingerbread, so the grandkids and I made them especially for him this Christmas.

OLYMPUS DIGITAL CAMERA      OLYMPUS DIGITAL CAMERA   OLYMPUS DIGITAL CAMERA

Gingerbread Cookie Ornaments

(makes about 4-5 dozen medium-sized cookies)

¾ cup dark molasses

½ cup packed dark brown sugar

1/3 cup cold water

5 tablespoons shortening

3 ½ cups flour (all-purpose or whole wheat pastry flour can be used)

1 teaspoon baking soda

½ teaspoon salt

½ teaspoon ground allspice

1 teaspoon ground ginger

½ teaspoon ground cloves

½ teaspoon ground cinnamon

Beat molasses, sugar, water, and shortening.  Mix in remaining ingredients.  Dough will be relatively stiff.  Cover with plastic wrap and chill for at least 2 hours to firm dough.

Heat oven to 350 degrees.  Roll dough ¼ in. thick on floured board (do not use whole wheat flour for rolling).  Brush off excess flour and cut with floured cookie cutters into desired shapes.  Place about 2 inches apart on lightly greased cookie sheet.  For tree ornaments, use a plastic straw to cut out little holes in tops of cookies.  If you are decorating with colored sugar or sprinkles, shake these over the cookies and press lightly into dough.

OLYMPUS DIGITAL CAMERA

Bake until firm, when no indentation remains when touched, about 10-12 minutes.  Cool on rack before frosting, if desired.  (I don’t recommend frosting before hanging on the tree, for reasons mentioned above, but that’s up to you.)

OLYMPUS DIGITAL CAMERA

I am not a professional baker, nor a photographer, just a pretty good cook.  So I don’t claim these are the prettiest cookies you’ll ever see.  But they sure taste good!  (My daughter-in-law, Tori, says that I make things taste good, and she makes them look good, and that’s the truth of it.)

OLYMPUS DIGITAL CAMERA

The other cookie we always make is a sugar cookie.  This recipe comes from a neighbor and good friend of my mother’s, Marge Darby.  My brother and sister and I played with and went to school with the Darby kids, so their family is always there in my memory whenever I think about my childhood.   My mother loved these cookies, and one day, she sent me over to the Darby house to copy down the recipe.  I must have been 8 or 10 years old, as my awkward printing in the original copy attests.

OLYMPUS DIGITAL CAMERA

Since I wrote this recipe down nearly 50 years ago, it’s the one always used in our family.  I have tried others, but they just don’t stack up to this one.  Both Marge and Mama have since passed away, but I think of them each time I bake these cookies.

About a year or so ago, the oldest Darby boy, Tom, contacted me via Facebook.  We’ve been sharing memories and stories ever since, so when I got the sugar cookie recipe out in preparation for this holiday season, I thought I’d take a picture of it to show to Tommy.  I was sure he’d get a kick out of it, but I had no idea it would mean as much to him as it did.  (For his reaction, see Tom Darby’s blog.) Just this past week, he baked the cookies he remembered from childhood.  And he gave us a little more of the recipe’s history. Tommy says, “As far as I can recall they came from my Grandma on my Dad’s side. They were in a cookbook put together by the Women of the Fort Dodge (Iowa) Lutheran Church which was published sometime between the end of the Great Depression and World War II.”  That’s a recipe with a lot of history and tradition behind it, and they are the best sugar cookies I’ve ever tasted.

Sugar Cookies

4 cups flour

2 cups sugar

1 cup finely chopped pecans

1 teaspoon vanilla

½ teaspoon salt

1 cup shortening, or butter, or *oleo  (see note below)

3 eggs

1 teaspoon baking soda

1 tablespoon hot water

Sift flour and sugar and salt together into bowl.  Cut in fat, add nuts and mix well.  In center of flour mixture add 3 beaten eggs and vanilla.  Add soda dissolved in hot water.  Mix thoroughly.  Roll thin, cut and shape.  To roll out cookies, use half powdered sugar, half flour.  Place two inches apart on ungreased cookie sheet.  Bake 8-10 minutes at 400 degrees.

OLYMPUS DIGITAL CAMERA

Notes:  For those who don’t know, oleo refers to oleomargarine. It became popular or widely-used during the food rationing of WWII. A friend of mine remembers mixing the yellow coloring into the margarine to make it look like butter. I grew up using margarine for everything, but of course I don’t use it any more. However, for this recipe, I usually use half shortening and half softened butter.  I like the flavor butter gives, but all butter makes the cookies spread awkwardly and lose their shapes.

I always chill the dough for an hour before rolling—this makes them easier to roll, and it also helps them keep their shape while baking.  Keep the dough in the fridge and cut off smaller pieces to work with until it is all rolled and cut.  Thin means about 1/8th inch, and this thinness helps keep them crisp, but you have to watch them because they will burn quickly.

Also, using half powdered sugar and half flour to roll out the cookies is key.  Plain flour (as I learned through bitter experience) just doesn’t taste as good.  I often use whole wheat pastry flour in the cookie dough, but it should be noted that to roll out the cookies, you need to use white, all-purpose flour mixed with the powdered sugar.

This recipe makes a lot of cookies, about 6 dozen, depending on what size you make them.  I often cut the recipe in half.

I used to decorate these cookies with a standard powdered sugar icing, but then I discovered edible paint, and that was what my children liked to do, and now my grandchildren enjoy painting the cookies as well.  (Some years, they get really creative.  This year, we baked between 10 and 15 dozen cookies, so they kept it basic!) I keep a set of cheap paintbrushes in the kitchen for this purpose and just run them through the dishwasher when we are done.

Edible Paint:

Separate two eggs.  Beat the yolks with a fork, then add 1 teaspoon of water and mix well.  Divide into several cups or dishes.  Add different food colorings to each cup, mix well.  After the cookies are rolled out, cut, and on the cookie sheets, use clean paintbrushes (run them through the dishwasher if they’ve been previously used on watercolor paints) and egg yolk paint to color the tops of the cookies.  As they bake, the paint will harden into a glaze.  They are really pretty, still taste great, but don’t deliver the sugar shock like icing does.  You can still taste the cookie, and believe me, these cookies are worth tasting.  As for how they look, they remind me of stained glass windows.  This seems somehow appropriate for both Christmas and Easter cookies, which is when I usually bake them.

OLYMPUS DIGITAL CAMERA

One of the best things about the holidays, for me, is the traditions we have made and keep alive through the years.  These are individual, to some extent, to each family, and I’d love to hear about your Christmas traditions, especially if you have a recipe to share.  Happy holidays, everyone.

OLYMPUS DIGITAL CAMERA

Standard
Main dishes, Recipes

(Bear) Sausage-stuffed Acorn Squash

Enough with the turkey already!  I’m working on new ways to use the four boxes of winter squash my garden produced this year.  I love all the old ways I use the squash, but I like to play in my kitchen.  This is my latest endeavor with acorn squash.  The Mighty Bear Hunter and I really enjoyed it.  I used our bear sausage, but you could use any ground sausage mix, although I would recommend going fairly lean with this one, as the squash will absorb any fat released from the sausage.  I only used one squash for Dennis and me, but I wrote the recipe for four people.  Just decrease the proportions by half if you’re empty-nesting like us, or double if you still have hungry teenagers at home.

Sausage-stuffed Acorn Squash

(serves 4)

OLYMPUS DIGITAL CAMERA

2 large acorn squash, halved lengthwise and seeds removed

1 lb. ground breakfast sausage*  (See note)

½ cup chopped onions

½ cup chopped green, red, or yellow bell peppers (optional, and you could certainly add other vegetables)

2 cloves garlic, chopped

1 large or extra-large egg, lightly beaten

¼ cup milk

½ cup plain bread crumbs OR oat bran* OR gluten-free almond flour bread crumbs

2 tablespoons dehydrated veggie flakes (optional)

¼ teaspoon salt (or more to your taste)

¼ teaspoon black pepper (or more to your taste)

Pinch of red pepper flake (optional)

Olive oil

Saute onions, peppers, and garlic in a tablespoon of olive oil until tender.  Set aside to cool.  Rub squash cavities with olive oil.  Sprinkle with salt and pepper.  Mix ground sausage, egg, milk, bread crumbs and seasonings.  Mix in sautéed vegetables. Line a pan large enough to hold the squash with foil.  Arrange squash halves so they will sit level.  (Ball up aluminum foil to use as wedges if needed.)  Fill squash cavities with meat mixture and smooth into mounds.  Brush sauce (below) over meat mixture.  Bake uncovered for 60 to 75 minutes at 375 degrees, or until meat juices run clear, and flesh of acorn squash is tender.   If desired, brush tops of meat with leftover sauce 15 minutes before end of cooking time.

Sauce:

¼ cup ketchup

¼ cup spicy brown mustard

2 tablespoons Worchestershire sauce

1 tablespoon maple syrup

Mix together.  Brush sauce on meat.

OLYMPUS DIGITAL CAMERA

Notes:  I use breakfast sausage in this recipe because it is commonly flavored with sage, fennel seed, and red pepper flake, all of which go well with the semi-sweet squash.  (Acorn squash is the least sweet of the winter squashes, in my opinion.)  Our bear sausage is very lean.  If I were using pork sausage, I would look for the leanest mix I could find or cut it with a lean meat like ground turkey.  Alternatively, to get more fat out of a higher-fat sausage mix, you could brown the sausage, drain it and cool it, then mix the other ingredients into it before filling the squash cavities.  If I were doing it this way, I would also precook the squash before filling it by roasting in a 400 degree oven for about 30 min.  Then after filling the squash, reduce heat to 350 and bake until set and sauce is caramelized.

Before I decided to eliminate gluten and grains as much as possible from my diet, I discovered, quite by accident, that the best binder for meatloaf and meatballs is oat bran.  Bread crumbs are the traditional binder for ground meats, but they can make for a tough loaf or ball.  I’d been trying to increase fiber while reducing net carbs for a long time, so I turned to oats, but I found that whole oats affected the texture of the meatloaf and made it somewhat chewy.  So one day when I went to the pantry to grab the oatmeal jar for meat loaf, I spied the oat bran jar.  And I thought, hmmm.  Well, why not try it?  I used the same amount of oat bran as I would use of oatmeal, which is about 1 ¼ cups to 2 lbs. of meat.  And I’m telling you, after that first attempt, I would never go back to either oatmeal or bread crumbs, because the oat bran binds perfectly and produces an incredibly tender meatloaf or meatball.  And it adds more fiber than bread crumbs.  Try oat bran in your next meatloaf or batch of meatballs, and I think you’ll see what I mean.

Of course, now that I’m trying to eliminate gluten from my diet, I’ve been using almond flour bread crumbs.  I save the heels (which are small) of the almond flour bread in a bag in the freezer and then dry them when I have enough to make it worthwhile at 170-200 degrees in the oven on cookie sheets.  When they’re dry, I pop them into the food processor and pulse until they are in crumbs.  Then they go back in a plastic bag and into the freezer, ready to go for the next dish.

I served these sausage-stuffed acorn squash with a salad and a helping of kale and chard, the last from the garden.  What a way to get your veggies!

OLYMPUS DIGITAL CAMERA

Standard
Desserts, Leftovers, Main dishes, Recipes

Thanksgiving Leftovers: Green Turkey Enchiladas and Pumpkin Pie Milkshakes

Most of us have a favorite way to use up Thanksgiving leftovers.  I’m freezing my leftover stuffing to use later this winter with the Cornish game hens I have in the freezer.  I usually make turkey soup, but yesterday, it occurred to me that I have all that green tomato salsa verde that I made earlier this fall, and why not use up the leftover carved turkey in some green enchiladas?   I hadn’t tried the sauce yet, and since I just picked another box of green tomatoes out of the greenhouse, I might want to make more of it.

OLYMPUS DIGITAL CAMERA

I made two pans of enchiladas, one with gluten-free tortillas for me, and one with flour tortillas for the rest of the family.   And they liked it quite a bit, so I might be making more salsa verde this week.

OLYMPUS DIGITAL CAMERA

I chopped three or four cups of leftover turkey, both white and dark meat, into bite-sized pieces.  This made six gluten-free enchiladas for me, and ten regular enchiladas for the family.  I had cheese already shredded in the freezer, so I used what I had, which was white cheddar.  My favorite cheese for green enchiladas is pepper jack, but Monterey jack is also good.  I lined my pans with foil because I plan to put any leftovers into the freezer for a quick, heat-up meal on rushed days.  The foil will allow me to lift the cooled enchiladas out of the pan, so I can wrap them with more foil and plastic for a tight seal.

Green Turkey Enchiladas

(makes 8-12 enchiladas)

1 pkg. medium-sized flour tortillas (12)

3 cups chopped turkey, light or dark meat or mixed

2 cups blended salsa verde (1 pint jar)

1 cup chopped onions

1 small can sliced black olives

2 cups shredded cheese

1 cup chunky salsa verde

Spray the bottom of a 13X9 inch pan with cooking spray (or oil it with a pastry brush) and spread a generous spoonful of sauce on the bottom of the pan.  Reserve a quarter cup of sauce for spreading on top.  Mix the rest of the sauce in a large bowl with the turkey, onions, chunky salsa verde, and olives.  It’s easiest to mix the cheese in at this point as well, reserving a quarter cup for the top.  What you end up with doesn’t look that tasty, but it will be, I promise.

Starting at one edge, place 3-4 tablespoons of the turkey filling mixture along the edge of the tortilla.  Roll it up and place it seam side down in the pan.  Continue until you have used all the filling mixture (you may have leftover tortillas).  Paint the tops of the enchiladas with the reserved sauce and sprinkle with reserved cheese.  Bake uncovered at 350 degrees for 30-45 minutes, or until enchiladas are bubbly and cheese is melted and golden brown.

OLYMPUS DIGITAL CAMERA

Serving suggestions:  Top with sour cream, more of the chunky salsa verde, chopped avocado, pico de gallo.  Black beans with garlic and lime make a nice side dish.  With a green salad, you have a complete meal.

This dish was a hit with the family.  We finished the meal with a recipe of my daughter’s, a pumpkin pie milk shake.  The first time she made this, she included the pie crust from the leftover pie, but we have since decided it’s better without the crust, so we make extra custard now specifically for this dessert.  We first used homestyle vanilla ice cream, but last year, we discovered that Dulce de Leche ice cream adds depth.  You can turn this into an adult drink with the addition of a shot per serving of the alcohol of your choice.  Rum, bourbon, or brandy are all good choices.  Of course, you can always just eat the pumpkin pie as is!

Amy’s Pumpkin Pie Milk Shake

OLYMPUS DIGITAL CAMERA

(makes about 4 one cup servings)

1 quart  of Dulce de Leche ice cream

1 cup milk

1 cup leftover pumpkin pie custard

whipped cream (optional)

Blend all ingredients together and pour into glasses.  Garnish with whipped cream.

Later this week, I will make turkey soup out of the pan drippings in the fridge and the two carcasses in the freezer.  If you’ve got a good recipe for using up Thanksgiving leftovers, I’d love to hear it.

Standard